


www.flexible-flyer.com 20-Rev. A 1-888-350-3015
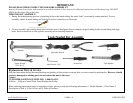
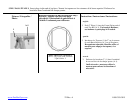
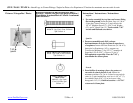
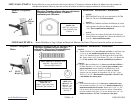
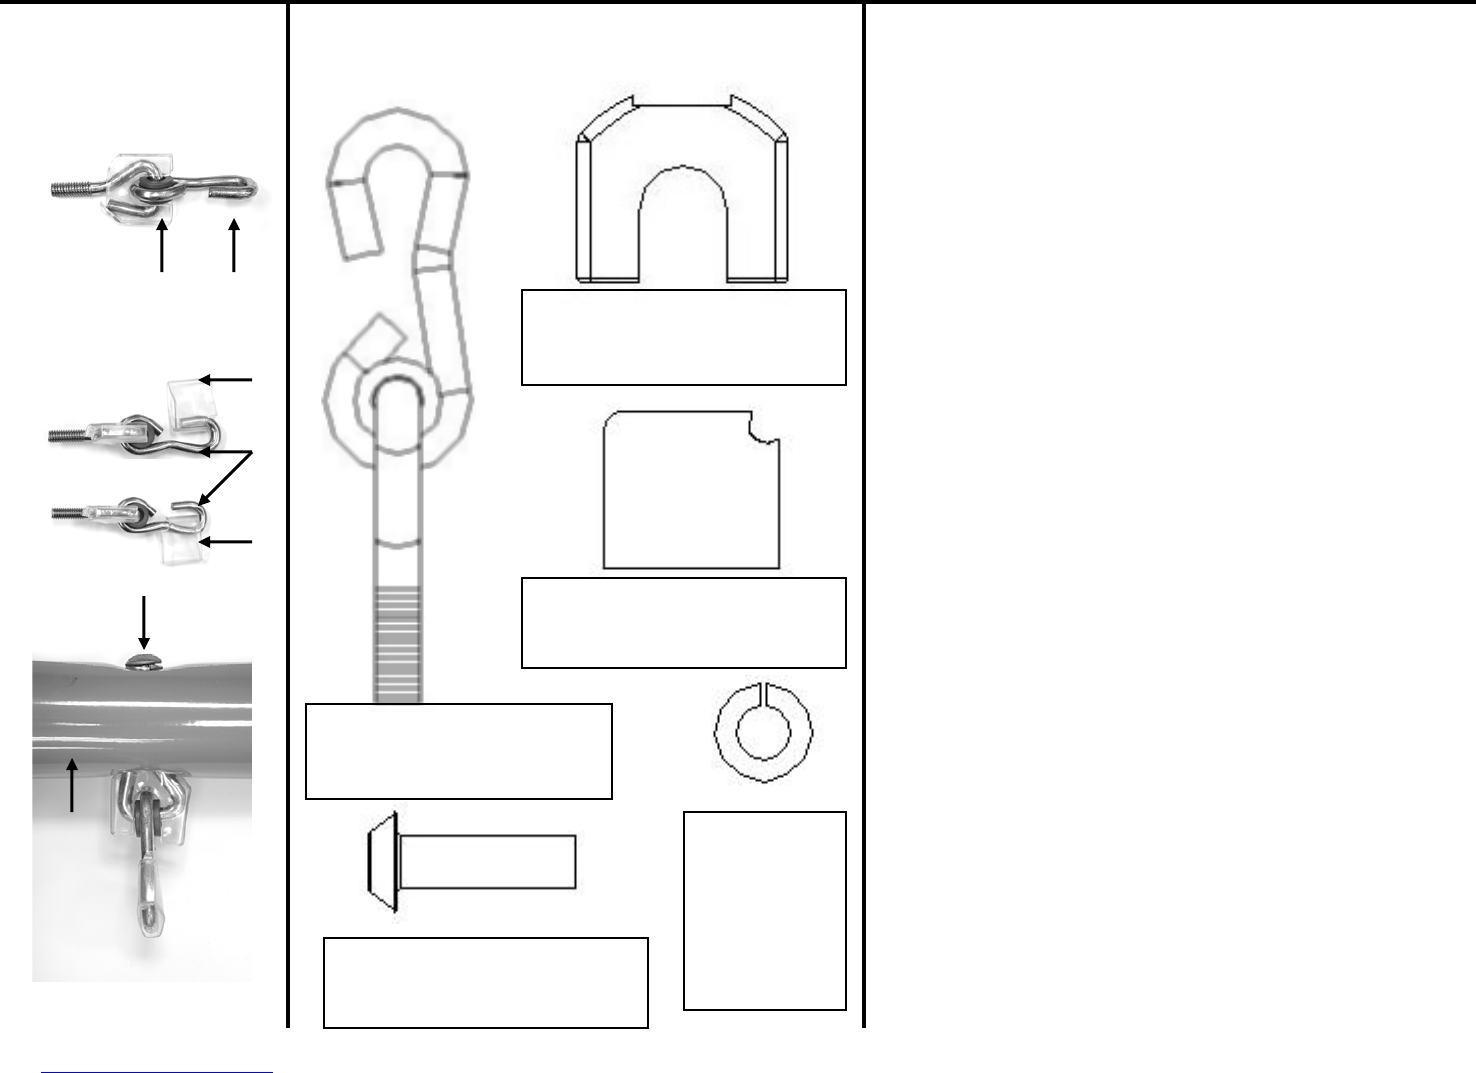
1. Slip the Bearing Covers (3) over the threaded end of the
Swing Bearings (2), See Detail A. Now Slip Bottom Bearing
Cover (4) onto Swing Bearings (2), See Detail B. then insert
the Swing Bearings through the slotted holes in the Top Bars
(A-1) and secure with a 3/8” Lock Washer (6) and a 5/16”
Barrel Nut (5), make sure all hooks are facing the same
direction. Note: The top bar has two different holes,
round and slotted. Slotted holes faces down toward the
ground. Tools needed: 3/16” Allen Wrench.
3 2
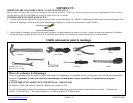
1. Faire glisser les caches (3) des crochets d'articulation
supérieurs de la balançoire (2) par dessus les extrémités
filetées des crochets, Voir détail A. Faire glisser maintenant
les caches (4) des crochets d'articulation inférieurs de la
balançoire (2) sur les crochets, Voir détails B. Insérer ensuite
les crochets d'articulation supérieurs au travers des trous
rainurés des poutres (A-1), et les immobiliser avec une
rondelle-frein 3/8" (6) et une douille-écrou à tête
hémisphérique 5/16" (5), s'assurer que les crochets sont
tournés dans la même direction. Note : La poutre comporte
deux types de trous différents, ronds et rainurés. Les
trous rainurés sont dirigés vers le sol. Outils nécessaires :
clé Allen 3/16" (4,8 mm).
Detail / Detalle
/ Détail B
Detail / Detalle /
Détail A
H
ar
d
ware
(
ac
t
ua
l
s
i
ze
b
u
t
f
or re
f
erence on
ly)
/
Herrajes (Tamaño real pero sólo para referencia) /
Illustrations de quincaillerie à l'échelle 1 seulement
p
our référence. :
Pictures / Fotografías /
Photo :
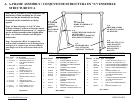
Instructions/ Instrucciones /Instructions:
STEP / PASO /
É
TAPE 1: Attach Swing Bearings to Top Bar /
Sujete los Ganchos de Columpio a la Barra Superior / Fixation
des crochets d'articulation à la poutre
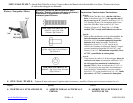
MAKE SURE YOU HAVE CLEARED ALL HOLES N TUBING AS SPECIFIED ON PAGE 14. /
ASEGÚRESE DE ABRIR TODOS LOS ORIFICIOS DEL TUBO SEGÚN SE ESPECIFICA EN LA PÁGINA
15. / S'ASSURER D'AVOIR DÉGAGÉ TOUS LES TROUS DE TUBES COMME SPÉCIFIÉ PAGE 16.
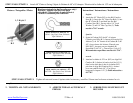
ITEM /
ARTÍCULO /
ARTICLE #10
001664P – Qty
Used / Cant.
Utilizada / Qté
Utilisée: 6
ITEM / ARTÍCULO /ARTICLE #2
H31001W - Qty Used / Cant.
Utilizada / Qté Utilisée: 6
ITEM / ARTÍCULO /ARTICLE #3
02906 – Qty Used / Cant. Utilizada
/ Qté Utilisée: 6
ITEM / ARTÍCULO /ARTICLE #4
M01370W – Qty Used / Cant.
Utilizada / Qté Utilisée: 6
ITEM / ARTÍCULO / ARTICLE #5
007002P – Qty Used / Cant.
Utilizada / Qté Utilisée: 6
F
rench:
Sp
anish:
1. Deslice las Cubiertas de Gancho (3) sobre el extremo roscado
de los Ganchos de Columpio (2), Véase el Detalle A. Ahora
deslize la Cubierta de Gancho Inferior (4) sobre los Ganchos
de Columpio (2), Véase el Detalle B. Luego inserte los
Ganchos de Columpio a través de los orificios ranurados en
las Barras Superiores (A-1) y asegure mediante una Arandela
de Seguridad (6) de 3/8” y una Tuerca (5) de 5/16”, asegúrese
que todos los ganchos están dirigidos en la misma dirección.
Nota: La barra superior tiene dos orificios diferentes,
redondo y ranurado. Los orificios ranurados se dirigen
hacia abajo hacia el piso. Herramientas requeridas:
Llave Allen de 3/16”.
E
n
g
lish:
6 &/y/et 5
4
4
2
A-1