Maintenance
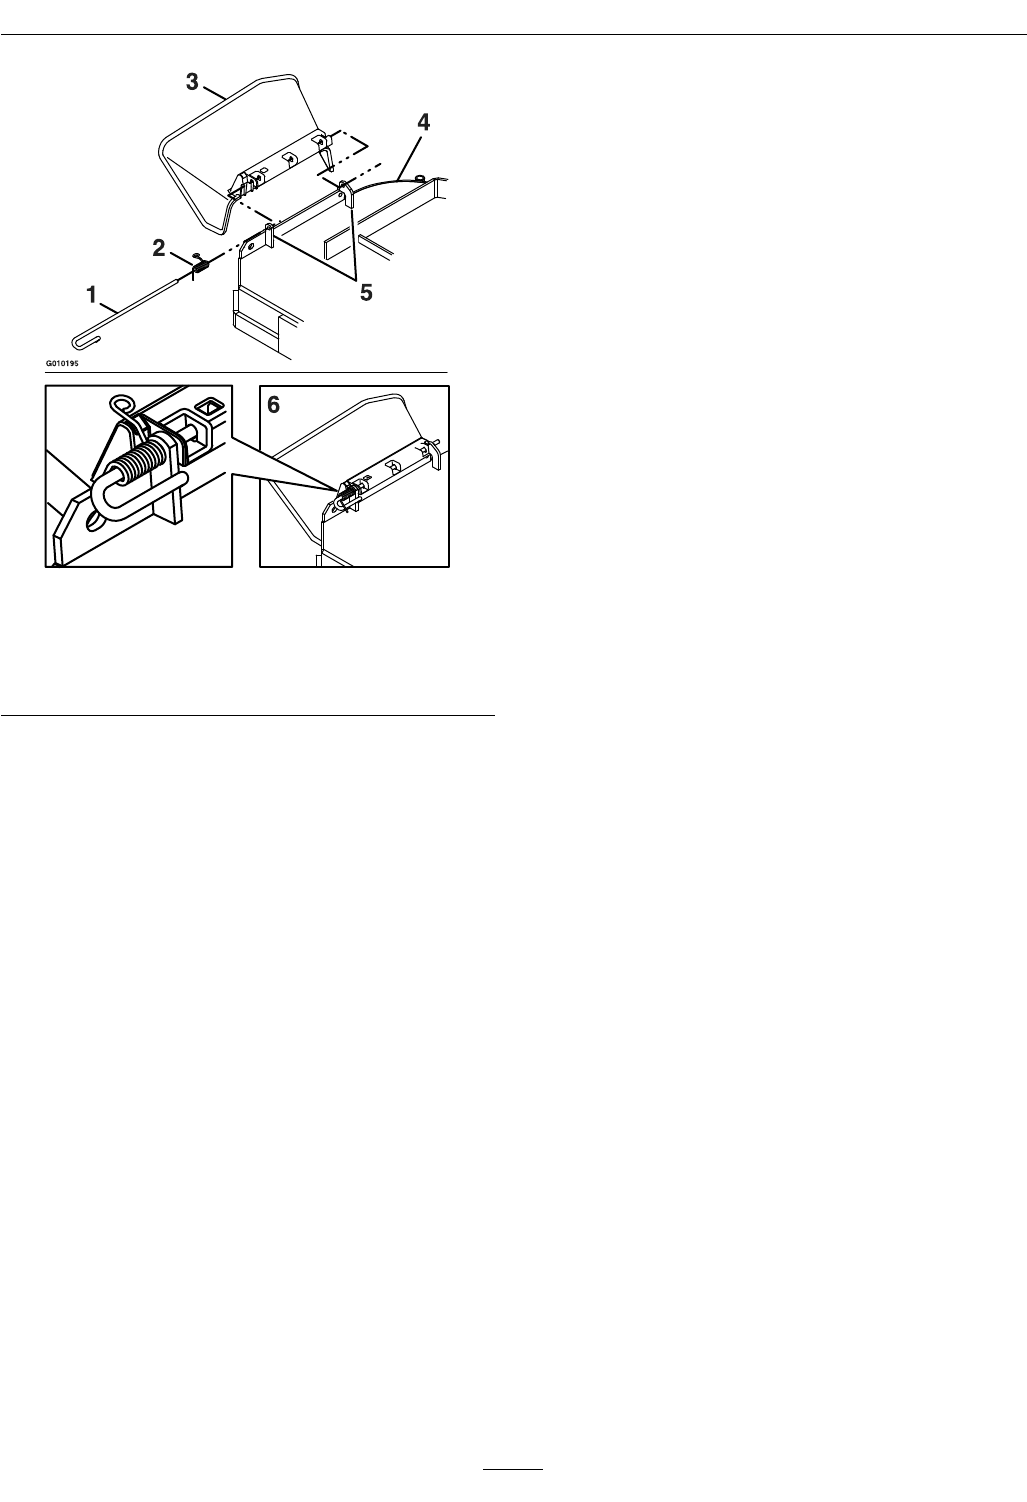
Figure 7
1. Rod 4. Mower deck
2. Spring 5. Discharge deector
bracket
3. Discharge deector
6. Assembled view
3. Hook the bent end of the rod around the front
discharge deector bracket to retain it from
sliding out. Place the leg of the spring with the
loop in the notch in the discharge deector to
hold the discharge deector in the down position
(see Figure 7).
Important: The discharge deector must be
spring loaded in the down position. Lift the
deector up to test that it snaps to the full
down position.
Check Safety Interlock
System
Service Interval: Before each use or daily
1. For your safety, your Exmark mower is equipped
with Operator Presence Controls, referred to as
(OPC). When either the PTO is engaged, or
the speed control lever is not in neutral and the
operator removes both hands from the handles,
the mower engine must stop.
2. To determine if the OPC is in operating condition,
clear area of bystanders. Run the engine at
one-third throttle, then with the drive levers and
neutral lock latches in the “neutral lock” position,
move the speed control lever out of neutral and
release the OPC levers–the engine must stop.
3. Again, run the engine at one-third throttle, move
the speed control lever to neutral, engage the
PTO and release the OPC levers–the engine
must stop.
Note: Park brake must be disengaged before the
speed control lever is moved out of neutral or
PTO is engaged or engine will kill.
Note: If machine does not pass any of these tests,
do not operate. Contact your authorized EXMARK
SERVICE DEALER.
Important: It is essential that operator safety
mechanisms be connected and in proper
operating condition prior to use for mowing.
Check for Loose Hardware
Service Interval: Before each use or daily
1. Stop engine, wait for all moving parts to stop, and
remove key. Engage parking brake.
2. Visually inspect machine for any loose hardware
or any other possible problem. Tighten hardware
or correct the problem before operating.
22
