


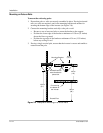
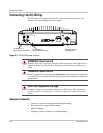
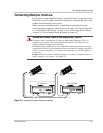
Connecting the DC Wiring
975-0253-01-01 3–3
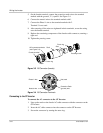
• Female and male DC cable connectors to mate with the Multi-Contact
connectors PV-ADSP3/GWD (positive) and PV-ADBP3/GWD (negative) on
the GT Inverter. You will need two connectors (one female and one male) for
each PV string (you can connect up to two PV strings to the GT Inverter).
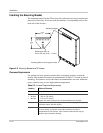
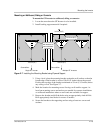
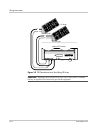
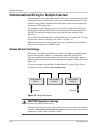
Connecting the PV Array
The following procedure is illustrated in Figure 3-2. If there will be more than one
PV string, label the positive and negative wire pairs appropriately (for example:
PV 1, PV 2).
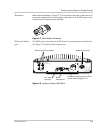
To wire the PV array to the GT Inverter:
1. If necessary, install DC conduit from the PV string(s) to the GT Inverter.
2. Terminate the wires coming from the PV string(s) with appropriate
Multi-Contact connectors.
3. Connect the POSITIVE (+) wire from the #1 PV string to a GT Inverter PV
positive (+) quick connect.
4. Connect the NEGATIVE (–) wire from the #1 PV string to a GT Inverter PV
negative (–) quick connect.
5. If necessary, repeat for the #2 PV string. Double check that the wires are in
the proper locations.
If only one PV string connection is used, cover the unused PV quick connects
with the seals provided.
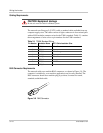
CAUTION: Equipment damage
Before connecting the PV array to the inverter, check to ensure correct polarity and that
the voltage between the positive (+) and negative (–) is below 600 Vdc (U
PV
≤600 Vdc).
To check the PV array DC voltage:
1. Uncover the PV arrays and expose them to full sunlight. The sunlight must be intense
enough to produce the required output voltage.
2. Measure the PV array open circuit DC voltage across the DC positive (+) and negative
(–) terminals. This voltage must be less than 600 Vdc. Voltage over 600 Vdc will damage
the inverter.
3. Cover the PV arrays with an opaque material again.
WARNING: Shock hazard
Never connect or disconnect the PV modules from the GT Inverter under load (by pulling
the PV quick connects before disconnecting the grid). Always disconnect the GT Inverter
from the grid first.