


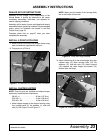
18 Service
MAN0458 (9/23/2005)
Blade Servicing
The chipper blades will eventually become dull, making
chipping difficult and adding strain on the machine.
Poor chipping performance is usually a result of dull
chipper blades. It is recommended that the blades be
sharpened every 5 to 15 hours or if the chipper’s per-
formance has decreased. Check for the following
symptoms and sharpen the blades as needed.
● Severe vibration when feeding material into the
chipper.
● Small diameter branches do not self-feed.
● Chips discharge unevenly or have stringy tails,
especially when chipping green branches.
Blade Removal & Cutting Edge Reversal
1. Remove the discharge cap or optional discharge
tube from the chipper housing.
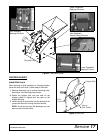
2. Install disk lock. See Install Disk Lock, page 17.
The disk is restrained to remove blade.
3. Remove blade by removing lock nuts from chipper
disk.
4. Inspect blades for cracks or nicks in cutting edge.
5. Turn cutting edge over and use new edge or
sharpen if both edges have been used.
6. Remove disk lock, rotate chipper disk, align holes,
insert disk lock, and remove blade, turn cutting
edge or sharpen second blade.
7. Install discharge cap or optional discharge tube
when blades have been reworked.
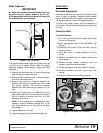
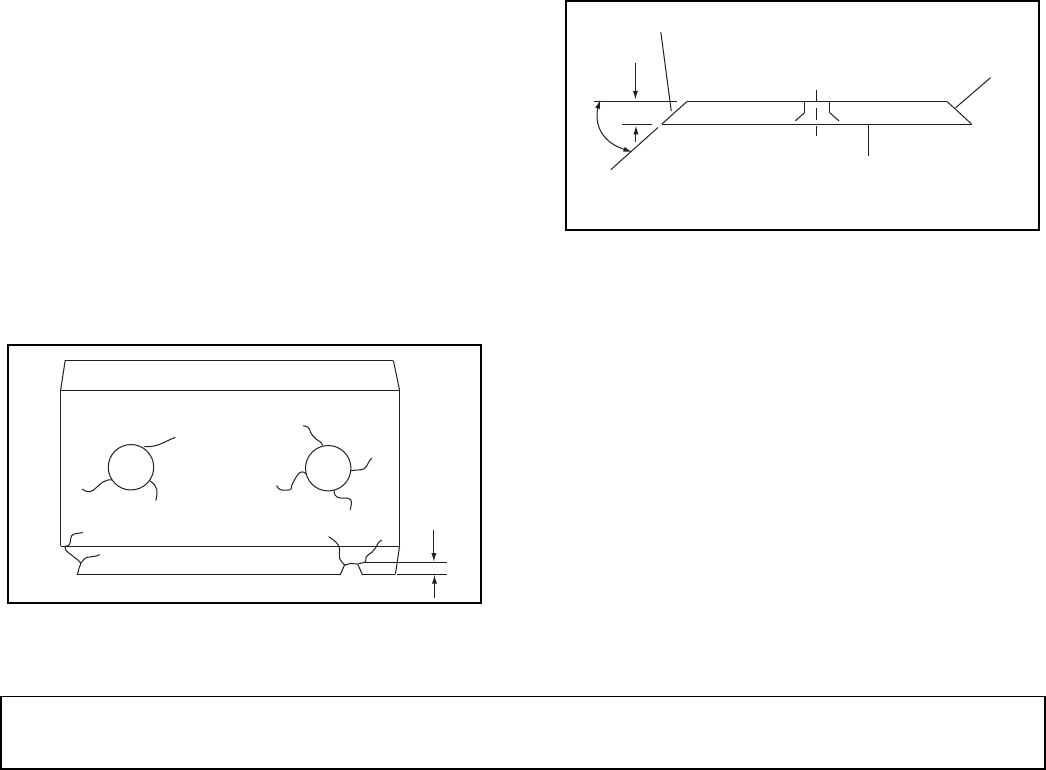
Blade Inspection
Before you sharpen the chipper blades, check for per-
manent damage. Replace if:
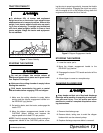
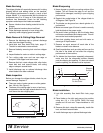
● There are cracks, broken corners or nicks greater
than 1/8 inch. See Figure 5.
● The base of the cutting edge is worn or has been
sharpened so that the edge extends less than 1/16
inch above the rotor chipping slot.
Figure 5. Inspect Blades
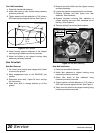
Blade Sharpening
1. Never sharpen or grind the mounting surface of the
blades. This will cause the edge to roll and the
blade will be damaged, resulting in poor chipping
performance.
2. Regrind the angled edge of the chipper blade to
45-degrees. See Figure 6.
3. The blades can be ground on a bench grinder of a
professional.
4. Make sure some type of fixture is used to correctly
hold the blade at the proper angle.
5. Be careful when grinding so that the blades does
not become overheated and change color. This will
remove the heat-treated properties.
6. Use short grinding times and cool with water or
some type of liquid coolant.
7. Remove an equal amount off each side of the
blade to maintain rotor balance.
8. Small imperfections such as nicks and burrs on the
flat side of the blade will not affect the chipping
performance of the machine,
9. For blades that have been repeatedly sharpened,
make sure that the sharpened surface extends
past the chipping slot opening. If it does not extend
past the opening, the blades must be replaced.
Figure 6. Double Edge Blade
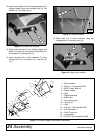
Blade Installation
1. Lock disk assembly. See Install Disk Lock, page
17.
2. Place blade on the disk and secure into position
using two 1/2 x 1-3/4 (ASTM F835) flat head
screws and 1/2 lock nuts. Torque hardware to 120
lbs-ft.
3. Remove disk lock, rotate disk assembly, install disk
lock, and install second blade.
4. Install discharge cap or optional discharge tube.
1/8"
LA2
45°
Mounting Surface
Do Not Grind
.38
Sharpen
Surface
Sharpen Surface
LA3