


Operation 13
MAN0458 (9/23/2005)
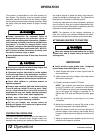
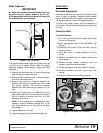
TRACTOR STABILITY
A minimum 20% of tractor and equipment
weight must be on the tractor front wheels when
attachments are in transport position. Without this
weight, front tractor wheels could raise up result-
ing in loss of steering. The weight may be attained
with front wheel weights, ballast in tires or front
tractor weights. Weigh the tractor and equipment.
Do not estimate.
Figure 1. Tractor Stability
STARTING THE CHIPPER
Do not put chipper into service unless all
shields and guards are in place and in good condi-
tion. Replace if damaged.
Make sure the cutting chamber is empty before
starting the machine.
Shift tractor transmission into park or neutral
and set brakes before engaging PTO and chipper.
1. Make sure the cutting chamber is empty before
starting and the chipper engagement handle is in
the RELEASE (up) position.
2. Set parking brake, start the tractor, and engage the
tractor PTO.
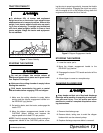
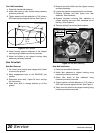
3. Move the chipper engagemement handle to the
CHIPPING (down) position and increase the
engine speed to the rated PTO rpm position.
NOTE: Carefully engage the rotor by slowly moving the
engagement handle to the CHIPPING position, allow-
ing the rotor to speed up gradually, increase the throttle
to full throttle position. Engaging the clutch too quickly
with the engine at full or half throttle will bog down the
engine and will shorten the life of the belt.
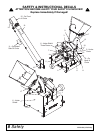
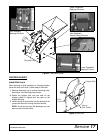
Figure 2. Chipper Engagement Handle
STOPPING THE CHIPPER
1. Lower the tractor rpm’s.
2. Move the chipper engagement handle to the
RELEASE (up) position.
3. Disengage the tractor PTO handle and shut off the
engine.
4. Allow chipper to come to a complete stop.
CLEARING PLUGGED DISK
Keep hands and feet out of feed and discharge
openings while machine is operating to avoid seri-
ous personal injury. Turn off power and allow
machine to come to a complete stop before clear-
ing obstructions.
1. Remove the discharge cap.
2. Remove debris, taking care to avoid the chipper
blades which can be extremely sharp.
3. Replace discharge cap once debris is removed.
CD1564-2