


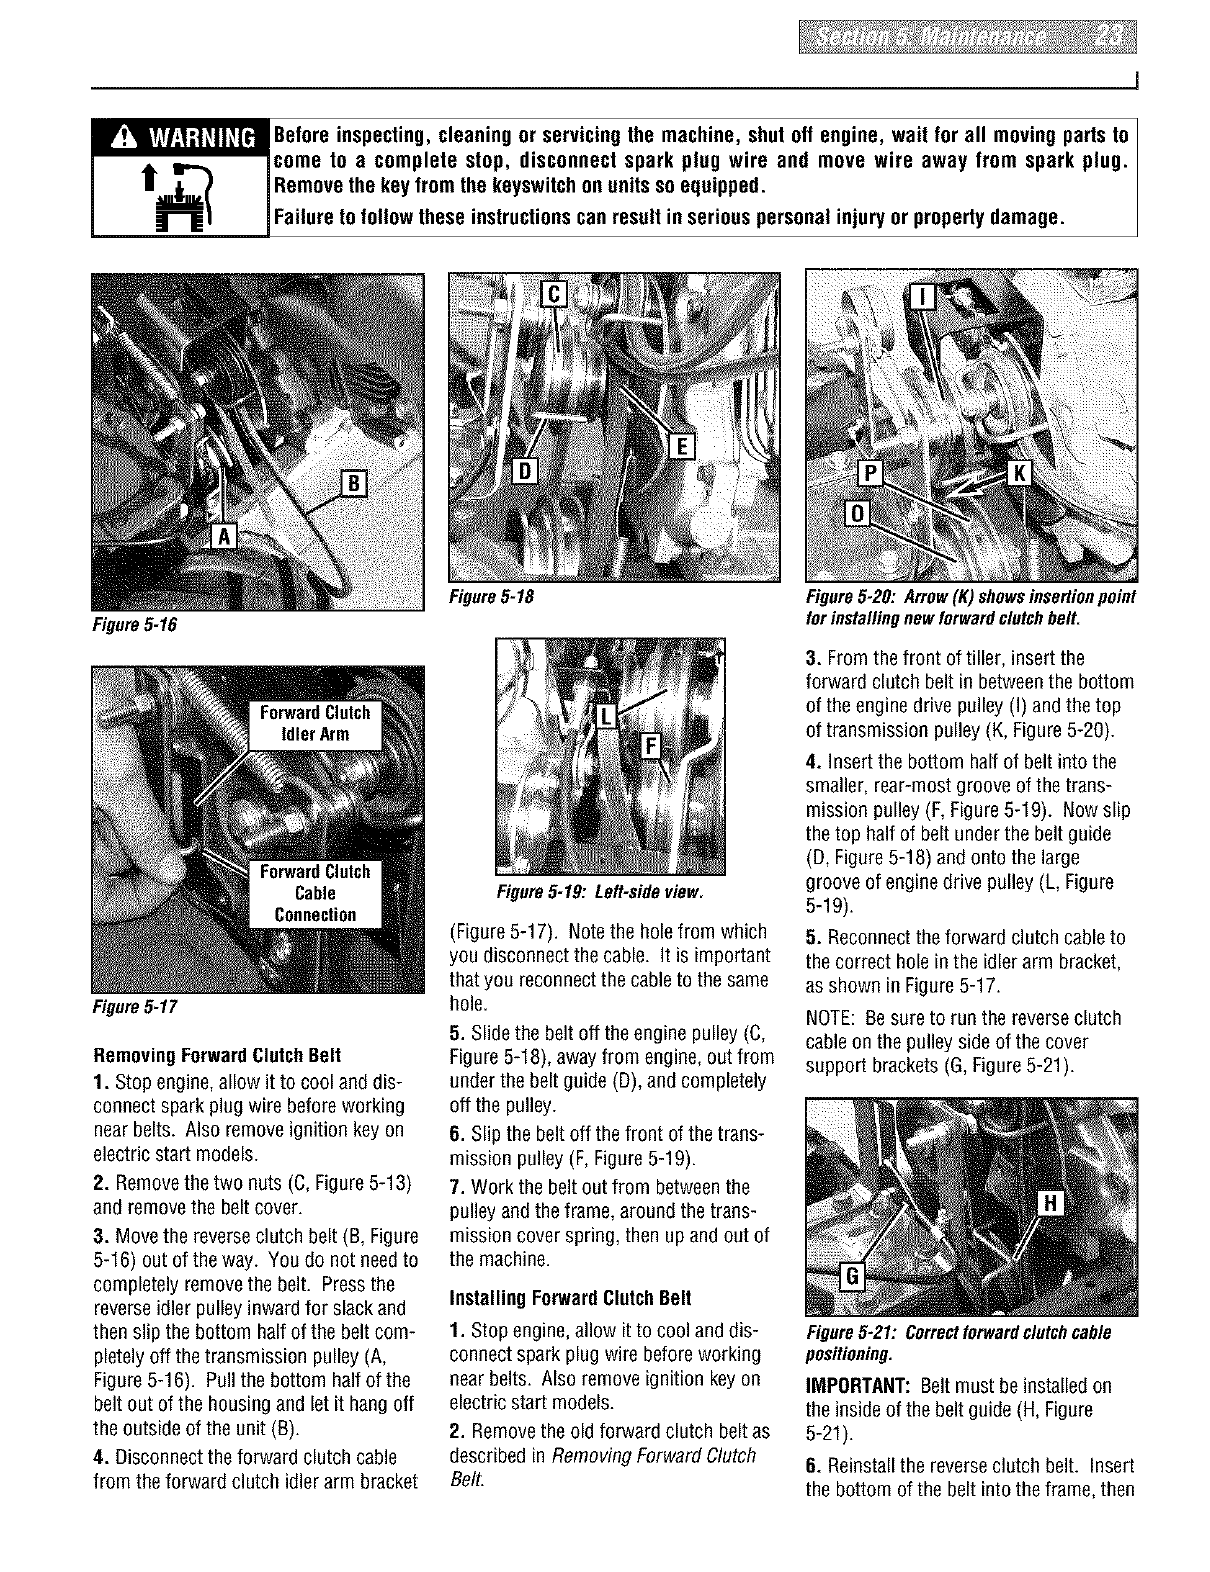
Before inspecting, cleaning or servicing the machine, shutoff engine, wait for all moving parts to
come to a complete stop, disconnect spark plug wire and move wire away from spark plug.
Remove the key from the keyswitchon units so equipped.
Failure to follow these instructionscan result in serious personal injury or property damage.
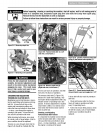
Figure5-16
Figure5-17
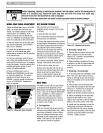
RemovingForwardClutchBelt
1. Stop engine,allow it to cool and dis-
connect spark plug wire beforeworking
nearbelts. Also removeignition key on
electric start models.
2. Removethe two nuts (C, Figure5-13)
and removethe belt cover.
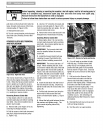
3. Move the reverseclutch belt (B, Figure
5-16) out of theway. You do not needto
completely removethe belt. Pressthe
reverseidler pulleyinward for slackand
then slip the bottom half of the belt com-
pletelyoff the transmission pulley (A,
Figure5-16). Pull the bottom halfof the
beltout ofthe housingand let it hang off
the outside of the unit (B).
4. Disconnectthe forward clutch cable
from theforward clutch idler arm bracket
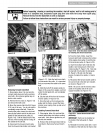
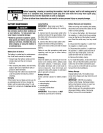
Figure5.18
Figure5-19: Left-sideview.
(Figure5-17). Notethe holefrom which
you disconnect the cable. It is important
that you reconnectthe cableto the same
hole.
5. Slide the belt off theengine pulley (C,
Figure5-18), awayfrom engine,out from
underthe belt guide (D), and completely
off the pulley.
6. Slip the beltoff the front ofthe trans-
mission pulley (F, Figure5-19).
7. Work the beltout from betweenthe
pulleyand the frame, around thetrans-
mission cover spring, then up and out of
the machine.
InstallingForwardClutchBelt
1. Stop engine,allow itto cool and dis-
connect spark plug wire beforeworking
nearbelts. Also remove ignition key on
electric start models.
2. Removethe old forward clutch beltas
described in Removing Forward Clutch
Belt.
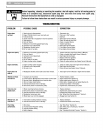
Figure5-20: Arrow(K)showsinsertionpoint
forinstallingnewforwardclutchbelt.
3. Fromthe front oftiller, insert the
forward clutch belt in betweenthe bottom
of the engine drive pulley (I) and the top
of transmission pulley (K, Figure5-20).
4. Insertthe bottom half of belt into the
smaller, rear-most grooveof the trans-
mission pulley (F, Figure5-19). Now slip
the top half of belt underthe beltguide
(D, Figure 5-18) and onto the large
groove of engine drive pulley (L, Figure
5-19).
5. Reconnecttheforward clutch cableto
the correct hole in the idler arm bracket,
as shown in Figure5-17.
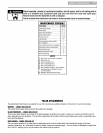
NOTE:Besure to run the reverseclutch
cableon the pulleyside of the cover
support brackets(G, Figure5-21).
Figure5-21: Correctforwardclutchcable
positioning.
IMPORTANT: Beltmust be installed on
the insideof the belt guide (H, Figure
5-21).
6. Reinstallthe reverseclutch belt. Insert
the bottom of the belt into the frame, then