


Belts, Controls and Linkages
2 - 8 Two Stage Snowthrower Drive Systems Manual
Auger/Impeller Drive Control Linkage —
All Other Models
There are two adjustment mechanisms used. One has
a clevis with a jam nut. The other has a rod going
through a loop with a flange nut on either side.
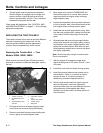
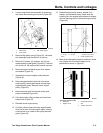
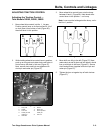
1. Thread a hex flange nut (flange side down) onto
upper control rod located on right handle
(Figure 53).
Figure 53
654
2. Install lower link through outer hole in lower
control rod.
3. Insert upper control rod through loop in lower link
control rod.
4. Thread a flange lock nut (flange side up) onto
bottom of upper control rod below loop in lower
link.
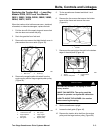
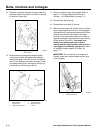
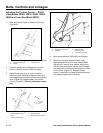
5. Check the distance between the top of the
handgrip and the bottom of the auger/impeller
control lever (Figure 54). This is a preliminary
setting only.
Figure 54
665
6. Remove the belt cover (refer to "REPLACING
THE AUGER/IMPELLER DRIVE BELT",
page 2 - 1, steps 1-2). Compress the auger/
impeller control lever and check that the slack is
removed from the auger drive belt when the lever
is 1-2 inches (2.5-5 cm) above the handgrip
(Figure 54).
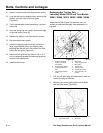
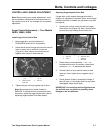
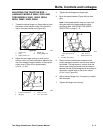
7. Adjust the clevis or two flange nuts to obtain this
dimension, then tighten the two nuts or jam nut
securely (Figure 55).
Figure 55
649
8. The auger must stop when the handgrip is
released. If it does not stop, adjust the clevis or
flange units on the auger rod.
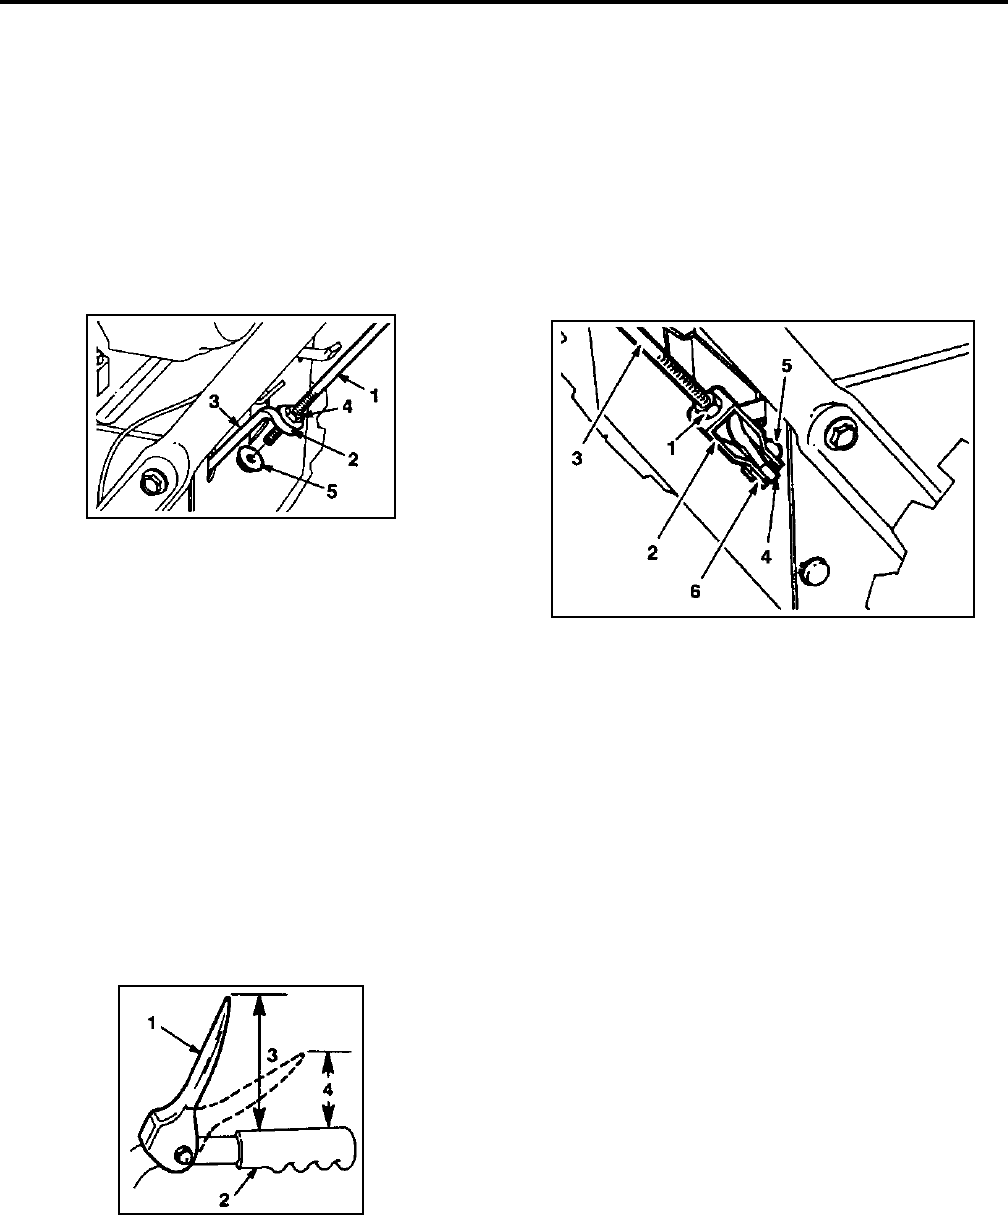
1
.
T
rac
ti
on ro
d
2. Loop
3. Lower traction rod
4
.
Fl
ange nu
t
5. Locking flange nut
1
.
T
rac
ti
on con
t
ro
l
lever
2. Handgrip
3
.
4
3/8
i
n.
(11
cm
)
4. 1 to 2 in. (2.5 to
5 cm)
1
.
J
am nu
t
2. Clevis
3. Upper control rod
4
.
L
ower con
t
ro
l
ro
d
5. Clevis pin
6. Cotter pin