


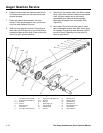

Auger Gearbox Service
1 - 6 Two Stage Snowthrower Drive Systems Manual
INSTALLATION
Installation of the auger assembly into the auger
housing can be done whether the auger housing and
traction assemblies are connected or not. There is no
significant time savings to either sequence.
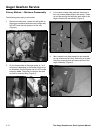
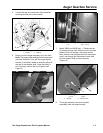
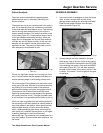
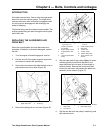
1. All self-aligning bearings (sometimes called the
flange bearings) MUST be installed loosely. All
models have one next to the auger drive pulley
and some use 2 more supporting the auger output
shafts. In all cases, these bearings must be a little
loose to assure the bearing can align itself with the
shaft before it is secured (Figure 19).
Figure 19
MVC-540
2. Make sure all the parts are installed on the auger
assembly. All spacers, thrust washers, and auger
bearings need to be hanging on the shafts.
(Including the scraper for models 38065 and
38080.)
3. Slide the assembly into the housing, directing the
input shaft into the rear bearing.
4. Start the cap screws from the side plates into the
bearings that support the auger output shafts.
Some models have 2 cap screws into a fixed
bearing; others have 4 cap screws into a self-
aligning bearing.
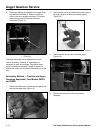
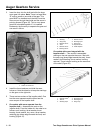
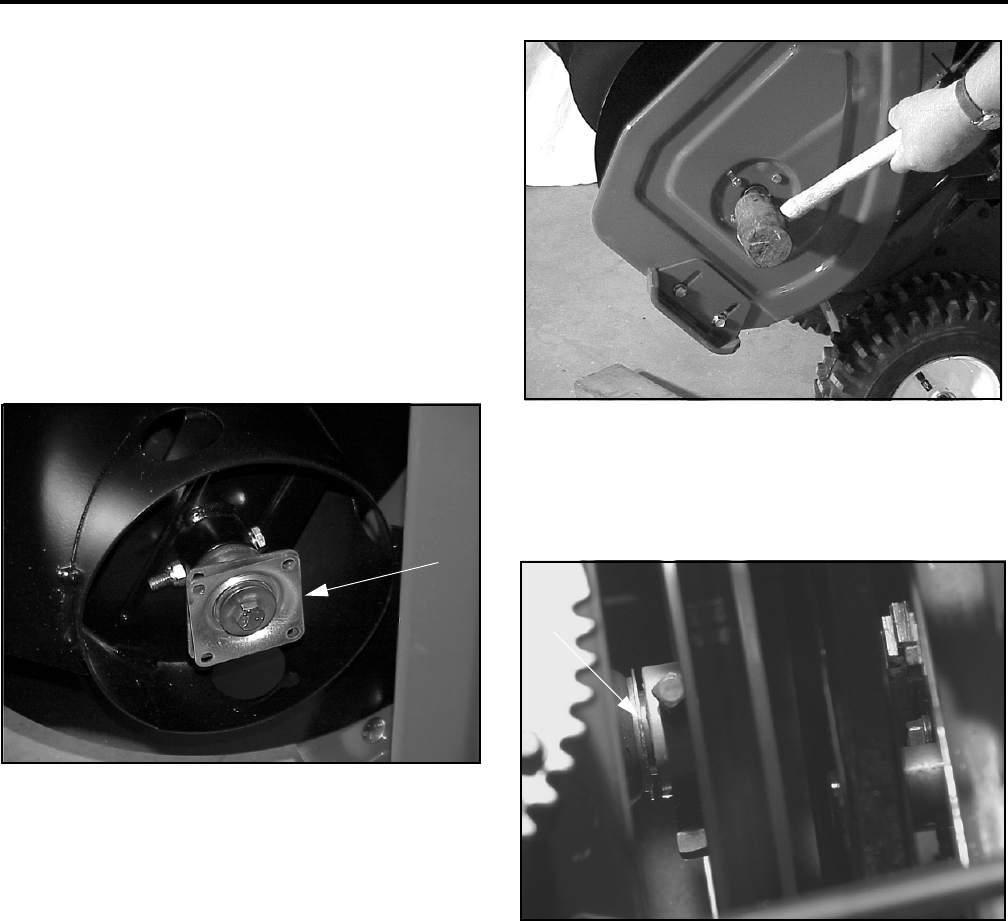
5. Models using four bolt bearings ONLY - Strike the
side plate and bearing area with a rubber mallet
three or four times, then secure the bearings. The
jolt aligns the bearings (Figure 20).
Figure 20
MVC-542
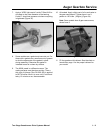
6. All models — Rotate the impeller back and forth.
One direction will push the impeller shaft to the
rear. Rotate it in that direction to force the shaft as
far to the rear as possible (Figure 21).
Figure 21
2773-012
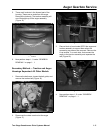
7. Secure the 4 cap screws on the self-aligning
bearing. Install the thrust washer and key.
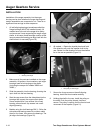
8. Holding the shaft to the rear, install the pulley on
the shaft. Push the pulley forward, hold and
secure. The pulley is used to limit the front to back
movement of the impeller (Figure 21).
1
1
.
B
ear
i
ng an
d
fl
ange
1
1
.
U
se pu
ll
ey
t
o remove gap