


Two Stage Snowthrower Drive Systems Manual 1 - 9
Auger Gearbox Service
Failure Analysis
There are some misconceptions regarding these
gearboxes that result in incorrectly identifying the
causes of failure.
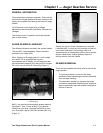
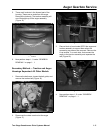
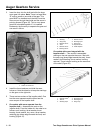
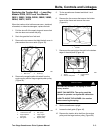
The square cut ring on the impeller shaft is not really a
seal. It is a wiper ring that has a tendency to pull down
to the shaft when the shaft begins to turn. The bushing
next to the ring really deflects most of the oil that is
thrown towards that area. The loose fit provides a vent
for the case (Figure 27). Occasionally a drop or two of
oil will get between the bushing and ring. When the
auger drive is disengaged, the ring will relax and that
oil might drip into the auger housing. At this rate, the
machine can be used for several years without any
significant oil loss. The yearly oil level check is more
than adequate to compensate for this.
Figure 27
2773-061
If there is a significant amount of oil coming out of this
area, it would indicate that the gearbox has been at a
severe operating angle or the bushing is badly worn.
Oil on the bottom of the gearbox can result from a leak
at any part of the case. As there is no internal pressure,
any leaking oil runs down the side of the case and
collects on the bottom until there is enough to drip off.
The source of the oil leak oil can be difficult to see.
Sprinkling some powder on the outside of the gearbox
will usually show the oil trail. The type of powder used
is not important. Just something that will stick to the oil.
When you open a gearbox that has had the gears fail,
the remaining oil will likely appear as a small puddle of
very thick grease in the bottom. Worm gears normally
create a large amount of friction due to the sliding
action. When something goes wrong, not enough oil,
poor quality oil, a problem with the gears, or just a gear
or bearing wearing out, the friction becomes
abnormally high. The remaining oil is cooked down to a
very thick residue. This can be the result of failures, not
the cause.
GEARBOX ASSEMBLY
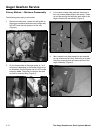
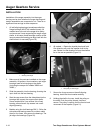
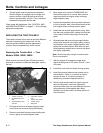
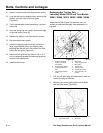
1. Use a wire brush or sandpaper to clean the auger
shaft. A clean, smooth shaft will help avoid
damage when installing new bushings and seals.
Clean the old gasket material from the case
mating surfaces (Figure 28).
Figure 28
2773-067
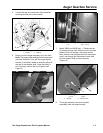
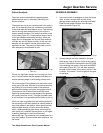
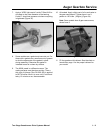
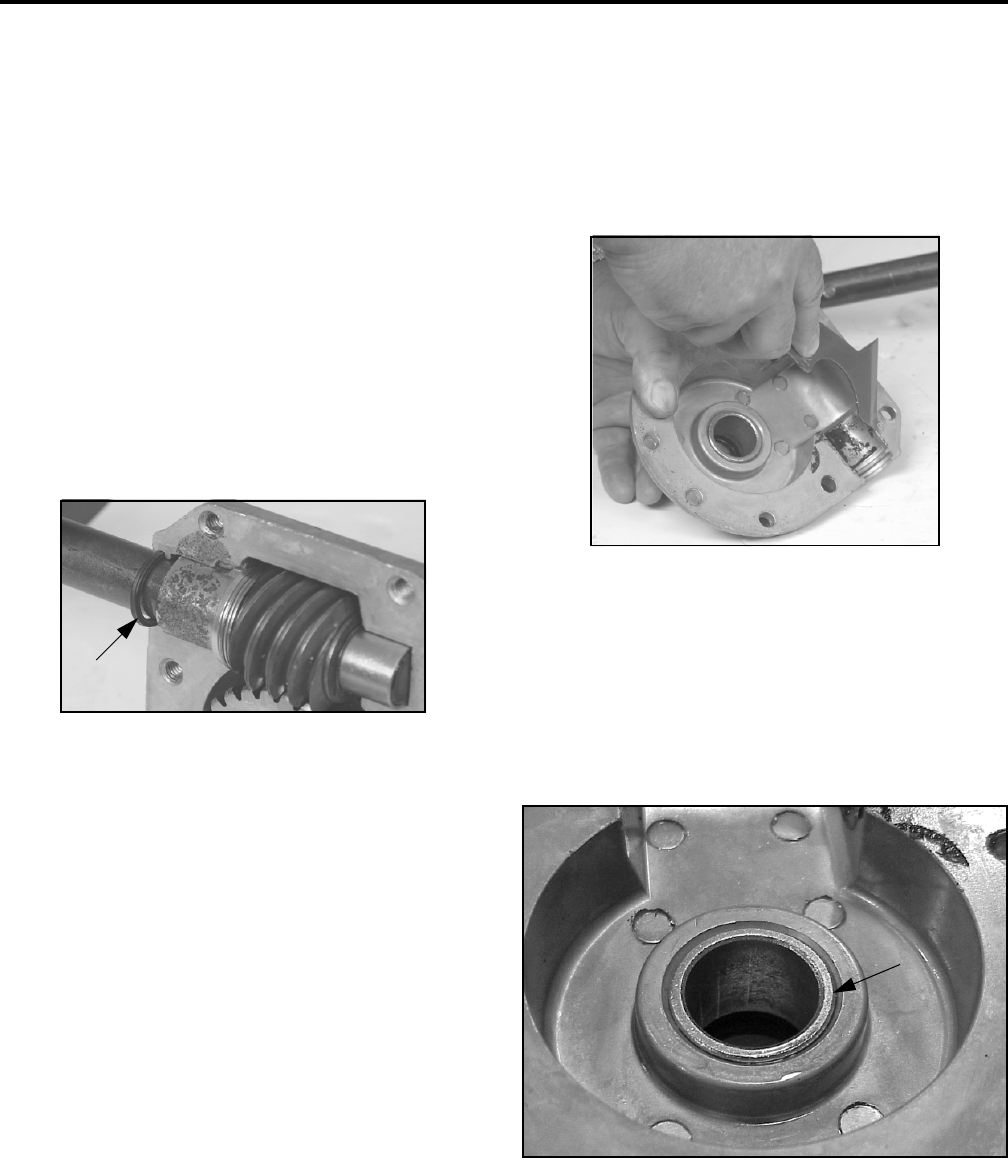
2. If new bushings are to be installed in the gear
case halves, now is the time. Apply a thin coat of
Loctite™ Blue #242 or equivalent to the OUTSIDE
of the bushing and press in flush with the INSIDE
of the case (Figure 29). This will allow space for
the seal on the outside. Wipe up any Loctite™ that
is visible. The Loctite™ must not get into the gear
or seal area.
Figure 29
MVC-710
1
1
.
Wi
per r
i
ng
1
1
.
Fl
us
h