


16
NOTE:
AutoStar requests the
Country/State, City,
and Telescope Model
information only the
first time AutoStar is
activated. If you wish
to change this informa-
tion, use the "Site" and
"Telescope Model"
options in the Setup
menu.
The de
vice that sup
-
plies the Time and
Date is preset at the
Observe the Moon
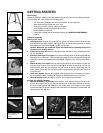
Point your telescope at the Moon (note that the Moon is not visible every night) and practice
using the Arrow keys and the slew speeds to view different features. The Moon contains many
interesting features, including craters, mountain ranges, and fault lines. The best time to view
the Moon is during its crescent or half phase. Sunlight strikes the Moon at an angle during these
periods and adds a depth to the view. No shadows are seen during a full Moon, causing the
overly bright surface to appear flat and rather uninteresting.
Consider the use of a neutral density Moon filter when observing the Moon. Not only does it cut
do
wn the Moon's bright glare, but it also enhances contrast, providing a more dramatic image.
To Track an Object Automatically
As the Ear
th rotates beneath the night sky, the stars appear to move from East to West. The
speed at which the stars move is called the sidereal rate.You can setup your telescope to move
at the sidereal rate so that it automatically "tracks" the stars and other objects in the night sky.
In other words, if the telescope is not tracking an astronomical object, the object will drift out of
the eyepiece field of view.The tracking function automatically keeps an object more or less cen-
tered in the telescope’
s eyepiece.
To track objects, you must first initialize AutoStar and then select "Targets: Astronomical" from
the A
utoStar Setup menu. You must also learn how the AutoStar keypad operates in order to
mo
ve through the AutoStar menus.
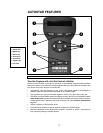
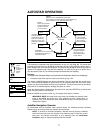
Moving Through AutoStar’s Menus
The AutoStar database is organized in levels for quick and easy navigation.
• Press ENTER to go deeper into AutoStar's menu levels.
• Press MODE to move back toward the top menu level.
• Use the Scroll keys to move up and down through the options available for each
level.
• Use the Scroll keys to enter characters and digits.
The Arrow keys are used to move the telescope, and can also enter numbers and letters.
Initializing AutoStar
This section describes how to initialize AutoStar. Perform this procedure the first time you use
AutoStar or after performing a RESET.
1.
Secure the locks: Make sure that the vertical and horizontal locks (13 and 14, Fig. 1) are
secured.
2.
Plug in AutoStar: Connect AutoStar to the HBX port of the computer control panel (A, Fig.
1b
).
3.
Turn on the control panel: Flip the telescope power switch of the computer control panel
to the ON position.
The AutoStar screen is activated and a copyright message displays briefly, followed by a
short beep. Then AutoStar takes a few moments to start up the system.
4.
Sun Warning: A message displays that warns not to look at the Sun. At the end of this
message, press the Speed/? key to signify that the message has been read and |
understood.
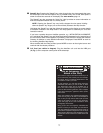
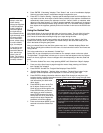
5. Getting Star
ted:
The Getting Star
ted men
u displa
ys a scrolling message
. Press ENTER
(
2, Fig. 5) to bypass the Help tutorial and continue with initialization.
6.
Daylight Savings Time: The next screen requests the status of Daylight Savings Time.
Press one of the Scroll keys to toggle between the YES/NO settings.When the desired set-
ting displays, press ENTER.
Note: When multiple choices are available within a menu option, the option that is
currently enab
led is usually displa
y
ed first and highlighted b
y a r
ight pointing Arro
w
(>).