[4] DISASSEMBLY/ASSEMBLY
[4]-5. Clutch
DISASSEMBLING
DISASSEMBLING
ASSEMBLING
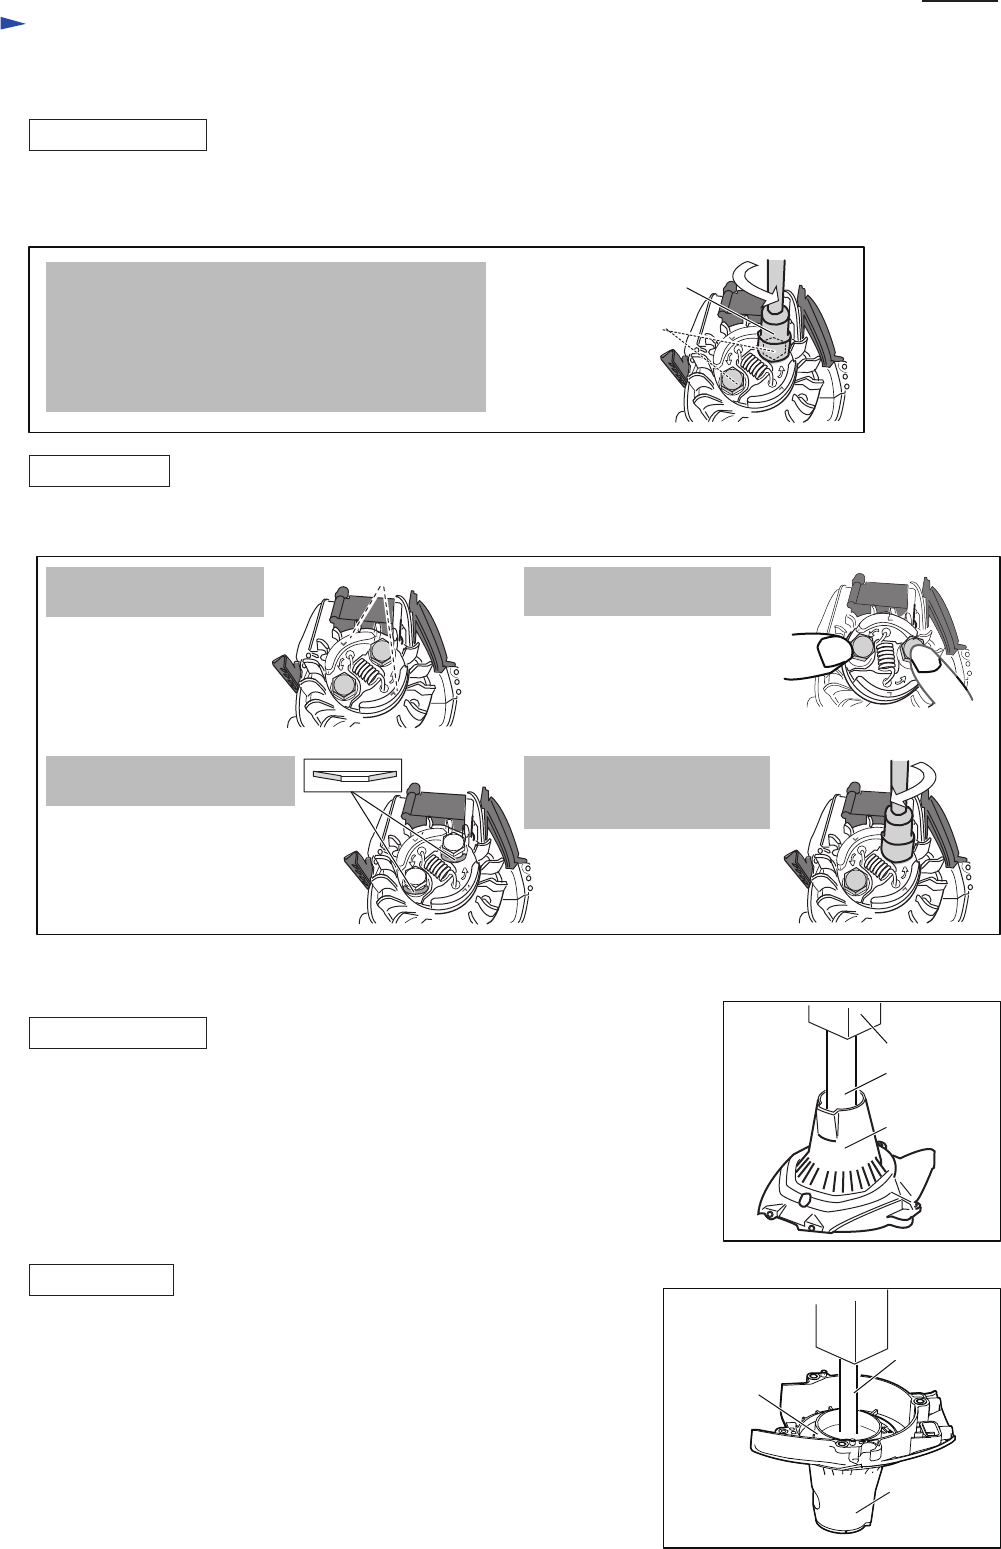
Disassemble Clutch by removing Shoulder hex bolt M6x25 (2pcs) with Cordless impact driver
using 13mm Socket bit. (Fig. 12)
(1) Remove Clutch case section from the engine
by unscrewing H.S.H. bolt M5x8 (3pcs).
(2) Remove Retaining ring S-12 with 1R004 from Clutch drum in the Clutch case.
(3) Remove Clutch drum from Clutch case section using 1R247 and Arbor press.
(Fig. 14)
(1) Put Clutch case on the table of Arbor press vertically, and then,
press-fit Clutch drum into Ball bearing 6201LLU with 1R286 and
Arbor press. (Fig. 15)
(2) Set Retaining ring S-12 in place with 1R004.
ASSEMBLING
Assemble Clutch by following steps in Fig. 13.
Fig. 12
Fig. 14
Clutch case
1R247
Arbor press
Fig. 15
Clutch drum
1R286
Clutch case
13mm
Socket bit
Shoulder hex bolt
M6x25 (2pcs.)
[4]-6. Clutch drum
Repair
P 6/ 14
Note:
• Clutch is removed with Cordless impact driver
without locking Piston.
• Do not remove Spark plug because compressed air
resistance in Cylinder is used for Piston locking.
• Remove Plug cap to prevent accidental engine start.
Fig. 13
L
3. Tighten Shoulder hex bolt
M6x25 by hand.
4. Set 13mm Socket bit to
Cordless impact driver and
tighten Shoulder hex bolts.
1. Marking “L” on Clutch
must face up.
2. Place Washer 8 at described
direction.


