


Repair
CAUTION: Repair the machine in accordance with “Instruction manual” or “Safety instructions”.
[4] DISASSEMBLY/ASSEMBLY
[4]-1. Attention
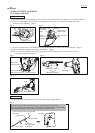
Follow the instructions below during repairing.
• Wear glove to avoid injury.
• Cool down the engine enough before repairing to avoid skin burn.
• Remove the remaining fuel in Tank and Carburetor completely. Note; No open flames in the workshop.
• Repair the tool on the stable workbench and keep dust out.
• Record where and how the parts are assembled to avoid mis-assembling. And assort and keep the disassembled parts
in the box by section.
• Treat the disassembled parts carefully. Be sure to clean and wash parts before assembling.
• Use Impact driver if bolts and screws can not be loosen.
• Tighten the bolts and the screws to the specific torque as listed in Fig. 59.
• Check the movement and sound of the main parts by manually turning each part once assembled.
• Check the assembled parts by manually turning them if there is any faulty or unusual gap.
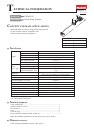
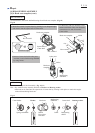
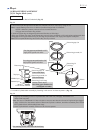
[1] NECESSARY REPAIRING TOOLS
[2] GASKET
Code No. Description Use for
Retaining ring pliers ST-2 for External ring removing/ assembling Retaining rings S-12 and S-24
1R004
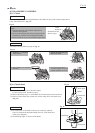
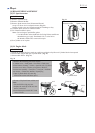
(1) Replace the removed gasket with the new one.
(2) Clean the matching surface where the gasket is placed to maintain its sealing performance.
Air density tester diagnosing Carburetor
removing / assembling M5 Hex socket head boltT-type hex. wrench 4-130
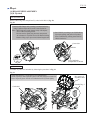
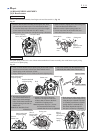
removing Clutch drum and Ball bearing 6001LLURound bar for arbor 20-1001R247
1R171
1R127
press-fitting Clutch drumRound bar for arbor 12-50
1R286
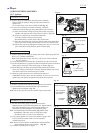
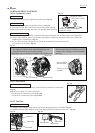
removing FlywheelFlywheel puller1R364
holding Cutter holderSpring pin extractor 4.01R308
Wire brush
Adjusting Ignition coil, Spark plug and Rocker arm assembly
removing / assembling FlywheelHex socket bit 13
cleaning Spark plug
Feeler gauge set1R366
---
---
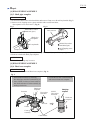
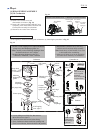
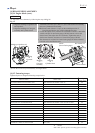
(1) Apply Makita grease N No.2 to Spiral spring in Recoil starter and the spline ends of Shaft.
(2) Apply Liquid gasket; ThreeBond 1215, to the matching surface of
Crank case and Cylinder block when assembled. (Fig. 55)
[3] LUBRICANT / ADHESIVE APPLICATION
P 2/ 14