


40
Section 5: Maintenance & Lubrication
RC4015 and RCM4015 Series 2 S/N 944961+ Rotary Cutters 330-845M
10/21/15
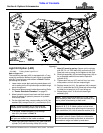
Table of Contents
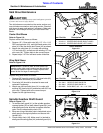
Drivelines With Slip Clutches
!
WARNING
Always disengage PTO, place tractor in park or set park
brake, shut tractor engine off, remove switch key, and wait for
blades to come to a complete stop before dismounting from
tractor to work on or around revolving components.
!
CAUTION
Slip clutches that have been in use or have been slipped for
only two or three seconds during run-in may be too hot to
touch. Allow a hot clutch to cool before working on it.
Friction clutches must be capable of slippage during
operation to protect gearboxes, drivelines, and other
drive train parts. Friction clutches should be “run-in” prior
to initial operation and after periods of inactivity to
remove any oxidation from the friction surfaces. Repeat
“run-in” at the beginning of each season and when
moisture seizes the inner friction plates.
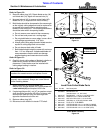
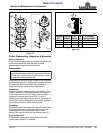
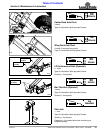
Clutch Types
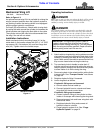
Figure 5-3
Refer to Figure 5-3 to determine which friction clutch your
cutter has. Follow “run-in” instructions for your specific
clutch type. Refer to this page for “Type A Clutches” and
page 42 for “Type B Clutches”.
IMPORTANT: Prior to initial operation and after long
periods of inactivity, slip friction disks to remove
oxidation and moisture. Moisture allows disks to slip
easily. Oxidation can prevent disk from slipping
causing driveline damage. This damage is NOT
covered under the warranty!
Type A Clutch Type B Clutch
26619
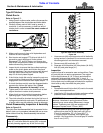
Type A Clutches
Clutch Run-In
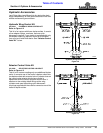
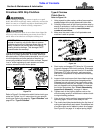
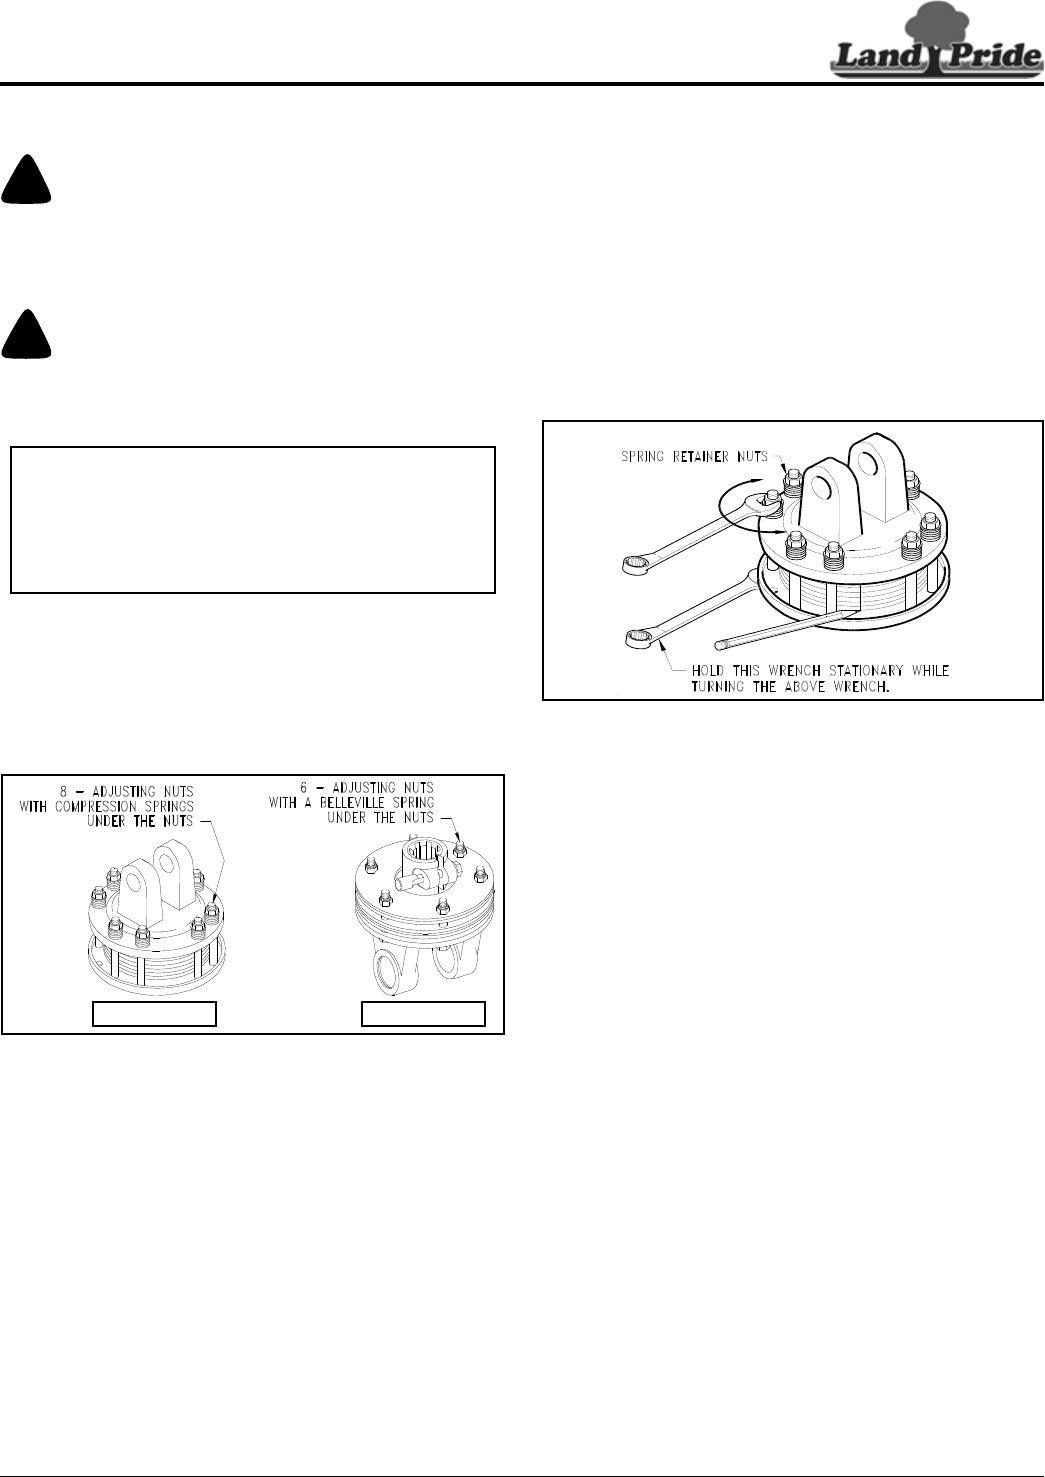
Refer to Figure 5-4:
1. Using a pencil or other marker, scribe a line across the
exposed edges of the clutch plates and friction disks.
2. Carefully loosen each of the 8 spring retainer nuts by
exactly 2 revolutions. It will be necessary to hold hex
end of retainer bolt in order to count the exact
number of revolutions.
3. Make sure the area is clear of all bystanders and
machine is safe to operate.
Type A Clutch Run-In
Figure 5-4
4. Start tractor and engage PTO drive for 2-3 seconds
to permit slippage of the clutch surfaces. Disengage
PTO, then re-engage a second time for 2-3 seconds.
Disengage PTO, shut off tractor, and remove key.
Wait for all components to stop before dismounting
from tractor.
5. Inspect clutch and ensure that the scribed markings
made on the clutch plates have changed position.
Slippage has not occurred if any two marks on the
friction disk and plate are still aligned. A clutch that
has not slipped must be disassembled to separate
the friction disk plates. See “Clutch Disassembly,
Inspection & Assembly” on page 41 below.
6. Tighten each of the 8 spring retainer nuts on the
clutch housing exactly 2 revolutions to restore clutch
to original setting pressure.
7. Allow clutch to cool to ambient temperature before
operating again. Clutch is now ready for use.
8. The clutch should be checked during the first hour of
cutting and periodically each week. An additional set
of scribe marks can be added to check for slippage.
See Figure 5-6 on page 41 to adjust spring length.
13693