


32
Section 4: Maintenance & Lubrication
OS1548 and OS1572 Overseeder (S/N 166724+) 308-303M
2-16/09
Land Pride
Table of Contents
Overseeders With Rear Roller Drive
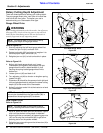
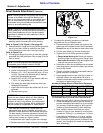
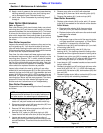
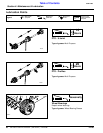
Refer to Figure 4-3:
a. Remove rear roller drive chain from speed
change sprocket to rear roller sprocket.
Rear Roller Drive Disconnect
Figure 4-3
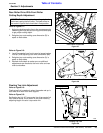
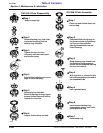
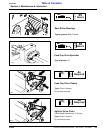
Refer to Figure 4-4:
4. Remove right hand side or rotor from Overseeder by
removing 1/2” x 1 1/4” bolts (#2), lock washer (#3), hex
nut (#4) and then right hand bearing mount plate (#1)
from Overseeder main frame.
Right Hand Rotor Disassembly
Figure 4-4
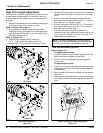
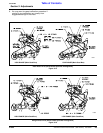
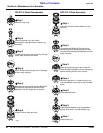
Refer to Figure 4-5:
5. Disconnect left hand side of rotor from rotor drive
hub (#1) by removing 7/16” x 1” long bolts (#3) and
7/16” lock washers (#2).
Left Hand Rotor Disassembly
Figure 4-5
26726
14703
14645
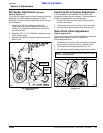
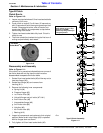
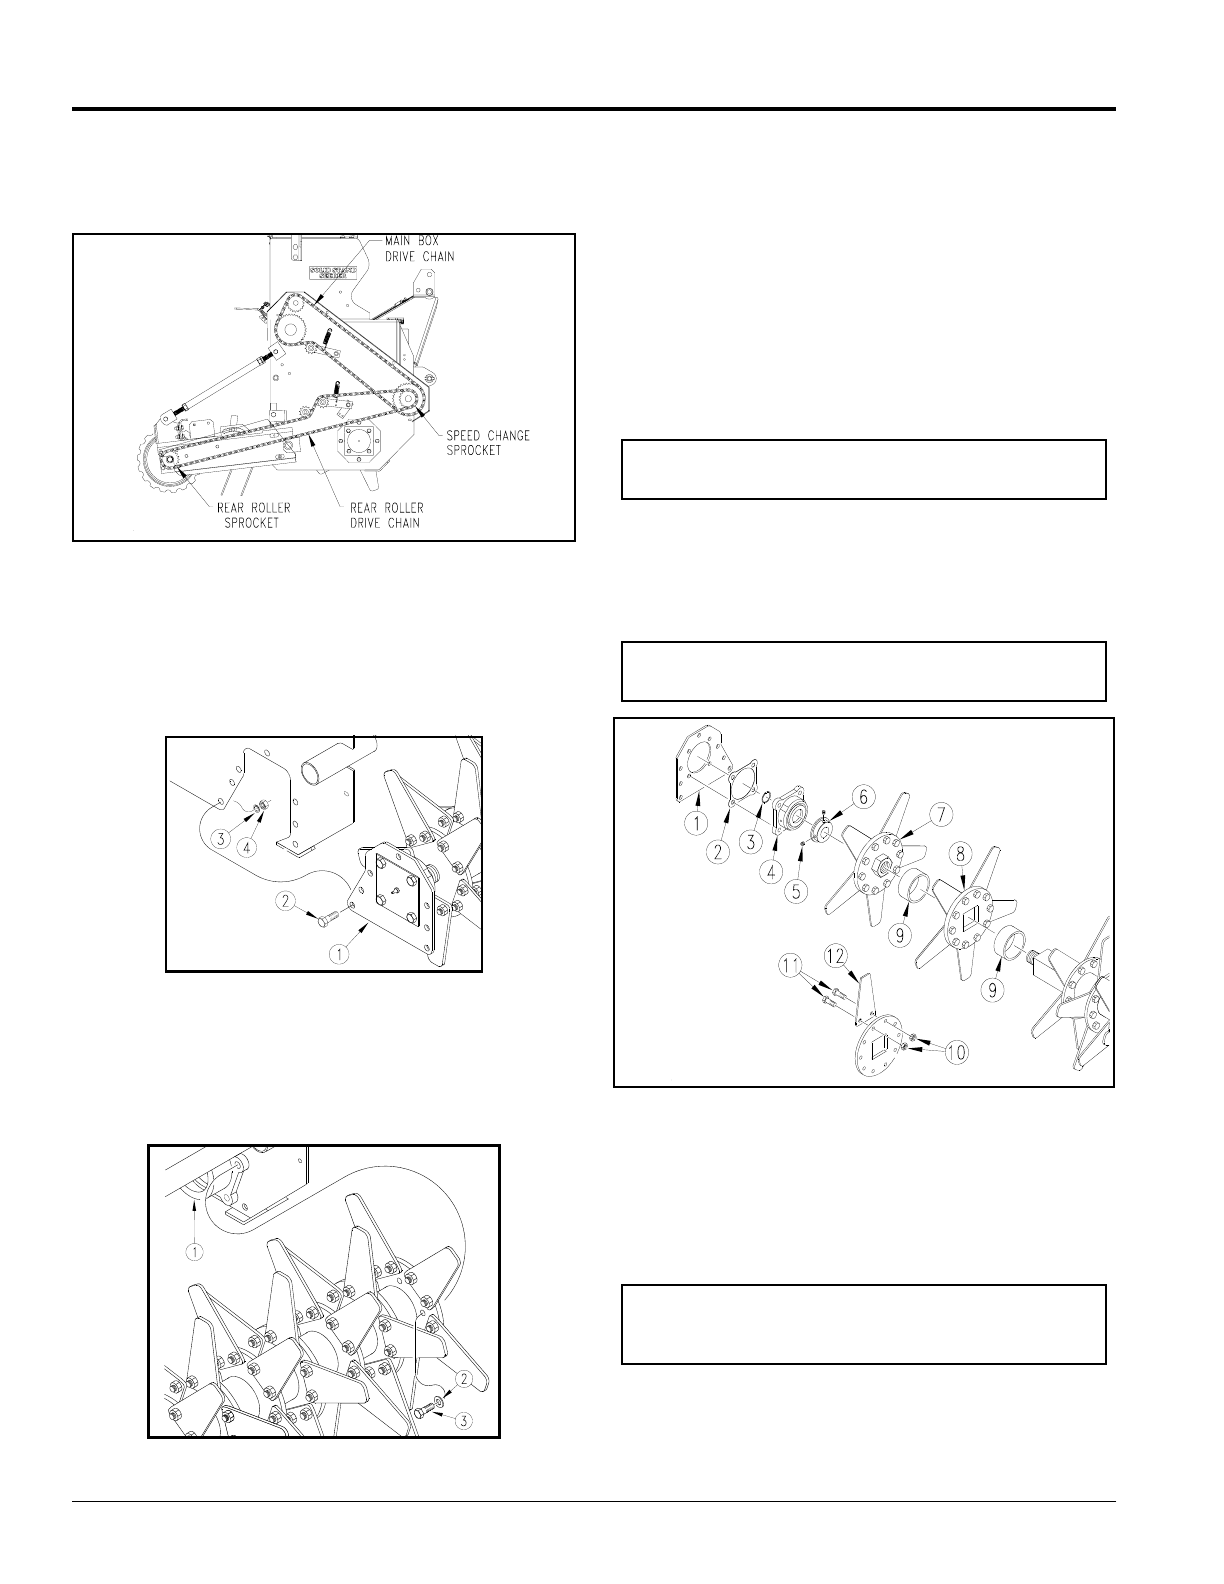
Refer to Figure 4-6:
6. Remove bearing mount plate (#1) from bearing
housing assembly (#4). Take care not to damage the
gaskets (#2) on either side of the right hand bearing
mount plate.
7. Remove snap ring (#3) and bearing (#4) from the
rotor shaft.
8. Loosen two set screws (#5) in seal guard hub (#6)
and slide hub off the rotor shaft.
9. Clamp rotor shaft on one of the knife mounting
flanges and, using a spanner wrench, unscrew
(left-hand threads) non-drive rotor flange (#7).
10. Slide knife mounting flanges (#8) and spacers (#9)
off rotor shaft.
11. Replace knives (#12) as needed using new 7/16”
lock nuts, Land Pride part no. 803-108C. Torque nuts
to 68 ft-lbs.
Rotor Bearing and Knife Removal
Figure 4-6
12. Inspect bearing and seal for wear and replace if
necessary.
13. Reassemble spacers and knife mounting flanges in
the same spiral pattern as they were before
disassembly.
14. Reassemble non-drive rotor flange (#7). Using a
spanner wrench, torque to 985 ft-lbs. Remember:
These are left-handed threads.
15. Slide seal guard hub onto the rotor shaft and leave
set screws loose.
NOTE: The threads on the non-drive rotor flange are
left-handed threads.
NOTE: The spiral arrangement of the knives needs
to be reassembled in the same manner.
14700
NOTE: The knives should all be on the right side of
the mounting flanges as viewed from the rear of the
Overseeder.