


26
Section 3: Adjustments
OS1548 and OS1572 Overseeder (S/N 166724+) 308-303M
2-16/09
Land Pride
Table of Contents
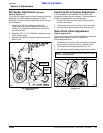
Rear Arm Length Adjustment
The rear roller is normally mounted to the short arm holes
to keep tractor ballast weight to a minimum. Use long
arm hole setting only if optional rear tine attachment is
included.
1. Support Overseeder with an overhead hoist to adjust
rear roller for short arm or long arm use.
Refer to Figure 1-8 on page 11:
2. If Overseeder is equipped with rear roller drive,
remove rear chain guard (#6), front chain guard (#7),
right and left solid links (#1), rear roller drive chain
and drive sprocket (#13).
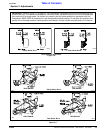
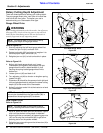
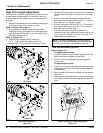
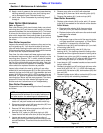
Refer to Figure 3-10:
3. Remove roller scraper (#8) by removing
3/8” x 1" bolts (#10), flat washers (#9), lock
washers (#11) and nuts (#12) from both arms (#1).
Rear Roller Adjustment
Figure 3-10
Long Arm
14673
Short Arm
14636
4. Remove both rear roller arms (#1) from Overseeder
frame by removing cotter pin (#13) and 1” clevis pin
(#14).
5. Remove rear roller adjustment bracket (#2) from
both rear roller arms by removing 1/2” x 1 1/4” long
bolts (#3) and 1/2” flange nuts (#4).
6. Remove from each roller arm 3/8” x 1 1/2” bolts (#5),
lock washer (#6) and hex nut (#7). Do not remove
bearings from rear roller shaft.
7. The rear roller should be free to move now.
Reposition rear roller adjustment bracket (#2) to the
long or short arm location on roller arms (#1) and
reassemble in reverse order.
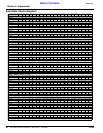
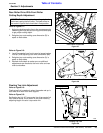
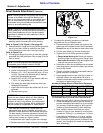
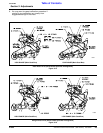
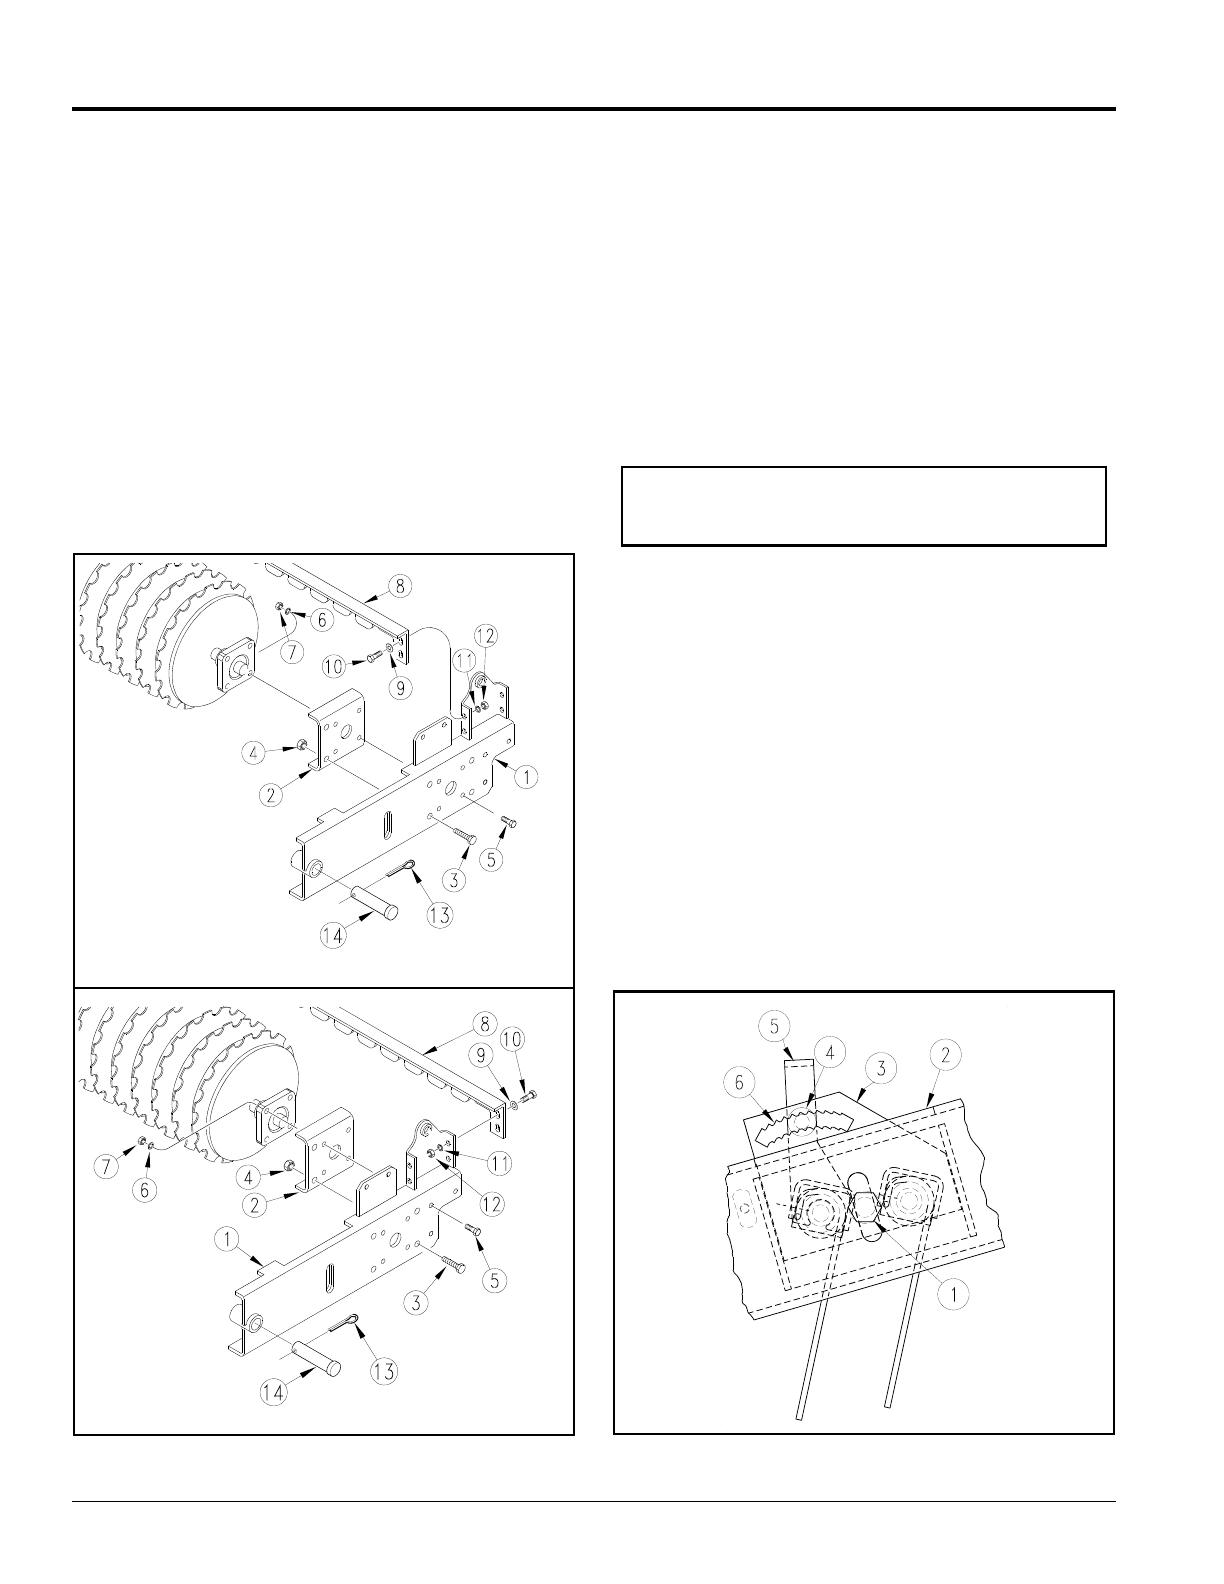
Tine Attachment (Optional)
Refer to Figure 3-11:
To adjust height of tines:
1. Loosen 3/4" bolt (#1) on outside of right hand and left
hand roller packer support channels (#2).
2. Raise or lower tine assembly (#3) and retighten
3/4" bolt (#1).
To adjust angle of tines:
3. Loosen 1/2" nut on carriage bolts (#4) and push head
of carriage bolt from its notch (#6) on each side of the
tine assembly.
4. Move handle (#5) forward or backward to the desired
tine angle.
5. Make sure carriage bolts (#4) are nested in the same
notch (#6) on both sides and retighten carriage bolt
nuts.
Torsion Tine Height & Angle Adjustment
Figure 3-11
NOTE: For long arm assembly, you may need to
add 3 or more flat washers between the bottom rear
bolt (#5) and rear roller adjustment bracket (#2).
10542