


14
Section 2: Operating Instructions
OS1548 and OS1572 Overseeder (S/N 166724+) 308-303M
2-16/09
Land Pride
Table of Contents
Section 2: Operating Instructions
Operating Check List
Hazard control and accident prevention are dependent
upon the awareness, concern, prudence and proper
training involved inthe operation, transport, maintenance
and storage of the seeder. Therefore, it is absolutely
essential that no one operates the Overseeder without
first having read, fully understood and become totally
familiar with the Operator’s Manual. Make sure the
operator has paid particular attention to:
• Important Safety Information, pages 1 to 3
• Section 1: Assembly & Set-up, page 9
• Section 2: Operating Instructions, page 14
• Section 3: Adjustments, page 18
• Section 4: Maintenance & Lubrication, page 31
The following information should be known and
inspections made before operating your seeder.
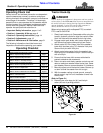
Operating Checklist
✔ Check
Page No.
Read and follow all Safety Rules carefully.
Refer to “Important Safety Information”. Page 1
Make sure all guards and shields are in place.
Refer to “Important Safety Information”.
Page 1
Read and follow Hook-up & preparation instructions.
Refer to “Section 1: Assembly & Set-up”. Page 9
Read and follow all operating procedures.
Refer to “Section 2: Operating Instructions”. Page 14
Read and make all required adjustments.
Refer to “Section 3: Adjustments”. Page 18
Read and follow all Maintenance Instructions.
Refer to “Section 4: Maintenance & Lubrication”.
Page 31
Read and follow all Lubrication Instructions.
Refer to “Lubrication Points”.
Page 38
Make sure all gearboxes are properly lubricated.
Refer to Gearbox lubrication. Page 40
Check tire pressure. Refer to “Tire Inflation Chart” Page 48
Inspect seed cups and seed tubes for foreign matter. Page 18
Set speed change sprocket for drive type desired. Page 19
Set seed rate. See “Seed Rate Charts”. Page 20
Check seeder initially and periodically for loose bolts
and pins. Refer to “Torque Values Chart”. Page 48
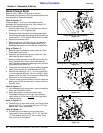
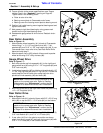
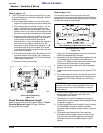
Tractor Hook-Up
!
DANGER
Tractor hook-up to equipment is dangerous and can result in
serious injury or death. Do not allow anyone to stand between
the seeder and tractor during hook-up operations. Do not
operate hydraulic 3-point lift controls while someone is
directly behind the tractor or near the seeder.
When using tractors with multispeed PTO, be certain
PTO is set for 540 RPM.
1. Slowly back tractor up to Overseeder while using the
tractor’s hydraulic control to align the tractor’s lower
hitch link holes with the seeder’s clevis lug holes.
2. Engage tractor park brake, shut tractor engine off
and remove key before dismounting from tractor.
3. Attach tractor’s 3-Point lower links to the seeder’s
lower hitch clevises using 7/8” diameter hitch pins.
Secure hitch pins with linch pins.
4. Attach tractor’s top center link to the seeder’s top
hitch using a 3/4” diameter hitch pin. Secure hitch pin
with a linch pin.
5. Ensure that the lower hitch arms are blocked to
prevent excessive side movement.
6. Return to tractor and slowly operate controls up and
down to make sure seeder clears tractor tires, frame
and drawbar. Move or remove drawbar if it interferes.
7. Manually adjust one of the tractor’s lower lift arms up
or down to level the seeder from left to right.
8. With the seeder resting on level ground, manually
adjust tractor’s top link until the seeder is level from
front to rear.
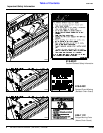
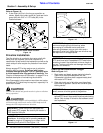
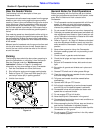
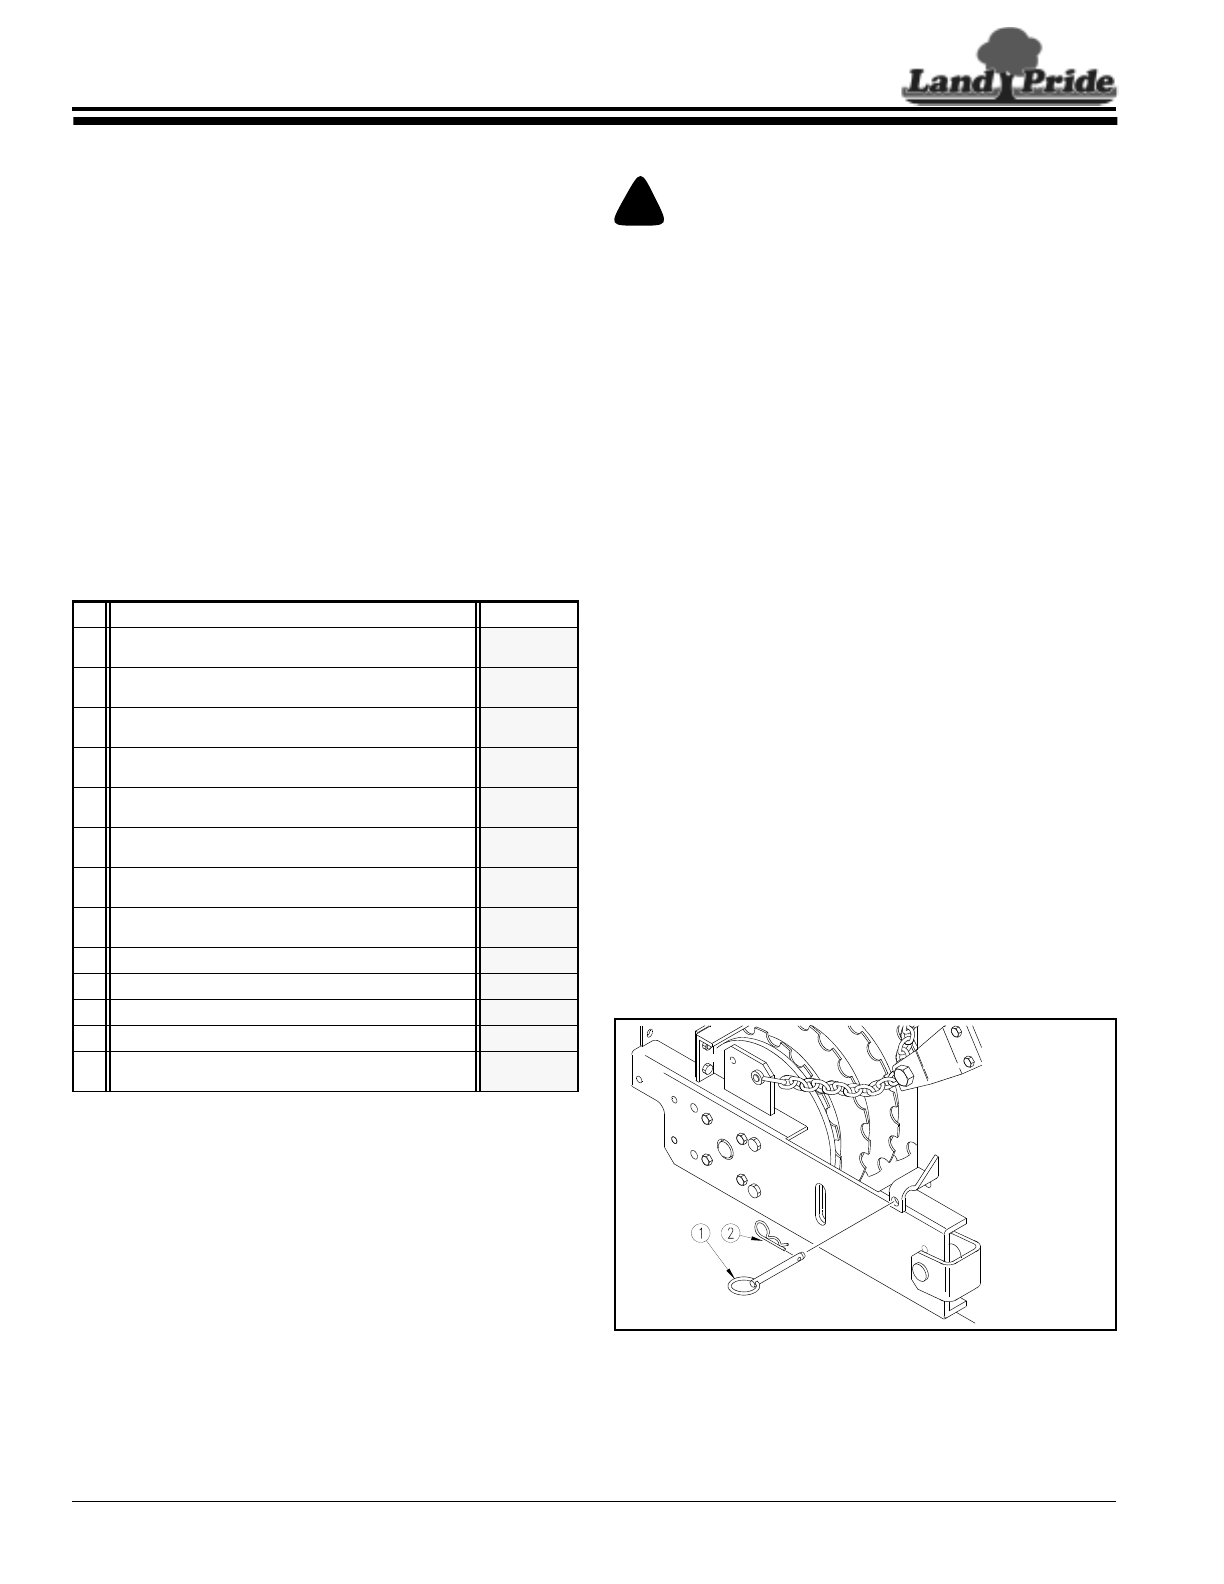
Refer to Figure 2-1:
9. Remove rear roller stop pin (#1) and hairpin
cotter (#2) out of parking position.
Rear Roller Stop Pin in Parking Position
Figure 2-1
14669