


9
Section 1: Assembly & Set-up
2-16/09
OS1548 and OS1572 Overseeder (S/N 166724+) 308-303M
Land Pride
Table of Contents
Tractor Requirements
Weight & Horsepower
Tractor horsepower should be within the range noted
below. Tractors outside the horsepower range must not
be used.
Horsepower Rating. . . . . . . . . . . . . . . . . . . 25-60 HP
3-Point Hitch Type . . . . . . . . . . . . . . . . . . . . . . .Cat. I
Rear PTO Speed . . . . . . . . . . . . . . . . . . . . .540 RPM
Tractor Weight . . . . . . . . . See Important Note Below
Shipping information
Your Overseeder is shipped partly assembled via flat
bed truck. It is the responsibility of the dealer to unload
and assemble the Overseeder.
Unload all equipment before beginning assembly. Do not
attempt any assembly work while Overseeder is on the
truck.
Read and understand the previous section, “Important
Safety Information” page 1, before starting assembly.
Pre-Assembly Checklist
The information in the Pre-Assembly Checklist is general
in nature and was written to aid the operator in preparing
of the tractor and Overseeder for use, and to provide
general operating procedures. The operator’s
experience, familiarity with the machine, and the
following information combined should provide efficient
Overseeder operation and good working habits.
Having all the parts and equipment readily at hand will
speed your assembly task and make the job as safe as
possible. Please review Pre-Assembly Checklist now.
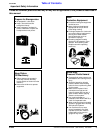
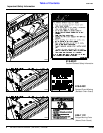
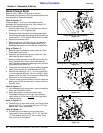
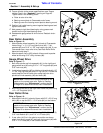
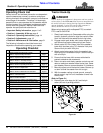
Sling Brackets
Refer to Figure 1-1:
After the unit is uncrated, check to see if the sling
brackets (#1) are installed, if not, install one on each end
of unit now with 1/2” x 1” long bolts (#2), 1/2” lock washer
(#3) and 1/2” hex nut (#4). The sling brackets allow
points at each end to hook the chain for lifting of the unit.
IMPORTANT: Ballast may need to be added to your
tractor to maintain steering control. Refer to your
tractor’s operator manual to determine if additional
ballast is needed.
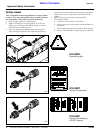
NOTE: When hooking hoist chain to sling brackets,
be certain to either use a spreader bar on the chain
or use a long chain to prevent bending sling brackets.
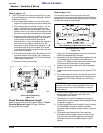
Pre-Assembly Checklist
Torque Requirements
Refer to “Torque Values Chart” on page 48 to determine
correct torque values when tightening hardware.
Sling Bracket Installation
Figure 1-1
Check Reference
Make sure miscellaneous assembly tools are on hand: Hammer,
tape measure, hacksaw, assortment of wrenches & sockets,
3/8" drill, drill bits and spirit level.
Have a forklift or hoist with properly sized chains and safety
stands on hand capable of lifting 2000 lbs.
Have a minimum of two people available during assembly.
See Specifications on page 44 for unit weights.
Check to see if auxiliary tractor weights are needed.
Make sure all major components and loose parts
are shipped with the machine.
Operator’s
Manual
Double check to make sure all fasteners & pins
are installed in the correct location. Refer to the
Parts Manual if unsure.
NOTE: All assembled hardware from the factory
has been installed in the correct location.
Remember location of a part or fastener if
removed during assembly. Keep parts separated.
Operator’s
& Parts
Manual
Make sure working parts move freely, bolts are
tight & cotter pins are spread.
Operator’s
Manual
Make sure all grease fittings are in place and
lubricated.
Section 4
Page 31
Make sure gearbox is filled with gear lube as
indicated in “Lubrication Points”.
Section 4
Page 38
Make sure all drive chains are properly tension
and aligned.
Operator’s
Manual
Make sure all safety labels are correctly located
and legible. Replace if damaged.
Safety Labels
Page 4
Make sure all tires are inflated to the specified
psi air pressure.
Section 9
Page 48
Make sure all wheel bolts and axle nuts are
tightened to the specified torque.
Section 9
Page 48
14588
Section 1: Assembly & Set-up