


31
Section 4: Maintenance & Lubrication
2-16/09
OS1548 and OS1572 Overseeder (S/N 166724+) 308-303M
Land Pride
Table of Contents
Section 4: Maintenance & Lubrication
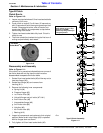
Maintenance
Proper servicing and adjustment is the key to the long life
of any implement. With careful inspection and routine
maintenance, you can avoid costly down time and repair.
1. After using your Overseeder for several hours, check
all bolts to be sure they are tight.
2. Lubricate areas noted in the “Lubrication” section.
3. Adjust idlers to remove excess slack from chains.
Clean and use chain lube on all roller chains as
needed.
4. Feed cup drive sprocketshould be oiledin its squarebore.
Move feedcup adjustment lever away fromsprocketas far
as possible in order to get oil back into square.
5. Always maintain proper air pressure in turf tires.
6. Replace any worn, damaged or illegible safety labels by
obtaining new labels from your Land Pride Dealer.
Storage
Clean, inspect, service and make necessary repairs to
the seeder when parking it for long periods and when
parking it at the end of a working season. This will help
ensure the seeder is ready for field use the next time you
hook-up to it.
1. Completely clean the seed box of seed and other
debri before storing.
2. Lubricate and adjust all roller chains and fittings.
3. Feed cup drive sprocket hub should be oiled in its
square bore. Squirt oil on to the square feed cup
shaft and move feed cup adjustment lever back and
forth in order to get the oil back into the square bore.
This is most important before putting the Overseeder
in storage.
4. Store the Overseeder and its attachments inside if
possible to extend the Overseeder’s life.
5. When in storage, lower the Overseeder with rollers
on a board or hard surface and adjust the parking
stand to properly support the seeder.
6. Repaint parts where paint is worn or scratched to
prevent rust.
7. Replace all damaged or missing decals.
8. Check knives for wear and replace if necessary.
9. Inspect Overseeder for loose, damaged or worn
parts and adjust or replace as needed.
10. Drain gear case and chaincase oil. Drain oil in gear
case by removing plug from the bottom side of the
rotor housing. Drain oil in chaincase by removing oil
level plug and fill plug.
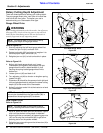
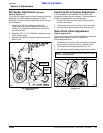
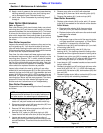
Individual Knife Replacement
The following instructions are for replacing only a few
bent and/or broken knives on the rotor without removing
the rotor from the Overseeder frame. It is best to remove
the rotor from the frame if replacing all knives. See “Rotor
Maintenance” on this page to replace all knives.
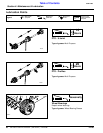
Refer to Figure 4-1:
1. Remove two cap screws (#2) and locknuts (#3) from
knife (#1) to be replaced.
2. Remove damaged knife and install new knife (#1) on
same side of attaching flange as the damaged knife
was using new 7/16” lock nuts (#3), Land Pride Part
No. 803-108C. Torque nuts to 68 ft-lbs.
Individual Knife Replacement
Figure 4-1
Rotor Maintenance
It is best to remove the rotor knife assembly when
replacing the complete set of knives, right hand bearing
and/or bearing seal. Knives are worn out when they can
not be set to penetrate the soil to your desired depth.
!
WARNING
Before making adjustments on the Overseeder, shut off the
tractor, disengage PTO, wait for all moving parts to stop and
lock brakes before dismounting tractor. Securely block
Overseeder on safe supporting stands and disconnect tractor.
1. Attach chain, cable or lifting strap to the two
Overseeder slingbrackets. Use an overhead hoist for
rotor removal and installation.
2. Remove chain guard from right hand side of your
Overseeder.
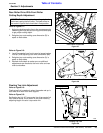
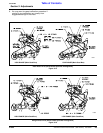
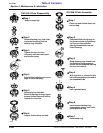
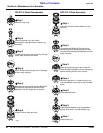
3. Remove drive chain as follows:
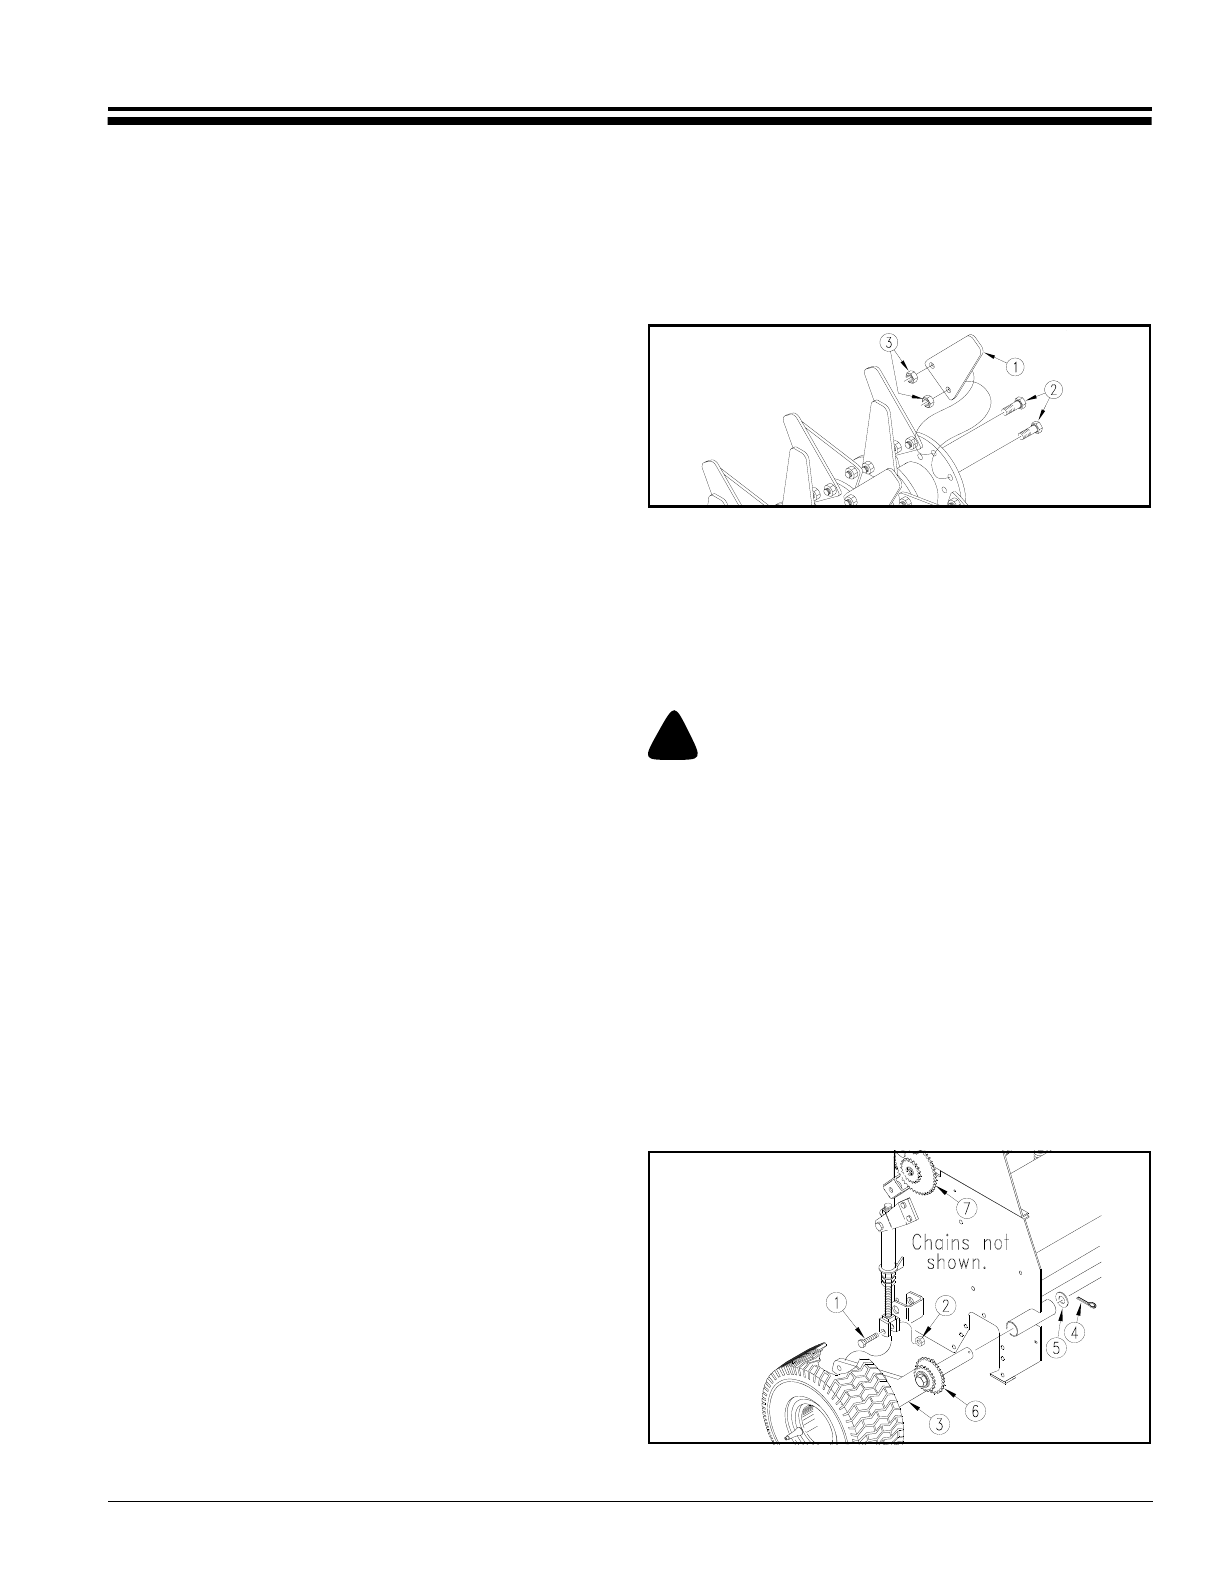
Overseeders With Gauge Wheel Drive
Refer to Figure 4-2:
a. Remove chain from gauge wheel sprocket (#6) to
seed cup sprocket (#7).
b. Remove 5/8” x 2 1/2” long bolt (#1) and nut (#2).
Gauge Wheel Disconnect
Figure 4-2
26768
14702