19
Section 5: Maintenance & Lubrication
12/09/15
AR2596 & AR2510 Pasture Aerators 325-127M
Table of Contents
Storage
Clean, inspect, service, and make necessary repairs to
the Aerator when parking it for long periods and when
parking it at the end of a working season. This will help
ensure that the Aerator is ready for field use the next time
you hook-up to it.
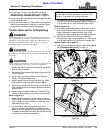
!
DANGER
Always secure Aerator in the up position with solid supports
before servicing underside of the unit.
1. Clean off any dirt and grease that may have
accumulated on the Aerator and moving parts.
Scrape off compacted dirt and then wash surface
thoroughly with a garden hose. A coating of oil may
also be applied to the unpainted area to minimize
oxidation.
2. Check tines and tine bolts for wear. Replace as
needed.
3. Inspect for loose, damaged, or worn parts and adjust
or replace as needed.
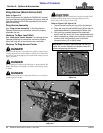
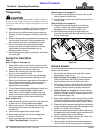
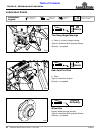
4. Lubricate as noted in “Lubrication Points” starting
on page 20.
5. Apply a light coat of oil or grease to the tines and
exposed cylinder rods to minimize oxidation.
IMPORTANT: The following should be adhered to
when parking the Aerator:
• When parking for short periods with Aerator
attached to the tractor, lower Aerator down so that
its weight is resting on the tines.
• When unhooking from the Aerator, lower Aerator
against hydraulic cylinder transport lock and
support hitch with jack stand.
6. Replace all damaged or missing decals.
7. Store Aerator on a level surface in a clean, dry place.
Inside storage will reduce maintenance and make for
a longer Aerator life.
8. Follow all unhooking instructions on page 16 when
disconnecting tractor from Aerator.
9. Repaint parts where paint is worn or scratched to
prevent rust. Ask your dealer for Aerosol Land Pride
touch-up paint. Paint is also available in touch-up
bottles with brush, quarts, and gallon sizes by adding
TU, QT, or GL to the end of the Aerosol part number.
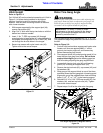
Ordering Replacement Parts
Land Pride offers equipment in factory standard beige
color with black highlights or optional color orange with
black highlights. Special attention must be given to the
part number when ordering orange to prevent ordering
the wrong replacement part. The suffix number 82 must
be added at the end of Land Pride’s beige part number
when ordering an orange replacement part. Parts
ordered without the suffix number will be supplied in
factory standard colors.
For example, if you are ordering a replacement part with
part number 555-555C and the existing part is orange
(not beige), then add the suffix 82 to the end of the
number to make the part number read 555-555C82.
Land Pride Aerosol Touch-up Paint
Part No. Part Description
821-011C PAINT LP BEIGE AEROSOL SPRAY CAN
821-002C PAINT LP BLACK AEROSOL SPRAY CAN
821-066C PAINT ORANGE AEROSOL SPRAY CAN
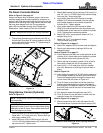
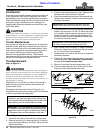
Tine Assembly (Front View)
Figure 5-3
30072
Right-Hand Gang
Left-Hand Gang
Direction
of Rotation
Knife Edge
Knife Edge
Direction
of Rotation
D
i
r
e
c
t
i
on
o
f
T
r
a
v
e
l
Notes:
1. Insert cap screws (#1) into the thicker 5/8" plate first and 1/2" plate last.
2. Apply Loctite 246 to cap screws (#1) before installing tine lock nuts (#2).
3. Tighten tine lock nuts (#2) to the
“Additional Torque Values” provided on page


