


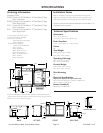


Jacuzzi Whirlpool Bath: Finestra Walk-in Bath Page 14 FL61000B • 10/07
PLUMBLING AND WATER SUPPLY
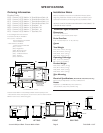
Drain Information
A drain/overow assembly provided with the tub must be installed on the bath, water tested, and connected to the sanitary system
of the house. After opening the carton, inspect for damage and verify that the kit is of the proper nish. In the Jacuzzi Whirlpool
Bath drain/overow kit, note that the waste ange, strainer, overow cover and cover screws are packaged in a separate package
within the kit to protect the trim nish. Follow the installation instructions provided with the drain/overow kit. After the drain is fully
installed, test for proper drainage. If the unit does not drain properly, rectify this condition before proceeding with the installation.
Jacuzzi Whirlpool Bath is not responsible for removal or reinstallation costs.
NOTE: Watertight installation of the drain is the installer’s responsibility. Drain leakage is excluded from the Jacuzzi Whirlpool Bath
warranty of this product.
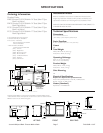
Plumbing
Pump, jets, and suction ttings for the whirlpool system are factory plumbed in schedule 40 PVC piping.
All Jacuzzi Whirlpool Bath products are factory tested for proper operation and watertight connections prior to shipping. If leaks are
detected, notify your Jacuzzi Whirlpool Bath dealer. Do not install the unit.
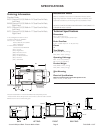
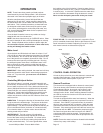
Anti-Siphon Valve
Optional Anti-Siphon valve installation. Anti-Siphon valve is not supplied with the tub. Consult your local plumbing code
requirements for the minimum height above the tub rim.
Water Supply
Consult local authorities for plumbing code requirements in your area.
IMPORTANT: Proper installation of the ll spout plumbing and compliance with local codes are the responsibility of the installer.
Jacuzzi Whirlpool Bath does not warrant connections of water supply ttings and piping, ll systems, or drain/overow systems.
Nor is it responsible for damage to the bath which occurs during installation.
CAUTION: A nonammable protective barrier must be placed between soldering work and bath unit to prevent damage to the bath.
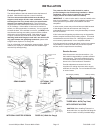
Shower Information
Because of the Walk-In baths’ unique design, a rigid shower door cannot readily be installed. If a shower is desired, we
recommend a hand-held shower be installed in conjunction with a shower curtain, as this will allow the user to control the direction
of the spray.
NOTE: Proper installation of a shower is the responsibility of the installer. Jacuzzi Whirlpool Bath is not responsible for damage to
the unit or for water damage which might occur due to its installation.
Clean-Up After Installation
To avoid dulling and scratching the surface of the bath, never use abrasive cleaners. A mild liquid detergent and warm water will
clean soiled surfaces. Remove spilled plaster with a wood or plastic edge. Metal tools will scratch the surface. Spots left by plaster
or grout can be removed if lightly rubbed with detergent on a damp cloth or sponge.
NOTE: Paint, tar, or other difcult surface stains can be removed with paint thinner, turpentine, or isopropyl alcohol (rubbing
alcohol).
Minor scratches which do not penetrate the color nish can be removed by lightly sanding with 600-grit wet/dry sandpaper. You
can restore the glossy nish to the acrylic surface of the bath with a special compound, Meguiar’s #10 Mirror Glaze. If that is not
available, use automotive rubbing compound followed by an application of automotive paste wax.
Major scratches and gouges which penetrate the acrylic surface will require renishing. Ask your Jacuzzi Whirlpool Bath dealer for
special instructions or visit our web site at http://www.jacuzzi.com/.
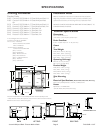
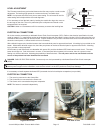
Drain Kits
Rotary Drain Kit. A PVC Rotary Drain Kit comes with a 43 inch cable length, please see the manufacturer's instructions included
with the kit.
Remote Drain Kit. An optional PVC Remote Drain Kit comes with a 50 inch cable length, please see the manufacturer's instructions
included with the kit. A template will be provided.