


English – 17
INSTALLATION
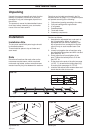
Setting up the Saw Carriage
WARNING!
The saw carriage is heavy. Two
persons are required when
setting up. Always wear boots
with steel toecaps.
CAUTION!
Do not drop the saw carriage onto the
rails or any other hard surface too
heavily. This will result in permanent
damage to the saw carriage’s bearings.
Do not place the saw carriage directly on
the ground so that dirt and unnecessary
contamination can come into contact
with the saw carriage’s wheels.
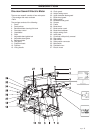
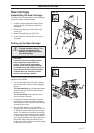
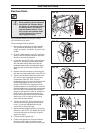
1. Two persons take hold of the saw carriage,
one on each side. Hold the saw carriage as
follows:
The right-hand side: by the bandsaw blade
tension crank and under the band wheel’s
protective cover.
The left-hand side: by the handle (13) on
the motor/engine console.
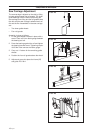
2. Lift and place the saw carriage so that the
grooves in its wheels are positioned above
their respective rails. Carefully lower the saw
carriage onto the rails.
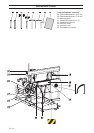
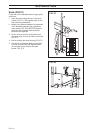
3. The one-man sawmill can be fitted with a
wheel kit (FIG. 22) and a handle (Part no. 531
01 95-93) to make handling the saw carriage
easier. The wheel kit is inserted into the steel
structure by the saw carriage’s runner wheels
on the left-hand side. The handle is attached
to the wheel housing on the right-hand side of
the sawmill. When using the wheel kit and
handle, the sawmill can be moved and placed
on the rails by one person.
Place the saw carriage on the rails and make
adjustments as follows:
!
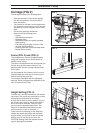
FIG. 21
FIG. 22
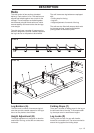
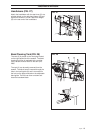
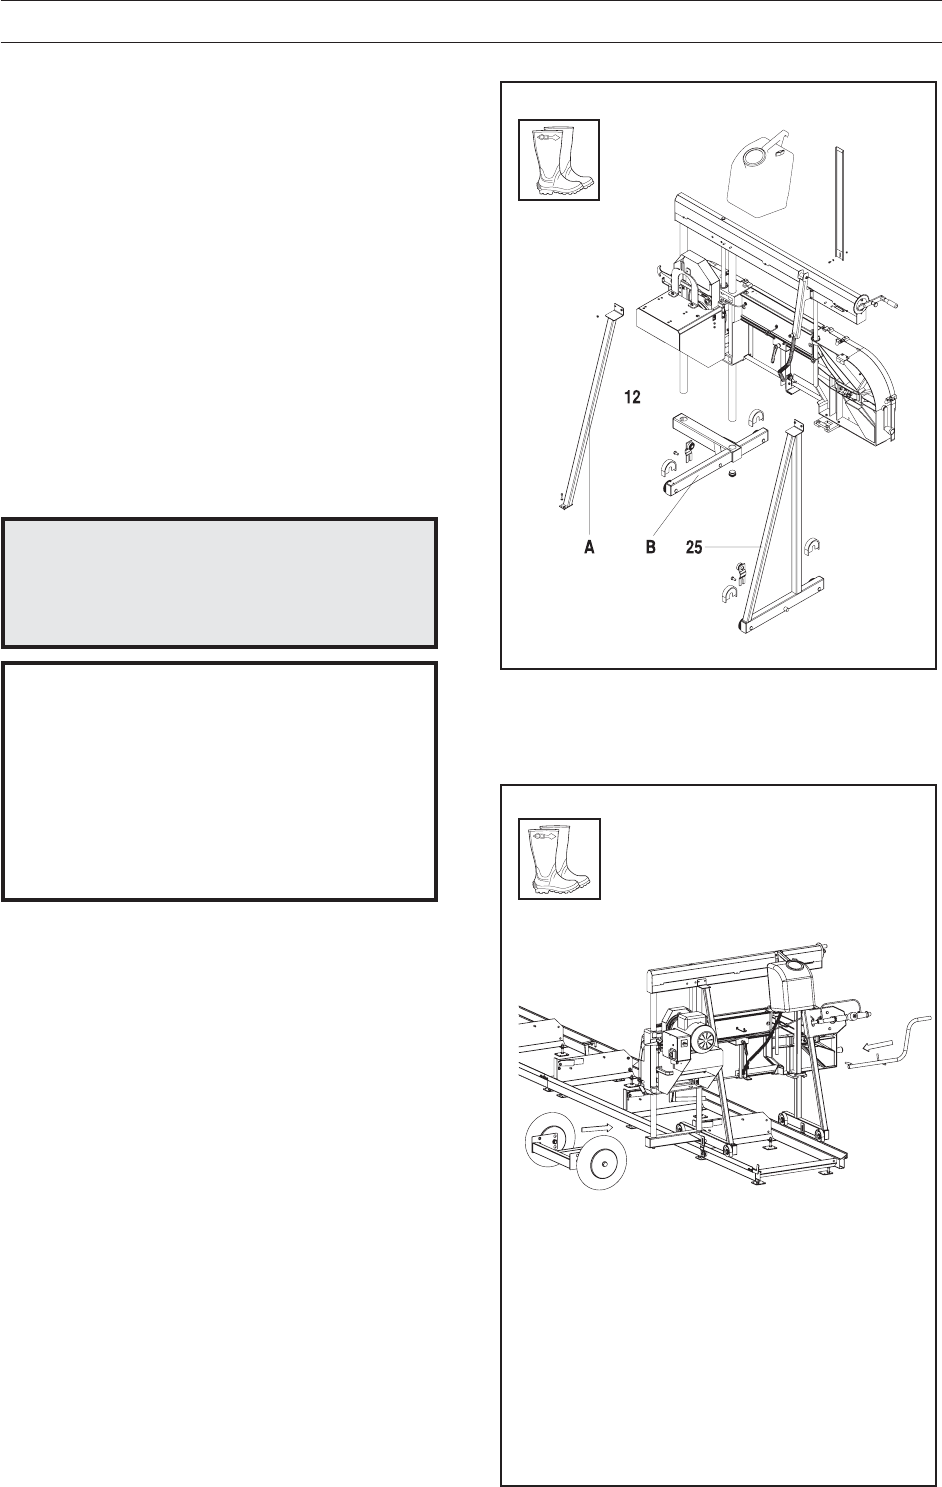
Saw Carriage
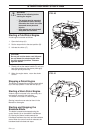
Assembling the Saw Carriage
The wheel fixture is assembled in the packaging,
where the sides are disassembled.
1. Crank the height adjustment crank (29) so
that the runner (12) reaches outside the
packaging.
2. Attach the wheel fixture (FIG 21B) to the
runner (12).
3. Attach the stabilising stay (FIG 21A)
4. Loosely attach the frame (25) to its fixture
and guide.