


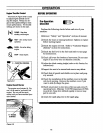
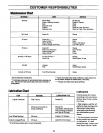
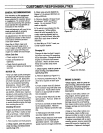

CUSTOMER RESPONSIBILITIES
GENERALRECOMMENDATIONS
The warranty on this equipment
does not cover items that have
been subjected to operator abuse
or negligence. To receive full val-
ue from the warranty, the operator
must maintain the equipment as
instructed in this manual.
Some adjustments will need to be
made periodically to properly
maintain your equipment.
All adjustments in the Service and
Adjustments section of this manu-
al should be checked.at least
once each season.
Keep the air filters clean and
change the spark plug once a
year. A clean air filter system and
a new spark plug will help your
engine run better and last longer.
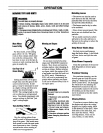
BeforeEachUse
• Check engine oil level.
• Check all hardware for
tightness.
• Check that all guards and
shields are in place and properly
secured.
MOTOROIL
• Only use high quality detergent
oil rated with API service classifi-
cation SF, SG or SH. Select the
oil's SAE viscosity grade accord-
ing to your expected bperating
temperature. Above 32OF, use
SAE 30; below 32OF, use 5W30.
NOTE: Although multi-viscosity
oils (5W30, 10W30 etc.) improve
starting in cold weather, these oils
will result in increased oil con-
sumption when used above 32OF.
Check engine oil more frequently
to avoid possible engine damage
from running low on oil.
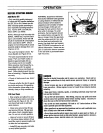
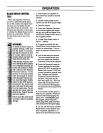
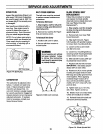
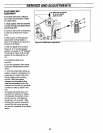
CheckingOil Level
Engine oil level must be between
"ADD" and "FULL" marks on dip-
stick at all times. Check before
each use and every 5 operating
hours.
1. Park machine on level ground.
2. Stop engine, wait for parts to
stop moving, and:disconnect
spark plug wire. ; _
3. Clean area around dipstick (Z,
Figure 5-1) to prevent dirt from en-
tering oil fill hole.
4. Remove dipstick. Oil level must
be between "ADD" and =FULL"
marks. Do not exceed "FULL"
mark on dipstick.
5. To add oil, pour slowly into dip-
stick opening. While adding,
check oil level frequently by se-
curely replacing dipstick and re-
moving to read oil level. Wipe dip-
stick clean each time oil level is
checked.
6. After tiltingto "FULL" ;'hark, se-
curely replace dipstick.
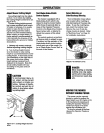
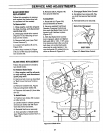
Changing0il
Change oil after the first 2 operat-
ing hours and every 25 operating
hours thereafter. Change oil while
engine is still warm from recent
operation. Warm oil flows more
freely and carries away more
impurities.
1. Stop engine, wait for parts to
stop moving, and disconnect
spark plug wire.
2. Remove dipstick (Z, Figure 5-1).
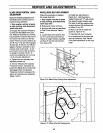
3. Remove protective cap (A, Fig-
ure 5-2) to expose oil drain port
(B).
4. Push oil drain hose (D) (includ-
ed in hardware bag with unit) onto
oil drain port. Route other end of
hose to an appropriate oil collec-
tion receptacle.
5. Twist oil drain fixture (C) to the
open position, Pull out. Drain oil
completely.
6. Push in and twist oil drain fixture
to the closed position. Remove
drain hose. Replace protective cap
(A).
7. Refill engine with fresh oil and
securely replace dipstick.
NOTE: Please dispose of all waste
materials in an ecologically re-
sponsible manner, Use proper
waste material storage containers.
24
Figure 5-1
Figure 5-2: Offdrain.
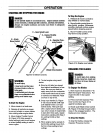
ENGINECLEANING
* Stop engine, wait forparts to
stop moving, disconnect spark
plug wire, and allow engine to
cool before inspecting or clean-
ing engine.
• Daily or more often, before run-
ning engine, remove grass and
chaff from recoil finger guard or
rotating screen to prevent engine
damage caused by overheating.
Also keep cooling vanes, governor
linkage, springs and controls free
of debris.
• Daily or more often, before run-
ning engine, clean muffler area
(be sure muffler is cool) to remove
all grass and combustible debris.
If engine is equipped with a spark
arrestor screen, remove assembly
every 50 hours for cleaning and
• inspection. Replace if damaged.