


8 Operation
32695 (Rev. 11/17/2006)
OPERATION
The designed and tested safety of this machine
depends on it being operated within the limitations as
explained in the manual. Be familiar with and follow all
safety rules in this manual, the tractor manual and
safety decals on the tractor and mower.
■ Do not exceed PTO speed of 1000 rpm maxi-
mum.
The safe operation of this machine is the responsibility
of the operator. The operator should be familiar with
the mower and tractor and all safety practices before
starting operation. Read and follow the safety rules on
page 5 through page 7.
The mower is designed for lawn or grass mowing. It is
not designed for rough conditions or heavy weed mow-
ing.
It is equipped with suction type blades for best results
in lawn mowing. Optional low suction blades are avail-
able for use in sandy conditions.
The warranty for this mower appears on the inside
back cover of this manual. Record the model and serial
numbers of your mower in the spaces provided above
the warranty. Provide this information to your dealer to
obtain correct repair parts.
Take all possible precautions when leaving tractor
unattended: disengage PTO, lower mower, shift into
neutral, set parking brake, stop engine and remove key
from ignition.
DAILY CHECK LIST
___ Check that mower is properly and securely
attached to tractor.
___ During inspection, check that all nuts and bolts
are secure and clevis pins are properly cotter
pinned.
___ Check condition of blades and security of attach-
ment.
CUTTING HEIGHT ADJUSTMENT WITH-
OUT CASTERS
Mower cutting height is raised, lowered and maintained
using tractor hydraulics and lift chains. Proper lift chain
adjustment is essential. The chains must be adjusted
so that tractor lift arms are in their highest position
before the lift or any part of mower is within 1/4" of con-
tacting tractor or mower lift stops. Improper lift chain
adjustment could result in damage to lift mechanism or
tractor.
Adjustment is accomplished by lowering lift arms and
inserting lift chains into keyhole lift lugs. Raise the
mower, checking to ensure it does not contact any part
of tractor. Take up links, one or two at a time, until the
desired height is obtained.
There is a long and short slot in the rear lift lugs. Level
mower by using these slots as needed.
After setting upper lift limit, lower mower to desired cut-
ting height. Set lower stop of mower hydraulic control
lever at this point. This will allow you to raise the mower
when necessary and return to the pre-set cutting
height.
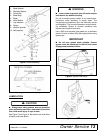
CUTTING HEIGHT ADJUSTMENT WITH
CASTERS
The caster arm has five holes for adjustment. Cutting
height is adjusted by changing the adjustment bracket
hole alignment with the caster arm.
There are two holes on the frame rail to mount the
caster arm. Use the rear hole for settings up to 3". Use
the front hole for settings above 3".
Whenever adjustments are made to the casters, care-
fully raise mower to ensure casters do not come in con-
tact with any part of tractor. Should any interference
occur, readjust lift chains.
Set lower stop of tractor hydraulic control lever to pre-
vent chains rubbing belt.
IMPORTANT
■ Be sure lift chains do not interfere with drive
belt.
■ Always raise mower off casters when backing
up and turning at the same time to prevent casters
from locking up on front tires.
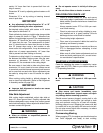
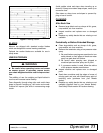
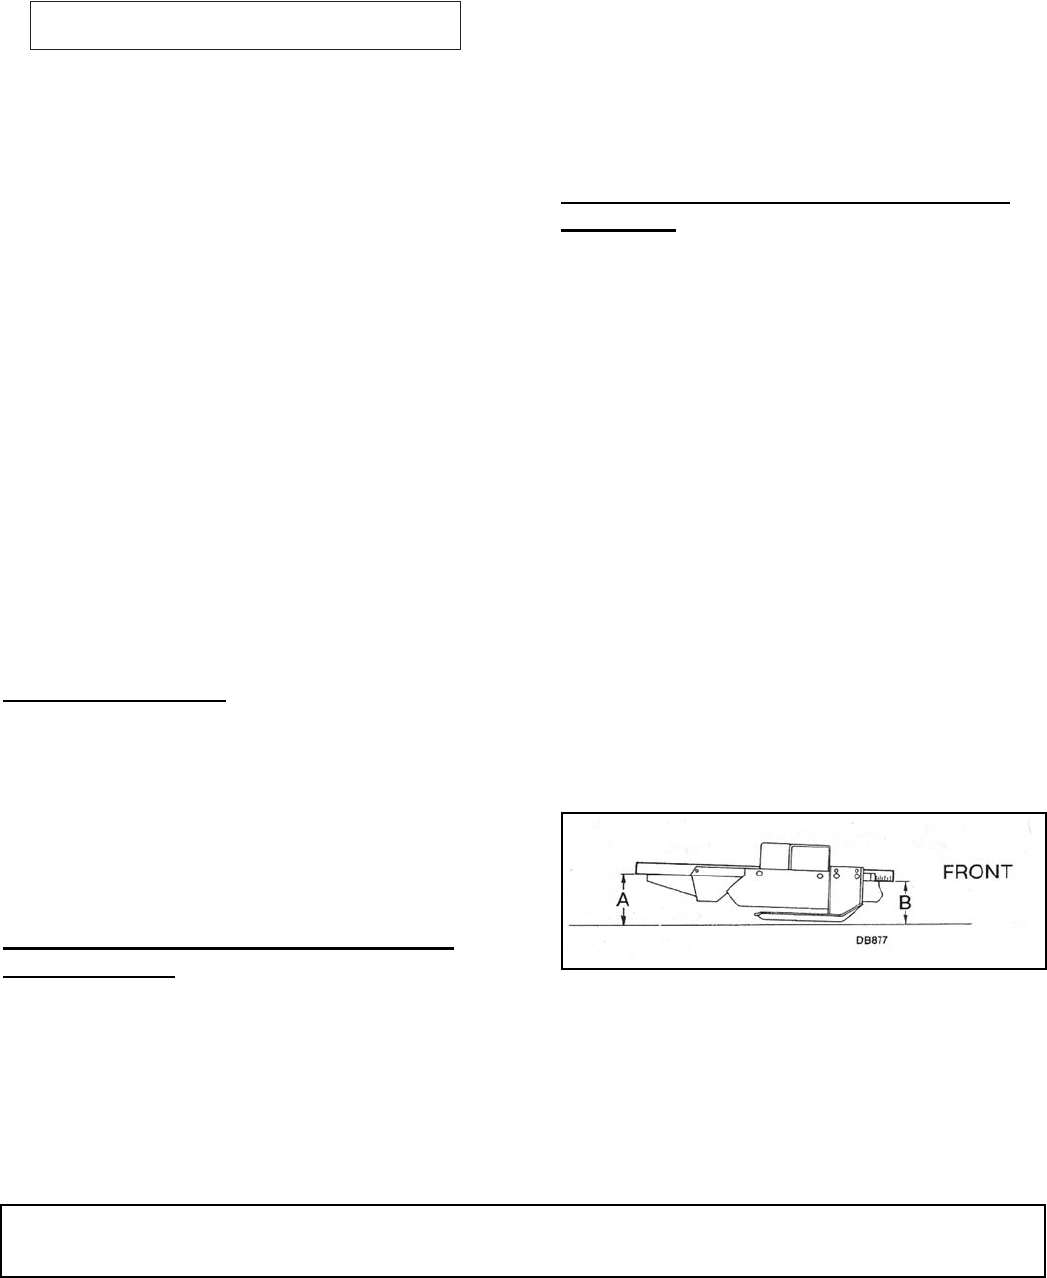
Attitude Adjustment
Figure 1. Attitude Adjustment
Place tractor and mower on a level surface to check
and adjust mower attitude. For best mowing results,
dimension “A” should not be more than 1/2" higher and
never lower than dimension “B” (except when using a
leaf mulcher or with some tractor tire configurations, it
may be necessary to adjust rear of mower approxi-
A WARNING