12 Owner Service
32695 (Rev. 11/17/2006)
OWNER SERVICE
■ Lower mower to ground, turn tractor engine off
and remove key before performing any mainte-
nance.
■ When completing a maintenance or service
function, make sure all safety shields are in good
condition and properly installed before placing
mower in service.
■ Always use personal protection devices such
as eye and ear protectors when performing mainte-
nance functions.
BELT INSTALLATION
See Belt Installation in Assembly section on page 19.
BLADE SERVICING
Blades may be removed from the mower while it is still
mounted on the tractor.
■ If you suspend mower on tractor hydraulic sys-
tem, be sure to install safety blocks. The tractor
hydraulic system could fail, causing mower to fall
and crush anything under it.
■ Do not handle mower blades with bare hands.
Careless or improper handling may result in seri-
ous injury.
Inspect blades before each use to determine that they
are mounted tightly and are in good condition. Replace
any blade that is bent, excessively nicked, worn or has
any other damage. Small nicks can be ground out
when sharpening.
BLADE REMOVAL
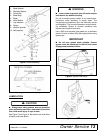
See Figure 3. Install blade wrench over spindle pulley
bolts to prevent spindle from rotating while removing
bolt (10) which has left hand threads. Then remove
special washer (9), sleeve (8), cup washers (7), shim
washer (6), blade (5), blade stop (4) and clutch disc (3).
Shoulder washer (2) will not normally come off
machine unless intentionally removed.
BLADE INSTALLATION
See Figure 3. Assemble shoulder washer (2) small end
up (if removed). Install remaining parts in reverse order
of disassembly. Ensure blade cutting edge is posi-
tioned to lead in counter-clockwise rotation, as viewed
from top of mower.
Shims should be added to blade installation to leave
approximately 1/32" cup in cup washers when blade
bolt is torqued to 170 lbs-ft.
Excessive blade slipping can cause the cup washers to
burn and lose their clamping force. If this happens, the
cup washers must be replaced.
This blade friction clutch disc allows the assembly to
slip when hitting a solid object. If slippage occurs dur-
ing normal mowing, it may be necessary to add an
additional shim washer (6).
■ Do not substitute any bolt for the special blade
bolt. It is self-locking, meeting the non-loosening
requirements for this application.
■ Your dealer can supply Woods replacement
blades. They are made of special steel alloys and
subjected to rigid heat-treated and inspections
requirements. Substitute blades may not meet
these rigid specifications and may be dangerous.
BLADE SHARPENING
IMPORTANT
■ When sharpening blades be sure to balance
them. Unbalanced blades will cause excessive
vibration which can damage blade spindle bear-
ings. Vibration may also cause structural cracks in
mowing housing.
See Figure 4. Follow original sharpening pattern as
shown in Figure 4. Do not sharpen blade to a razor
edge, but leave a 1/32" to 1/16" blunt edge. Do not
sharpen back side of blade.
A WARNING
A CAUTION
A WARNING
A WARNING


