


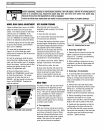

Before inspecting, cleaning or servicing the machine, shutoff engine, wait for all moving parts to
come to a complete stop, disconnect spark plug wire and move wire away from spark plug.
Remove the keyfrom the keyswitch on unitsso equipped.
Failure to follow these instructionscan result in serious personal injury or property damage.
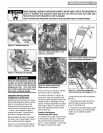
pull down on the belt and roll it onto the
large,forward-most groove of the trans-
mission pulley(P, Figure 5-20).
7. Reinstallthe belt cover.
8. Testfor correct tension on the forward
clutch belt (see CheckingForward Belt
Tension).
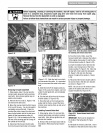
REVERSE CLUTCH BELT REMOVAL
AND REPLACEMENT
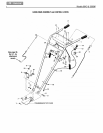
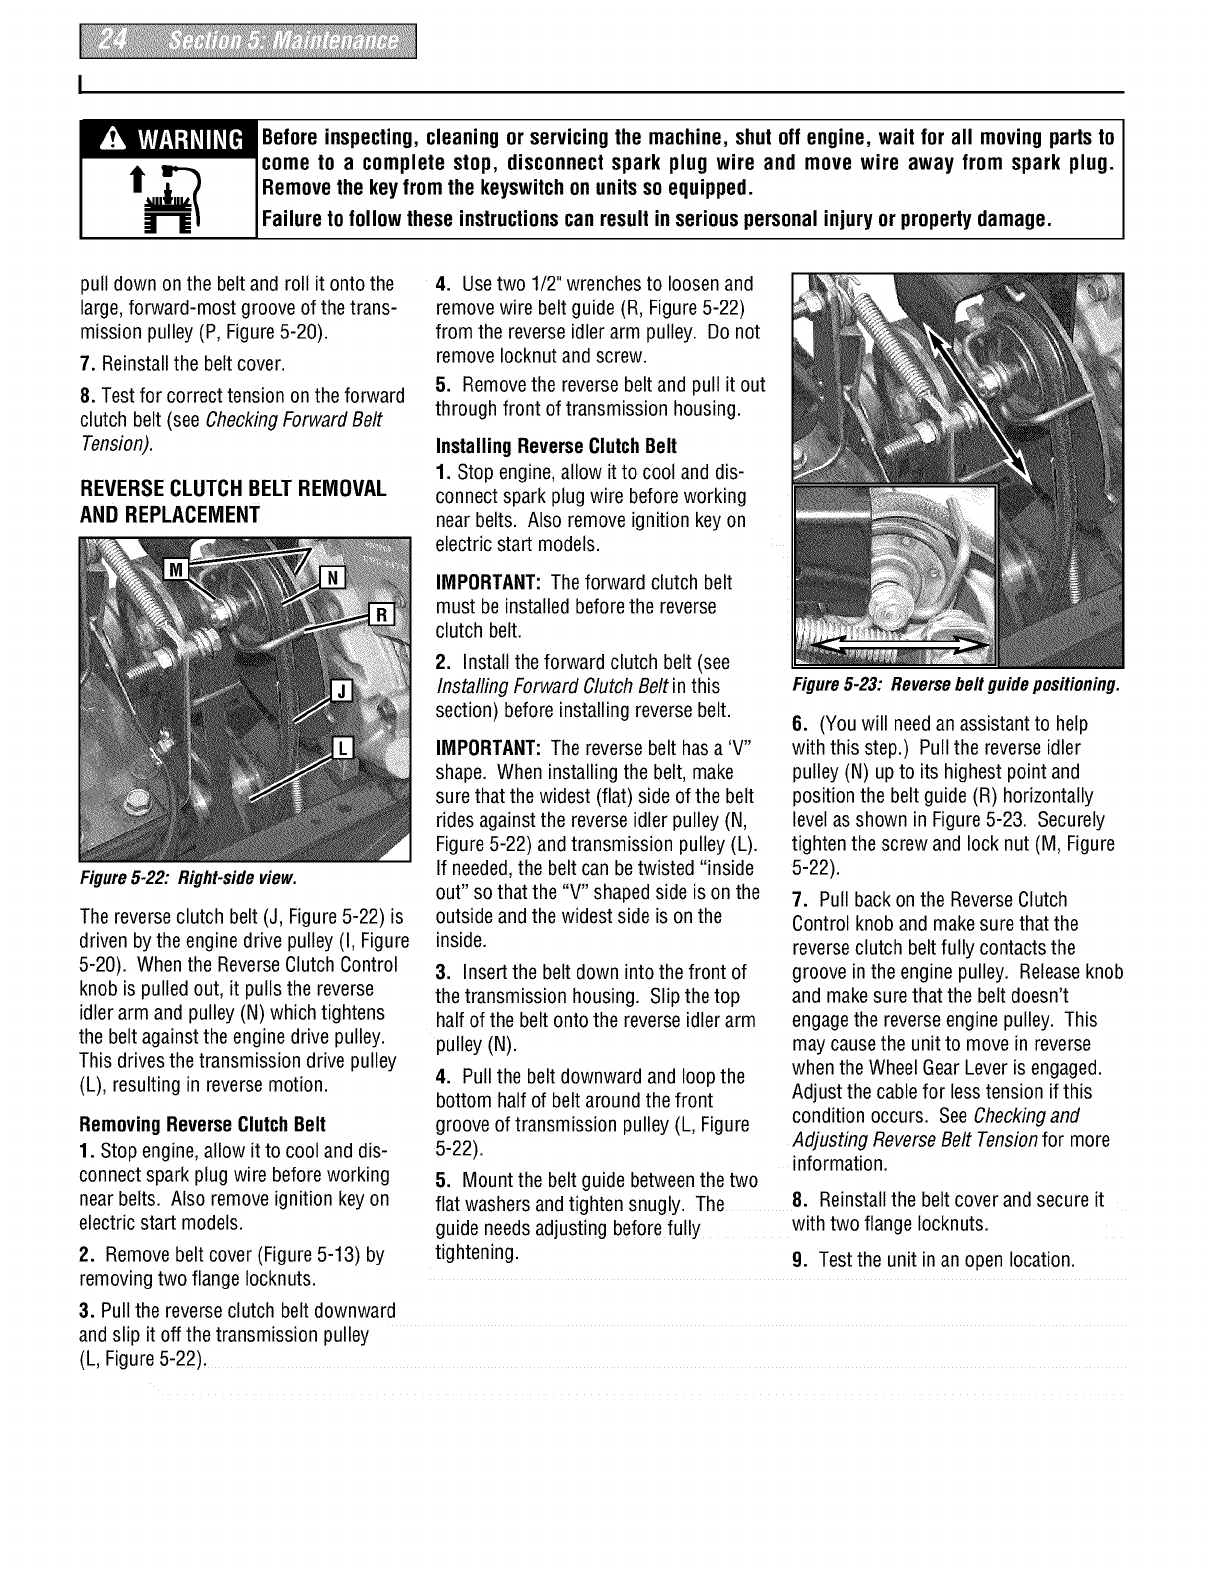
Figure5-22: Right-side view.
4. Usetwo 1/2"wrenches to loosenand
remove wire belt guide (R, Figure5-22)
from the reverse idler arm pulley. Do not
remove Iocknut and screw.
5. Removethe reversebelt and pull it out
through front of transmission housing.
InstallingReverseClutchBelt
1. Stopengine, allow it to cool and dis-
connectspark plug wire beforeworking
near belts. Also remove ignition keyon
electricstart models.
IMPORTANT:Theforward clutch belt
must be installed beforethe reverse
clutch belt.
The reverseclutch belt (J, Figure5-22) is
driven by the enginedrive pulley (I, Figure
5-20). Whenthe ReverseClutchControl
knobis pulled out, it pulls the reverse
idler arm and pulley (N) which tightens
the belt againstthe engine drive pulley.
This drivesthe transmission drive pulley
(L), resulting in reversemotion.
RemovingReverseClutchBelt
1. Stop engine,allow it to cool and dis-
connect spark plug wire beforeworking
nearbelts. Also remove ignition key on
electric start models.
2. Remove beltcover (Figure5-13) by
removingtwo flange Iocknuts.
3. Pull the reverseclutch belt downward
2. Install the forward clutch belt (see
Installing Forward Clutch Beltin this
section) before installing reversebelt.
IMPORTANT:The reversebelt has a 'V"
shape. When installing the belt, make
surethat the widest (flat) side of the belt
rides againstthe reverseidler pulley (N,
Figure5-22) andtransmission pulley (L).
If needed,the belt can be twisted "inside
out" sothat the "V" shaped side ison the
outside and the widest side is on the
inside.
3. Insert the belt down into the front of
the transmission housing. Slipthe top
half of the belt ontothe reverseidler arm
pulley (N).
4. Pull the belt downward and loopthe
bottom half of belt around thefront
grooveof transmission pulley(L, Figure
5-22).
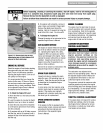
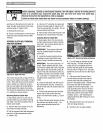
5. Mount the belt guide betweenthe two
Figure5-23: Reversebelt guidepositioning.
6. (You will needan assistantto help
with this step.) Pull the reverse idler
pulley (N) up to its highest point and
position the belt guide (R) horizontally
levelas shown in Figure5-23. Securely
tighten the screwand lock nut (M, Figure
5-22).
7. Pull backon the ReverseClutch
Control knob and makesure that the
reverseclutch belt fully contactsthe
groove in the engine pulley. Releaseknob
and makesure that the belt doesn't
engagethe reverseengine pulley. This
may causethe unit to move in reverse
when theWheel GearLeveris engaged.
Adjust the cablefor less tension if this
condition occurs. SeeCheckingand
Adjusting ReverseBelt Tensionfor more
information.
flat washers andtighten snugly. The 8. Reinstallthe beltcover andsecure it
guide needsadjusting beforefully with two flange Iocknuts.
tightening. 9. Testthe unit in an open location.
and slip it off the transmission pulley
(L, Figure5-22),