- 14 -
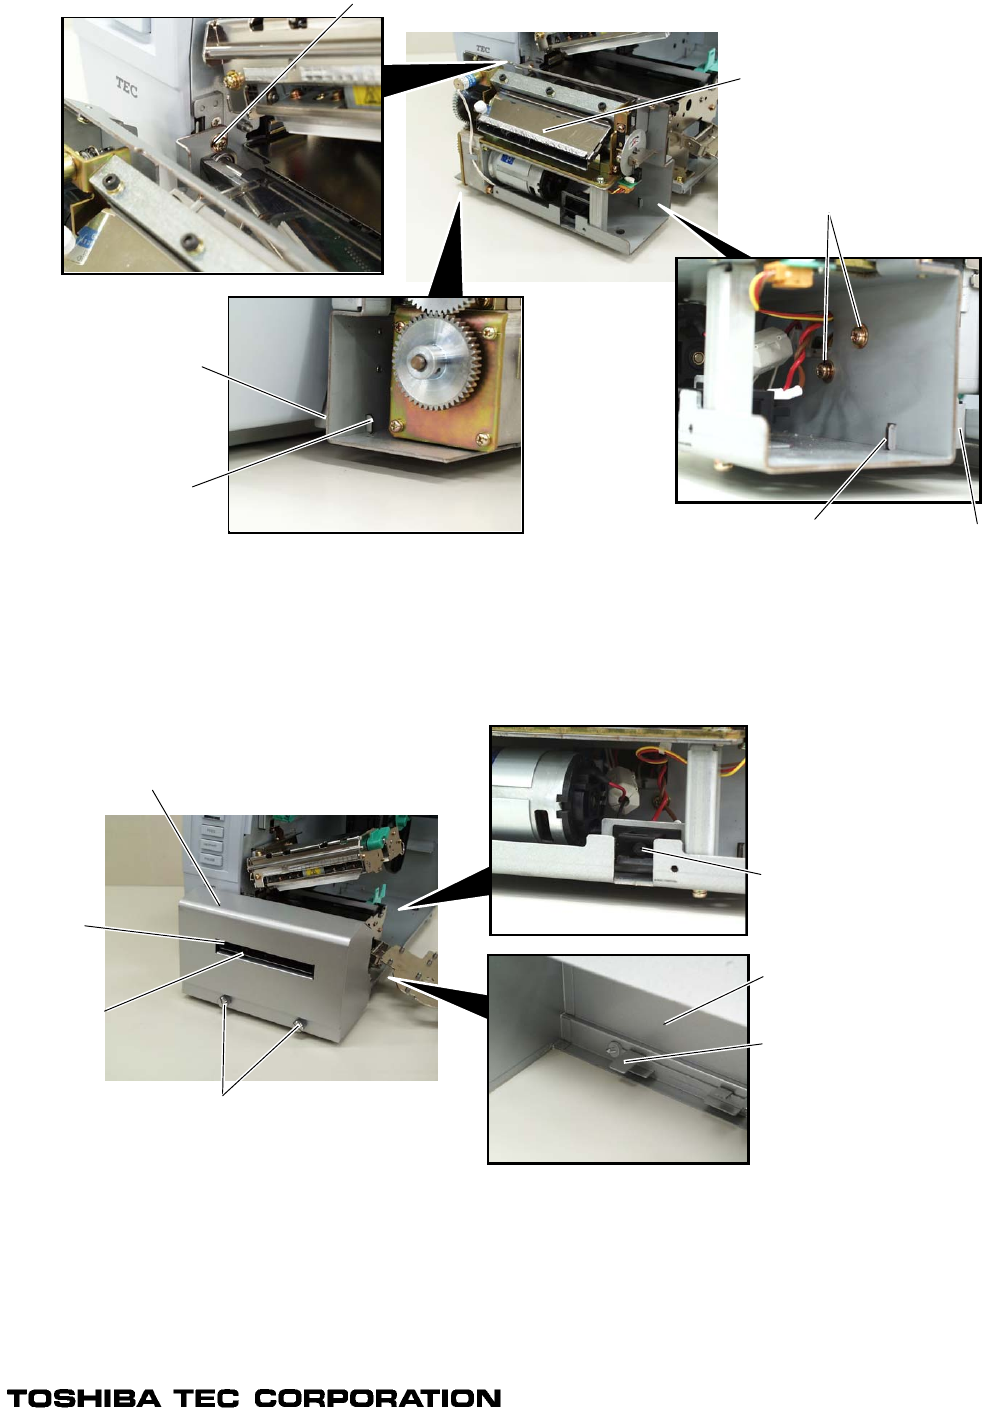
27) Fit the two tabs of the cutter drive unit into the notches, and then fix the cutter unit with the three
SM-4x8 screws.
28) Attach the cutter cover to the cutter unit with the two screws so that the tab of the cutter cover turns
on the cutter cover open switch.
NOTES: 1. Be careful not to pinch the cutter harness by the cutter cover.
2. Make sure that the anti-static brush is protruding from the media outlet.
29) Close the print head block and ribbon shaft holder plate.
NOTE: DO NOT excessively push down the print head block to close it. Doing so may cause a
failure of the print head block or damage to the print head.
30) Reassemble the side panel (L) and close the top cover. Finally check the cutter operation.
Cutter Unit
Screw
Cutter Cover
Anti-static
Brush
Media Outlet
SM-4 x 8 Screw
Notch
Tab
Notch
Tab
SM-4 x 8 Screw
Cutter Cover Open Switch
Tab
Cutter Cover


