


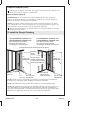


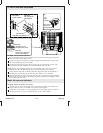
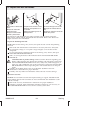


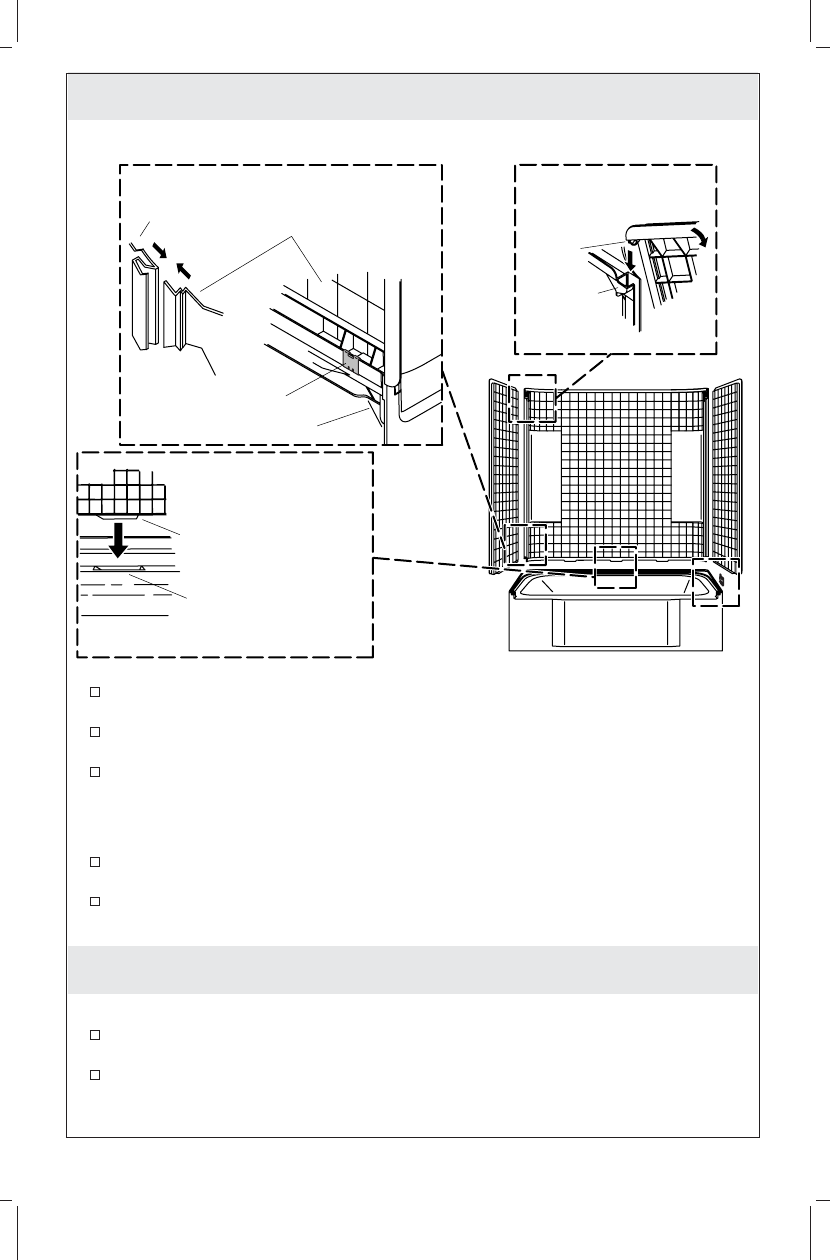
5. Pre-Fit the Wall Surrounds
NOTICE: Install the back wall first.
Ensure the bath surface is free of debris. This will minimize the gaps between the
wall surrounds and the bath surface.
Position the back wall with the wall tabs engaged in the bath slots, and the clips
are locked behind the back wall. (1)(2)
Position the end wall top pins into the back wall pivot joint and pivot the wall
into position until the retention clips lock behind the end wall. (3)
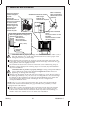
NOTE: If holes for plumbing fixtures need to be drilled, remove the clips prior to
assembling the end wall. Reattach the clips for final assembly of the wall set.
Verify that the end walls are flush against the edge of the bath. If adjustment is
needed, push or pull the bath to allow the end walls to rest on the bath.
Push the bath into position and verify that all walls are properly aligned with the
studs at the top and vertical wall flanges. If needed, add shims to bring the studs
into contact with the walls.
Munir les murs avoisinants
NOTICE: Installer d’abord le mur arrière.
S’assurer que la surface de la baignoire est libre de tout débris. Ceci limitera les
espaces entre les murs avoisinants et la surface de la baignoire.
Positionner le mur arrière avec les languettes du mur engagées dans les rainures
de la baignoire, et les clips verrouillés derrière le mur arrière. (1)(2)
(2)
(3)
Wall Tab
Languette du mur
Lengüeta de la pared
Bath Slot
Rainure de la baignoire
Ranura de la bañera
(1)
Pivot Joint
Joint pivot
Junta pivotante
Pin
Tige
Clavija
Back Wall
Mur arrière
Pared posterior
End Wall
Mur d'extrémité
Pared lateral
Bath/Baignoire/Bañera
Clip/Clip/Clip
1065823-2-C 22 Sterling