


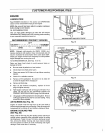

CUSTOMER RESPONSIBILITIES
ENGINE
LUBRICATION
Read ENGINE instructions in this section and OPERATION
section of this manual before trying to start engine
NOTE: Be sure oil has been added to engine crankcase
before trying to start engine.
OIL RECOMMENDATIONS
Onty use high quality detergent oil rated with APf service
classification SG Select the oil's SAE viscosity g fade according
to your expected operating temperature:
RECOMMENDED VISCOSITY GRADES
32°F
COLDER_€ I --_WARMER
5W30 SAE30
NOTE: Although multi-viscosity oils (5W30, 10W30, etc..)
improve starting in cold weather, these multi-viscosity oils will
result in increased oil consumption when used above 32°F.
Check your engine oi] level more frequently to avoid possible
engine damage from running low onoil
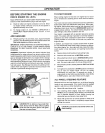
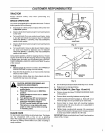
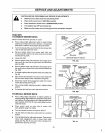
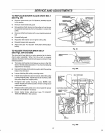
TO CHANGE ENGINE OIL (See Figs. 18 & 19)
Raise and lower hood slowly to avoid personal injury or
damage to tractor.
e Be sure tractoris parked on a level surface
e Oitwill drain more freely when warm.
e Clean area around oil fill drain and cap before removing
dipstick.
e Catch oil in a suitable container
e Remove oil fitt cap/dipstick Be careful not to allow dirt
to enter the engine when changing oil
• Remove oii drain plug.
• After oil has drained completely, replace oil drain
plug and tighten securely.
• Refill engine crankcase with oil through oil fill tube Pour
slowly° Do not over fill For approximate capacity see
PRODUCT SPECIFICATIONS on page 3 of this manual.
• Use gauge on oi!fillcap/dipstickfor checking level.. Besure
oil fill cap istightened securely for accurate reading. Keep
oil at FULL lineon dipstick
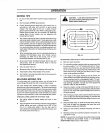
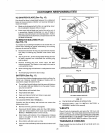
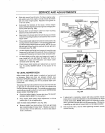
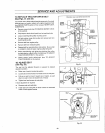
AIR SCREEN (See Fig. '19)
Engine air screen must be kept free of dirt and chaff to
preventengine damage from overheating. Clean airscreen with
compressed air to remove dirt and stubborn dried gum fibers
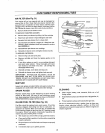
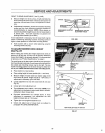
ENGINE COOLING FINS
(See Fig. 20)
Grass, chaff or dirt may clog the rotating screen and the air
cooling system, especially after prolonged service in cutting
tall dry grasses Yearly or every 100 hours, whichever occurs
first, remove the blower housing and clean internal cooling
lins and surfaces as shown to avoid overheating and engine
damage. Clean more often if necessary
2I
VIEW FROM RIGHT-HAND SIDE OF ENGINE
Fig, 18
I
OIL FILL CAP/
AIR SCREEN DIPSTICK
Fig. 19
CLEAN AREA OF
ALL DIRT AND DEBRIS
Flg. 20
i