


140 Chapter 8 Analyzing Digital Sources and Cables
}
void CLFSR::Dump10K()
{
int i;
FILE* f;
char s[100];
f=fopen(“c:\\temp\\noise.txt”,”w”);
Reset();
for (i=0;i<10000;i++)
{
sprintf(s,”%.6lx”,GetPixel());
fprintf(f,”%s\r\n”,s);
}
// AfxMessageBox(“See c:\\temp\\noise.txt”);
fclose(f);
Sending pseudo-random noise to external device
The analyzer can be the source for a pseudo-random noise test pattern. HDMI/DVI
displays can use this test pattern for testing and analysis purposes.
To generate a pseudo-random noise test pattern:
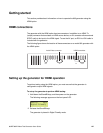
1. Connect the HDMI/DVI receiver device to the HDMI/DVI Tx connector on the generator.
2. If necessary, set the proper pseudo-random noise parameters within the generator.
•See “Starting the Analyzer Setup Utility” on page 112 for steps on viewing the
current analyzer configuration.
• To edit pseudo-random noise parameters, see “Setting pseudo-random noise
parameters” on page 142.
3. Place the generator in HDMI/DVI analyzer mode.
•See “Starting the analyzer” on page 113 for steps on launching analyzer mode.
4. Press and release the Step key to generate pseudo-random noise to be transmitted.
The key illuminates and pseudo-random noise is transmitted from the HDMI/DVI Tx
connector. The following message appears on the LCD:
5. To stop pseudo-random noise generation, press and release the Step key.
The light on the key extinguishes and pseudo-random noise is no longer transmitted.
Generating Psudo
Random Noise