


20
Sanding and Finishing
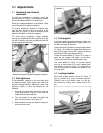
Leaving clean cuts will reduce the amount of
sanding required. Move the tool support out of the
way, adjust the lathe to a low speed, and begin
with fine sandpaper (120 grit or finer). Coarser
sandpaper will leave deep scratches that are
difficult to remove, and dull crisp details on the
spindle. Progress through each grit without
skipping grits (for example, do not jump from 120
grit to 220 grit). Fold the sandpaper into a pad; do
not wrap sandpaper around your fingers or the
workpiece.To apply a finish, the workpiece can be
left on the lathe.
Turn off the lathe and use a brush or paper towel to
apply the finish. Remove excess finish before
restarting lathe. Allow to dry and sand again with
320 or 400 grit sandpaper. Apply second coat of
finish and buff.
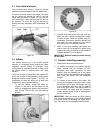
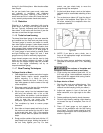
11.4 Face plate and bowl turning
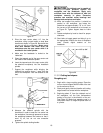
Face plate turning is normally done on the inboard
side of the headstock over the bed. Larger
workpieces must be turned on the outboard side
(remove tailstock and tool support base, and move
headstock to opposite end of bed - see Figure 9).
11.4.1 Mounting stock
Use of a face plate is the most common method for
holding a block of wood for turning bowls and
plates:
1. Select stock at least 1/8" to 1/4" larger than
each dimension on the finished workpiece.
2. Always select the largest diameter face plate
that can be used for the workpiece to be
turned.
3. True one surface of the workpiece for
mounting against the face plate.
4. Using the face plate as a template, mark the
location of the mounting holes on the
workpiece, and drill pilot holes of the
appropriate size. Face plates are drilled for No.
12 screws. (Phillips and square drive screws
will hold up better than slotted screws. Sheel
metal screws are case hardened with deeper
and sharper threads than wood screws.)
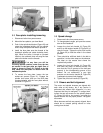
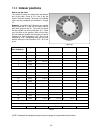
If the mounting screws on the face plate interfere
with the workpiece, a glue or waste block can be
used:
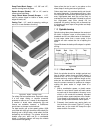
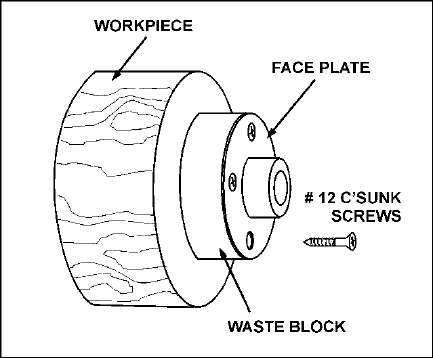
5. Make a block the same diameter as the face
plate, Figure 33. Both waste block and
workpiece should have flat surfaces for gluing.
6. Glue the block to the workpiece. Avoid using
brown paper or newspaper between the waste
block and workpiece. It may work fine if you
are using scrapers, but a slight catch with a
bowl gouge can separate the two.
NOTE: When using a waste block, be careful with
the adhesive you select. Dry workpieces can be
bonded with ordinary white or yellow glue but must
be clamped to ensure a good bond. Green
workpieces require cyanoacrylate type glue.
Figure 33
11.4.2 Faceplate or chuck?
While faceplates are the simplest, most reliable
method of holding a block of wood for turning,
chucks can also be used. As there are dozens of
chucks to choose from, the woodturner should first
consider all the different types of turning that will be
done, and read reports or discuss with other
turners who own chucks before making a decision.
A chuck is not a requirement, but is handy when
working on more than one piece at a time. Rather
than removing screws, you simply open the chuck
and change workpieces.
The most popular ones are four jaw scroll chucks
with a variety of jaws to accommodate different
size tenons. Most also come with a screw chuck as
well.
11.4.3 Wood selection
Firewood is the cheapest, most widely available
stock to use while learning to turn bowls. Simply
waste wood for a while practicing turning
techniques. Develop skill with each tool before
attempting to make a finished piece. It is best to
start with dry wood, without worrying about drying
or distortion. Once turning becomes comfortable,
try green wood which cuts very easily. As the
turner gains experience, he or she will find
extraordinary grain and figure in the form of burls,
crotches and bark inclusions.
11.4.4 Checks and cracks
Green wood will check and crack. For best results,
leave logs in as long a length as you can handle.
As the material starts to dry, surface cracks will
develop on the ends of the log. Cut off two to three
inches and you should find good, sound wood.
Also cut the log in half along the pith to avoid