


19
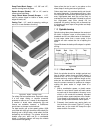
Figure 30
4. Keep as much of the bevel of the tool as
possible in contact with the workpiece to
ensure control and avoid catches. NOTE:
Always cut down-hill, or from large diameter to
small diameter. Always work toward the end of
a work-piece, never start cutting at the end.
5. Once the workpiece is roughed down to a
cylinder, smooth it with a large skew. Keep the
skew handle perpendicular to the spindle and
use only the center third of the cutting edge for
a long smoothing cut (touching one of the
points of the skew to the spinning workpiece
may cause a catch and ruin the workpiece).
6. Add details to the workpiece with skew, parting
tool, scraper or spindle gouge.
Beads
1. Make a parting cut for what is to be a bead to
the desired depth. Place the parting tool on the
tool support and move tool forward to make
the full bevel of the tool come into contact with
the workpiece. Gently raise handle to make cut
to the appropriate depth.
2. Repeat for other side of the bead.
3. Using a small skew or spindle gouge, start in
the center between the two cuts and cut down
each side to form the bead. Roll the tool in
direction of cut.
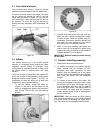
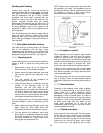
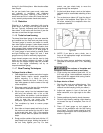
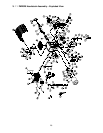
Coves
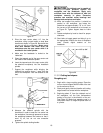
1. Use a spindle gouge. With the flute of the tool
at 90 degrees to the workpiece, touch the point
of the tool to the workpiece and roll in towards
the bottom of the cove. See Figure 31. Stop at
the bottom; attempting to go up the
opposite side may cause the tool to catch.
2. Move the tool over the desired width of the
cove.
3. With the flute facing the opposite direction,
repeat step 1 for other side of cove. Stop at
bottom of cut.
Figure 31
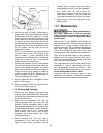
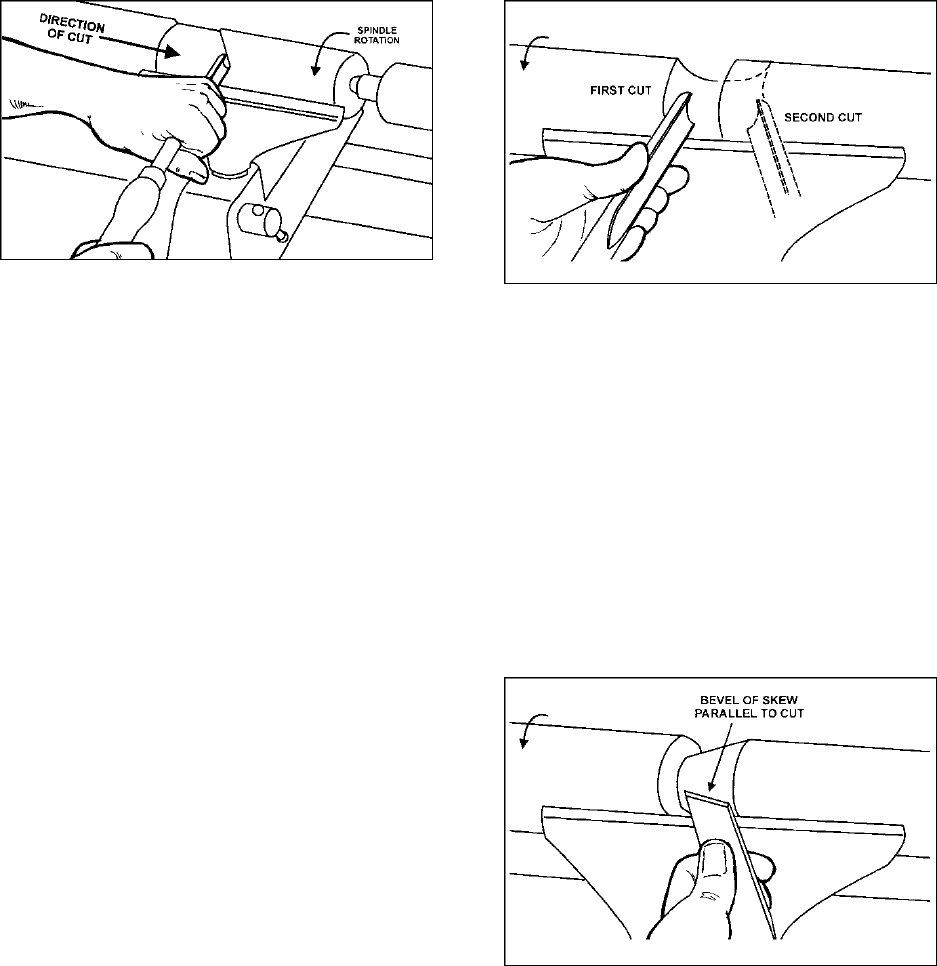
"V" Cuts
1. Use the long point of the skew. (NOTE: Do not
press the long point of the skew directly into
the workpiece to create the "V"; this will result
in a burned or burnished "V" with fibers being
rolled up at both sides.)
2. Lightly mark the center of the "V" with the tip of
the skew.
3. Move the point of the skew to the right half of
the desired width of your cut.
4. With the bevel parallel to the right side of the
cut, raise the handle and push the tool in to the
desired depth, as shown in Figure 32.
Figure 32
5. Repeat from the left side. The two cuts should
meet at the bottom and leave a clean "V" cut.
6. Additional cuts may be taken to add to either
the depth or width of the cut.
Parting Off
1. Use parting tool.
2. Adjust lathe speed to lower RPM for parting
through a workpiece.
3. Place tool on tool support and raise the handle
until it starts to cut and continue to cut toward
the center of the workpiece.
4. Loosely hold on to the piece in one hand as it
separates from the waste wood.