THE MINELAB EXPLORER II
77
ADVANCED USE
6
PHASE 1: Preparing for editing
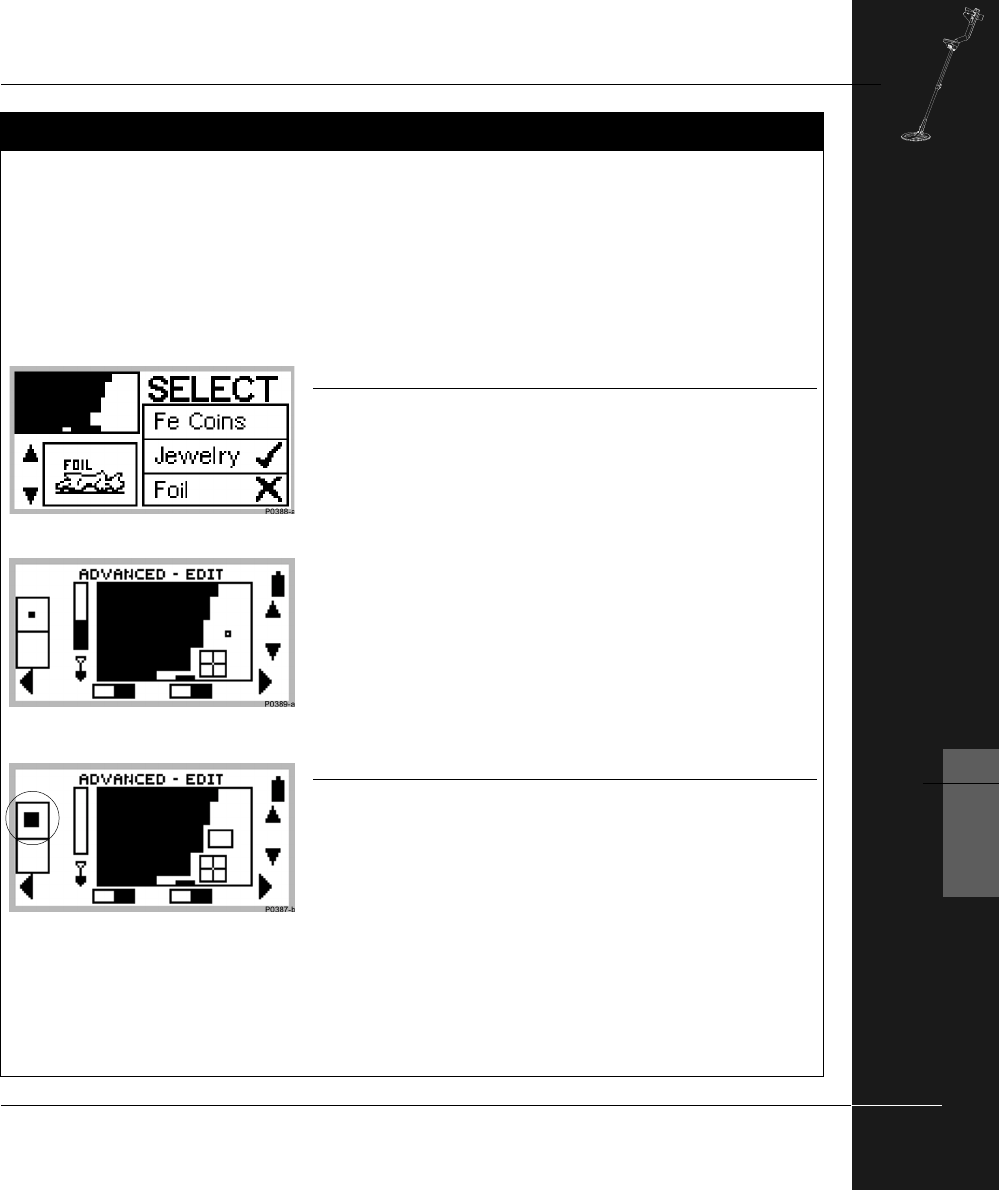
STEP 1 Choose SELECT from the Main Menu and press the top
right shift button to CLEAR the Smartfind thumbnail
display.
STEP 2 (Figure 6.8) Move down the target list and accept
JEWELRY and reject FOIL to establish an initial
discrimination pattern.
STEP 3 Press the Main Menu shortcut button and select DISPLAY.
STEP 4 (Figure 6.9) Select EDIT to show the ADVANCED-EDIT
screen. It is now possible to change the existing
discrimination pattern.
PHASE 2: Resizing and moving the target frame
STEP 5 (Figure 6.10) To change the size of the target frame, press
the top left shift button to switch between Edit’s three
target frame sizes. (For the purposes of this tutorial,
please choose the medium-sized frame).
STEP 6 To move the target frame, press the shift buttons next to
the display’s navigation arrows. Position the resized frame
over the screen section you wish to edit (in the location
approximated in Figure 6.10).
Continued next page...
tutorial
!
This tutorial builds upon what has been covered in earlier
target tutorials. The tutorial’s four phases outline the steps
necessary to edit and save a preselected discrimination
pattern.
Figure 6.9 Edit screen
Figure 6.8 Discrimination pattern for jewelry
(excluding foil)
EDITING AND SAVING TARGET PATTERNS
Figure 6.9 Edit screen with small target
frame
Figure 6.8 Select option
EDITING AND SAVING TARGET PATTERNS
Figure 6.10 Edit screen with target crosshair
and medium target frame
