


r
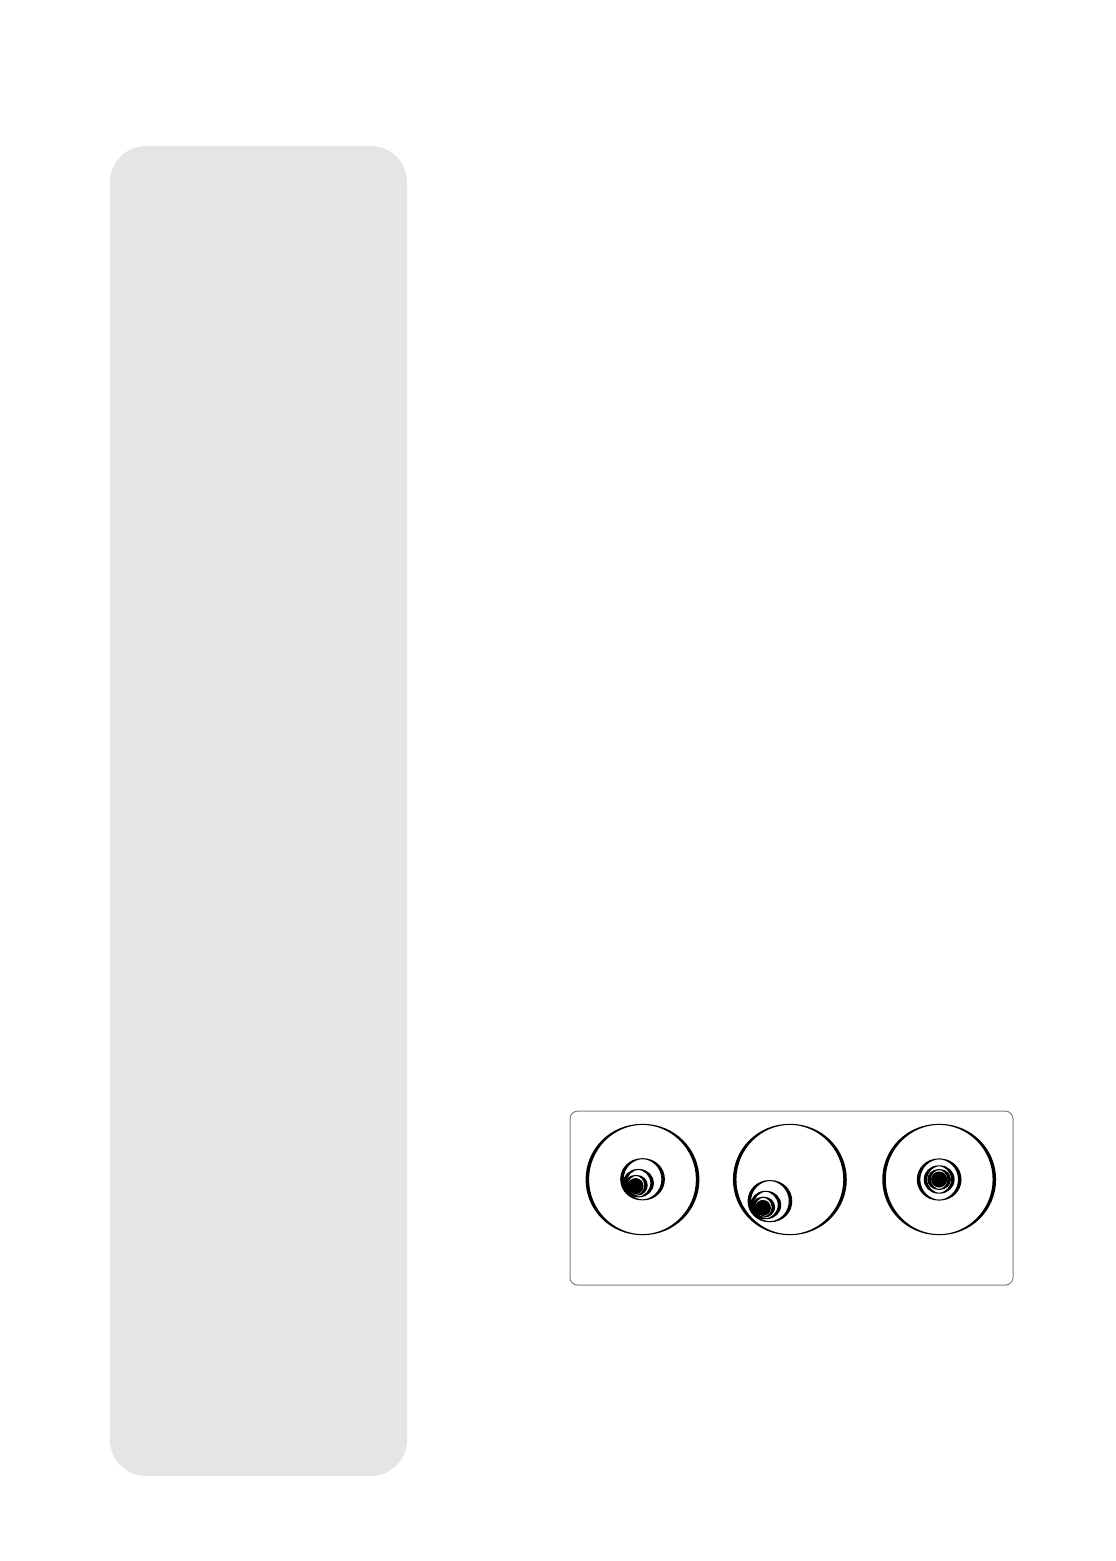
ings; these are called diffraction rings. Focus until the diffraction rings fills about 10%
of the eyepiece field-diameter. If the dark central spot is offset in (i.e., not concentric
with) the diffr
action rings, your telescope’s optical system is misaligned and requires
collimation.
Follo
w these steps for collimation of the optical system:
The only adjustments possible, or necessary, on the RCX400 models is performed
with the AutoStar handbox. No adjustment screws are necessary, as with traditional
telescopes
. A high-powered eyepiece, such as a 9mm eyepiece, or a 9mm eyepiece
with a 2x barlow, is required for collimation. A good rule of thumb to follow is to select
the highest power eyepiece you will use with your telescope, and double it (a 2x bar-
low is ideal for doubling). See
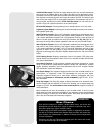
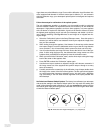
Fig. 48 below, to see images of an aligned and mis-
aligned image.
a. Select the “Collimation” option in the Setup/Telescope menu. Once this option is
selected, you will be able to use Autostar’s Arrow keys to adjust the image of the
star you have selected.
b. While looking through the eyepiece, Use Autostar II's Arrow keys at the slowest
slew speed, begin to move the defocused center ring so that the rings become
more concentric. You will most likely need to press more than one Arrow key.
c. You will notice that the star image will move across the field of view of the eye-
piece. If while using the Arrow key, the defocused star image moves out of the
eyepiece field, press MODE to temporarily leave the collimation menu.
d. When you have left the “Collimation” menu, use the Arrow keys to bring the image
back to the center of the eyepiece field.
e. Press ENTER to select the “Collimation” option again.
f. Use the Arrow keys to continue to adjust the image until it become concentric. If
the image moves out of the eyepiece field, perform steps c through e as many
times as necessary.
g. Carefully examine the concentricity of the diffraction rings. Always double check
the image in the center of the field of the eyepiece. The star point should appear
as a small central dot (commonly referred to as an “Airy disc”) with a diffraction
ring surrounding it. You now have the best alignment of the optics possible with
this telescope.
Set Default and Restore Default Options: The factory has collimated your telescope
and sa
v
ed the settings in the Restore Def
ault option.
You may retain this setting and
recall it if the telescope needs collimation. Or you may
overwrite this setting using the
Set Def
ault option after perf
or
ming precise collimation and recall it again when need
-
ed with the Restore Def
ault option.
52
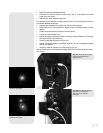
Fig. 48: Defocused star images. Misaligned (1, 2), Aligned (3).
1 2 3