


34
ܖ Calibrate Sensor
s:
This men
u allows you to improve your telescope's pointing
accuracy to alignment stars. It calibrates to correct slight mechanical misalign-
ment due to transport, vibration, or aging. It is recommended that calibration be
perf
ormed once on a new telescope after the user initially assembles it.
When this menu is selected, the telescope slews to Polaris. Autostar II then
prompts you to center Polaris and to press ENTER. Autostar II uses the position
of Polaris to fine tune the position of North and also detects level for the base of
the telescope.
ܖ Tracking Rate: Changes the speed at which the telescope tracks targets in the
sky.
a.
Sidereal: The default setting for Autostar II; sidereal rate is the standard rate
at which stars move from East to West across the sky due to the rotation of
the Earth.
b. Lunar: Choose this option to properly track the Moon over long observing
sessions.
c.
Custom: Allows entry of user-defined tracking rates.
Note: Custom Tracking Rate allows you to enter values from -999 (stands for
99.9%) to 999 (stand for +99.9%). The lower the number, the slower the rate; the
higher the number the faster the rate. If you enter -999, the telescope will move so
slow as to appear to be stopped. If you enter 999, the telescope will be moving at
approximately twice the tracking rate.
ܖ Guiding Rate: Allows you to change the base slew speed, 1x. Enter a percent-
age of the speed (less than 100%) and press ENTER. This function may be use-
ful in guiding the telescope during CCD and long-exposure photography. See
SLEW SPEEDS, page 21, for more information.
ܖ Reverse L/R: Reverses the functions of the Left and Right Arrow keys for con-
trolling the telescope's motion (i.e., the Right key moves the telescope to the left).
ܖ Reverse U/D: Reverses the functions of the Up and Down Arrow keys for con-
trolling the telescope's motion (
i.e., the Up key moves the telescope down).
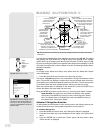
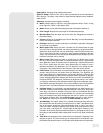
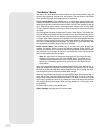
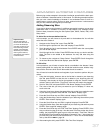
ܖ Home Sensors: Turns off or on the True North and True Level sensors, if pre-
ferred, for Easy, One-Star, and Two-Star alignment. User must then manually level
the telescope, set Dec. circle to 0°, point the optical tube to True North and point
the control panel on the base to South during alignment. The default setting for
this menu is "On." See
Figs. 32 and 33.
ܖ GPS Alignment: Allows three options. Select "Off" if you wish to align the tele-
scope manually (turns off GPS). Select "On" (default setting) if you wish to auto-
matically align your telescope and want the telescope to get the GPS fix when it
is needed during alignment. Select "At Start Up" if you want the telescope to get
a GPS fix when the telescope is powered up.
ܖ Dec. PEC: Allows you to perform periodic error correction on the Dec. drive worm
gear. Must be performed with a high-power reticle (eg., 9mm).
ܖ R.A.
PEC:
Allo
ws you to perform periodic error correction on the R.A. drive worm
gear. Must be performed with a high-power reticle (eg., 9mm).
ܖ High Precision: If High Precision is tur
ned on, when looking f
or a f
aint celestial
object (
e
.g.
, a neb
ula or galaxy), Autostar II first slews to a nearby bright star and
displays "ENTER to Sync." Center the star in the eyepiece, then press ENTER.
At that point the telescope has a high precision alignment to that part of the sky
and it then slews to the object that was originally requested.
Targets: Switches between Astronomical targets and Terrestrial targets. If
"Astronomical" is selected, the telescope tracking motor is activated and any object
you observe will remain centered in the eyepiece. If "Terrestrial" is selected, the track-
ing motor is tur
ned off
. See
T
O
TRACK AN OBJECT AUTOMATICALLY
, page 22.
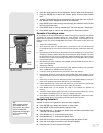
Site: Site pro
vides access to several options including:
ܖ Select: Displays the currently selected observing site. Use the Scroll keys to cycle
through all a
vailable sites (see
ADD belo
w). Press ENTER when the site you wish
Want to learn more about
adding and editing sites?
See page 37.
Tip:
If the "ENTER to Sync" fea-
ture is accessed by mistake
(holding the ENTER k
e
y f
or
more than 2 seconds),
press MODE to return to
the previous screen.
Do you want to learn how to
perf
or
m the
periodic err
or
correction procedure?
See
PERIODIC ERROR COR-
RECTION
, page 44.
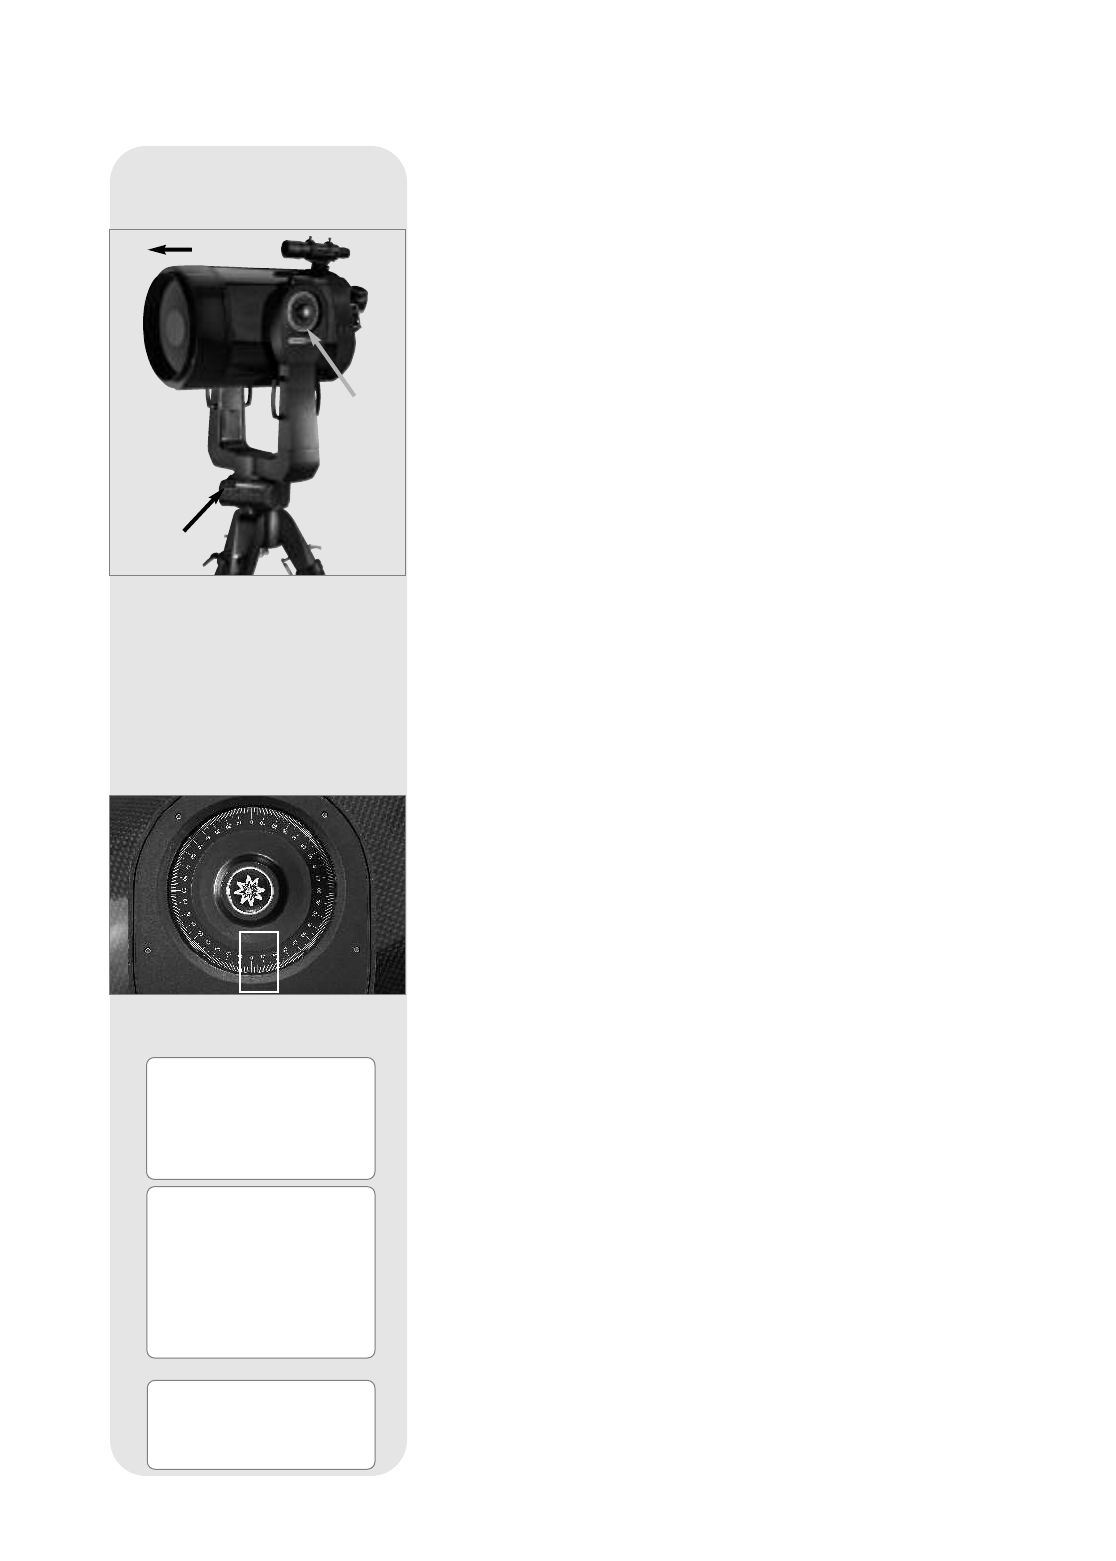
Fig. 32: Alt/Az Home Position. Note
that the Control Panel should face
South, which is not depicted in the
above photograph.
North
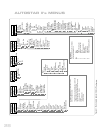
Fig. 33: Dec. Setting Circle at 0°.
Dec.
Setting
Circle
Level
Base