


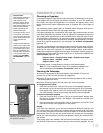

18
2. Insert eyepiece: Remove the UltraWide 24mm eyepiece from its container and
slide it in the diagonal mirror. Tighten the thumbscrew (
Fig. 20) located on the
diagonal mirror to a firm feel only.
3. Remove dust cover: Remove the dust cover (
18, Fig. 1a) from the optical tube
assembly by gently prying it off.
Mounting and Focusing the Viewfinder for the First Time
The first time you mount and focus the viewfinder, follow the these steps:
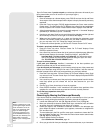
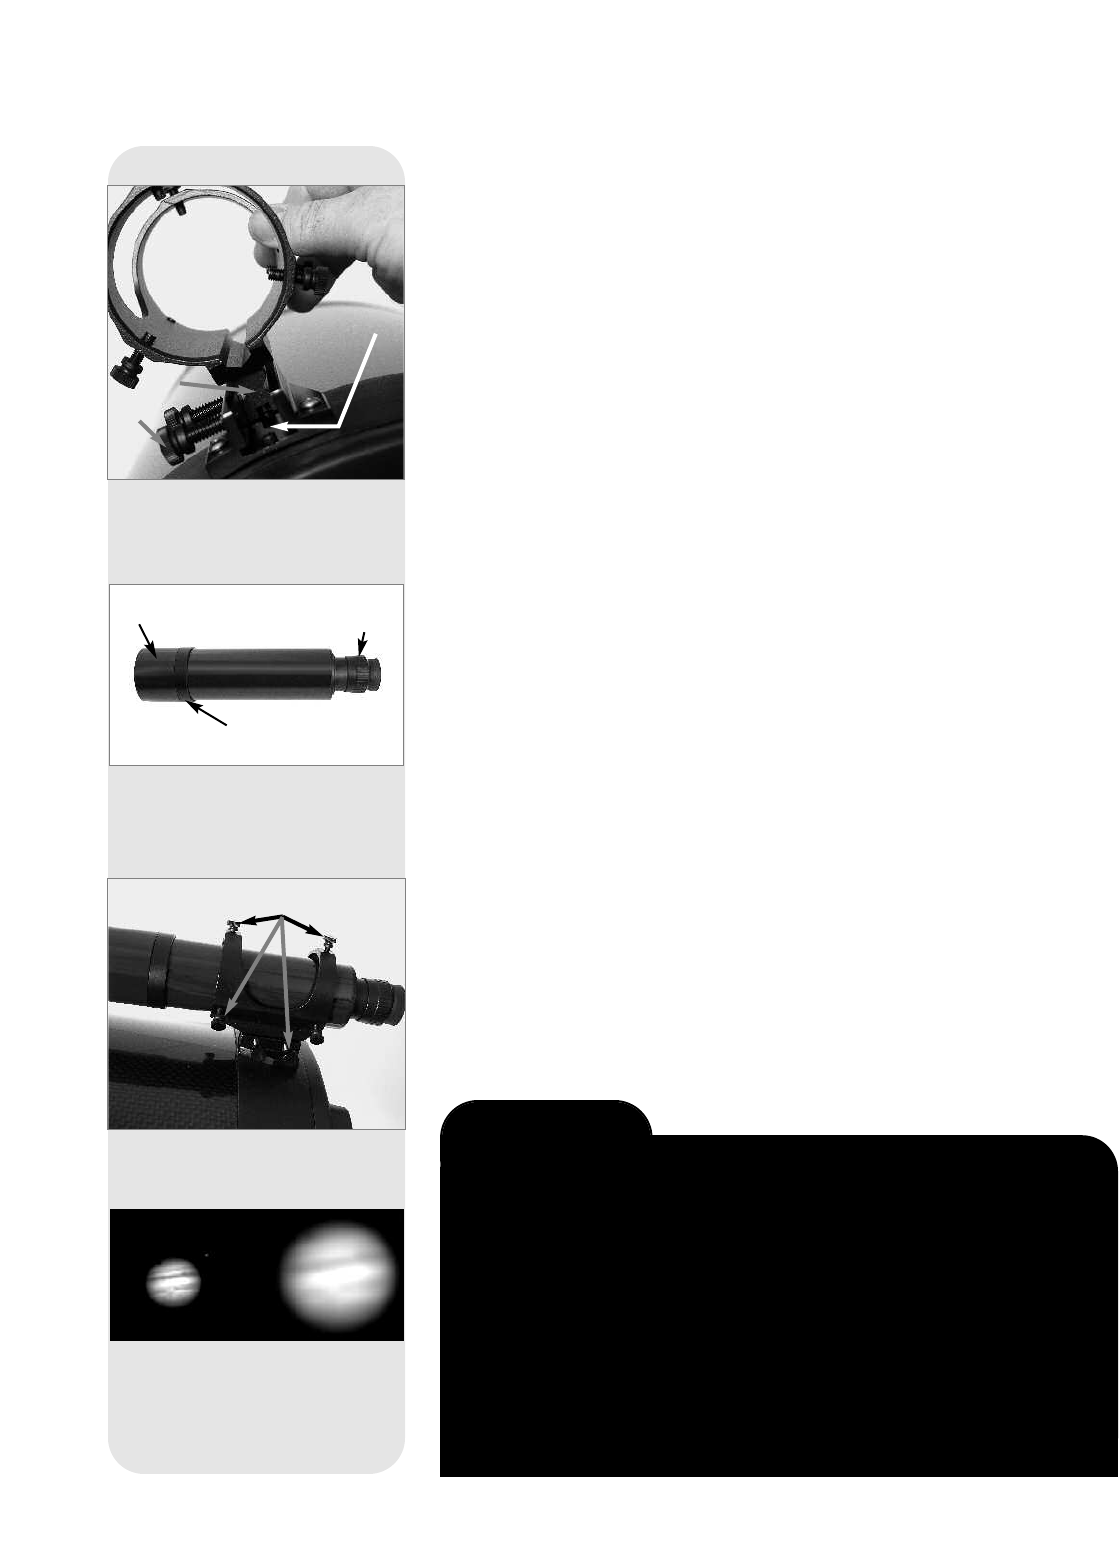
1. Slide the track on the bottom of the viewfinder bracket into the slot in the viewfind-
er mounting assembly. See
Fig. 21. To secure the viewfinder to the mounting
assembly, tighten the two thumbscrews to a firm feel only.
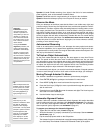
2.
Slide the viewfinder tube (see
Fig.
22
) into the vie
wfinder bracket. Loosely tight-
en the adjustment screws (see
Fig. 23). You will use the adjustment screws to
align the viewfinder (see the next section below).
2. Look through the viewfinder. Rotate the eyepiece/focuser until you sharply focus
the crosshairs.
3. Loosen (rotate clockwise) the objective lens locking ring.
4. Rotate the objective lens until you sharply focus on an object located at infinity.
5. Tighten the locking ring.
6. You may now rotate the eyepiece to focus on objects.
Aligning the Viewfinder
To align the viewfinder, perform steps 1 through 4 during the daytime; perform step 5
at night.
1. If you have not already done so, insert the UltraWide 24mm eyepiece into the
diagonal mirror.
2. Unlock the R.A. (
13, Fig. 1a) and Dec. (17, Fig. 1a) locks so that the telescope
moves freely on both axes.
3. Point the telescope at some well-defined and stationary land object at least 200
yards distant, such as the top of a telephone pole or street sign.Center the object
in the telescope eyepiece. Re-tighten the R.A. and Dec. locks.
4. Look through the viewfinder eyepiece and loosen or tighten, as appropriate, one
or more of the viewfinder adjustment screws (see
Fig. 23) until the viewfinder
crosshairs are precisely centered on the object you previously centered in the tel-
escope eyepiece.
5. Check this alignment on a celestial object, such as the Moon or a bright star, and
mak
e an
y necessar
y refinements
, using the method outlined in steps 2 through 4.
Note: Seeing conditions v
ar
y widely from night-to-night and site-to-site
.
T
urbulence in the air, even on an apparently clear night, can distort
images. If an image appears fuzzy and ill-defined, back off to a lower
po
w
er e
y
epiece f
or a more w
ell-resolved image (see
Fig.
24a and 24b
).
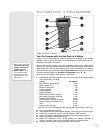
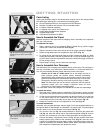
Fig. 21: Viewfinder bracket assembly:
Slide the track (23) into the mounting
slot (22). Tighten the thumbscrews
(24) to secure.
Fig.22: 8x50 Viewfinder tube:
Objective lens (25), eyepiece/focuser
(26) and locking ring (27).
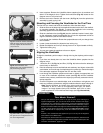
Fig. 23: Viewfinder adjustment screws
(28).
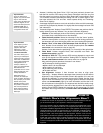
Fig. 24a & 24b: Jupiter; examples of
the right amount of magnification and
too much magnification.
T
oo Much Power?
Can you ever have too much power? If the type of power you’re referring to is
e
y
epiece magnification, y
es
, you can! The most common mistake of the begin-
ning obser
ver is to “overpower” a telescope by using high magnifications which
the telescope’
s aper
ture and atmospheric conditions cannot reasonably support.
Keep in mind that a smaller, but bright and well-resolved image is far superior to
one that is larger, but dim and poorly resolved (see
Figs. 24a and 24b). Powers
abo
v
e 400X should be employed only under the steadiest atmospheric condi-
tions.
A
utostar II can calculate the best e
y
epiece for you to use. Try out the “Eyepiece
Calc” feature in the Utilities menu.
Most obser
v
ers should ha
v
e three or f
our additional eyepieces to achieve the full
r
ange of reasonab
le magnifications possible with the
RCX400 telescopes
.
See
OPTIONAL ACCESSORIES, pages 48 - 50.
RCX400 TIPS
2@
2#
2$
2%
2^
2&
2*