


[4] DISASSEMBLY/ASSEMBLY
[4]-7. Ignition system
Repair
P 11/ 22
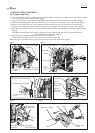
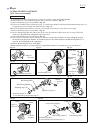
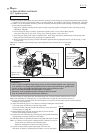
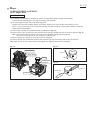
(1) Remove Plug cap from Spark plug, then check the continuity between Plug cap spring and the ground (earth) terminal
of Ignition coil with a circuit tester. If there is normal continuity, the resistance value will be 2.0kΩ±0.5kΩ. (Fig. 44)
(2) If there is no or intermittent continuity, check the continuity between Ignition cable and Plug cap spring by following
the procedure described below.
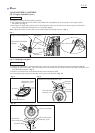
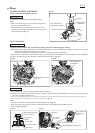
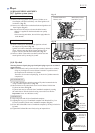
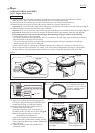
1. Apply spray lubricant in Plug cap, then pull out Plug cap spring together with Ignition cable from Plug cap using
small pliers. (Fig. 45)
2. Check if Plug cap spring is properly connected to Ignition cable. If not, connect them properly.
Also check Plug cap for any crack. If Plug cap is cracked, replace it with a new one.
3. Insert Plug cap spring in the center of Ignition cable. Then using small pliers, put them back into Plug cap while
taking care not to disconnect Plug cap spring from Ignition cable.
4. Make sure that Plug cap spring is firmly connected to Ignition cable by doing the same as you did in step (1) with
a circuit tester.
Note: Poor continuity between Plug spring cap and Ignition cable will result in no or weak spark.
Fig. 44
CHECKING PLUG CAP
CHECKING SPARK PLUG
Plug cap spring
Small pliers
Ignition coil
Fig. 45
Plug cap
Circuit tester
Primary wire of
Ignition coil
Plug cap spring
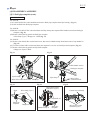
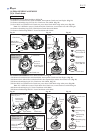
(1) Remove Plug cap from Spark plug, then Spark plug from Cylinder with the supplied socket wrench.
Note: If the electrodes of Spark plug are wet, wipe them with a rag then dry them with an air blower.
(2) Using a wire brush, carefully clean up carbon deposits (if any) from the electrodes and the ceramic insulator
around the center electrode.
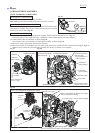
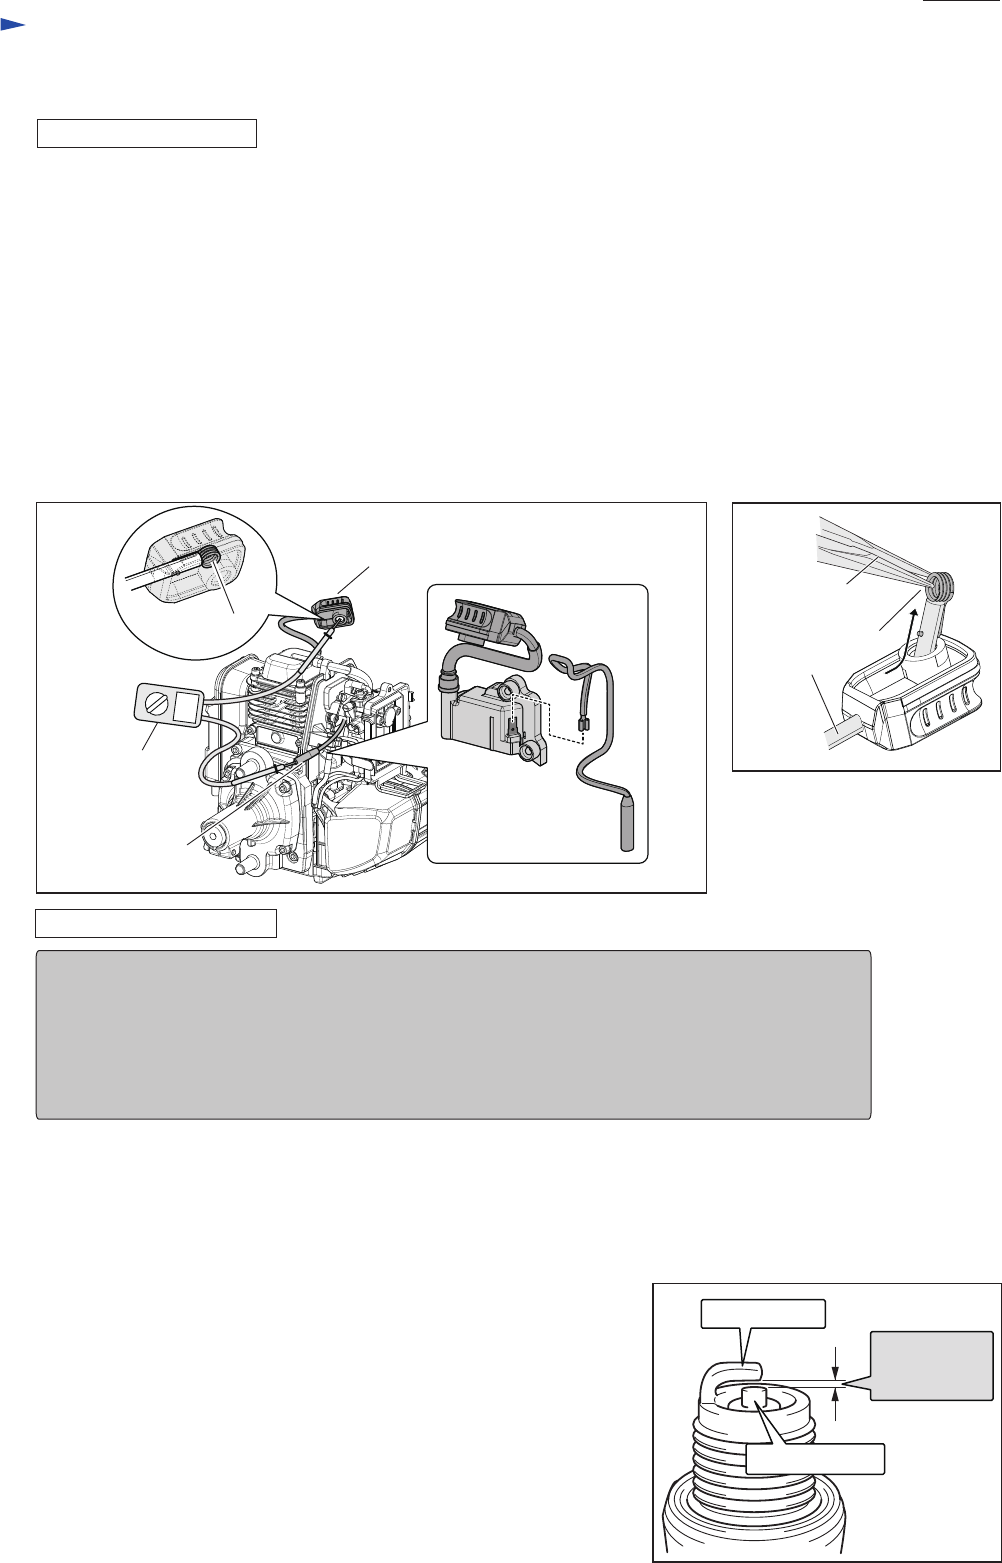
(3) Adjust the electrode gap to 0.7 to 0.8mm by carefully bending the side electrode.
Use Feeler gauge set (1R366) to check the gap width:
between the center electrode and the side electrode, insert 0.8mm leaf
of Feeler gauge set. (Fig. 45)
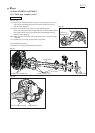
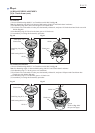
(4) Install another Spark plug into spark plug hole to prevent air/fuel
mixture from leaking outside of engine.
(5) Connect the removed Spark plug with Plug cap, then ground the threads
of Spark plug to a proper metal part of the engine.
(6) With Stop switch on, pull Recoil starter knob gently and check for spark.
Note: • It is hard to see the spark in a bright location. Therefore, be sure to
do the check in a shady but well-ventilated place.
• Sparks do not happen at without exceeding 500 rpm.
(7) If spark is not produced, replace Spark plug with a new one,
then check for spark by following the procedure (1) to (6) once again.
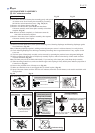
WARNING !!
• When a spark is produced, high-voltage current is delivered from Ignition coil to Spark plug.
It is, therefore, very dangerous to pull Recoil starter knob with your hand on Ignition cable.
Be sure to keep your hands off from Ignition cable when checking for spark.
• Fuel is extremely flammable and fuel vapors are explosive.
Therefore, clean up spilled fuel before starting to check for spark.
Also, be careful not to do the check near Carburetor.
Fig. 46
Electrode gap
must be
0.7 to 0.8mm.
side electrode
center electrode