


Repair
[3] DISASSEMBLY/ASSEMBLY
[3] -11. Spark Arrestor
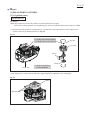
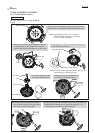
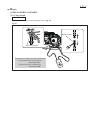
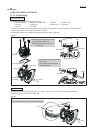
2. Remove Inner muffler cover (metal)
and Muffler gasket from Muffler.
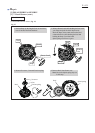
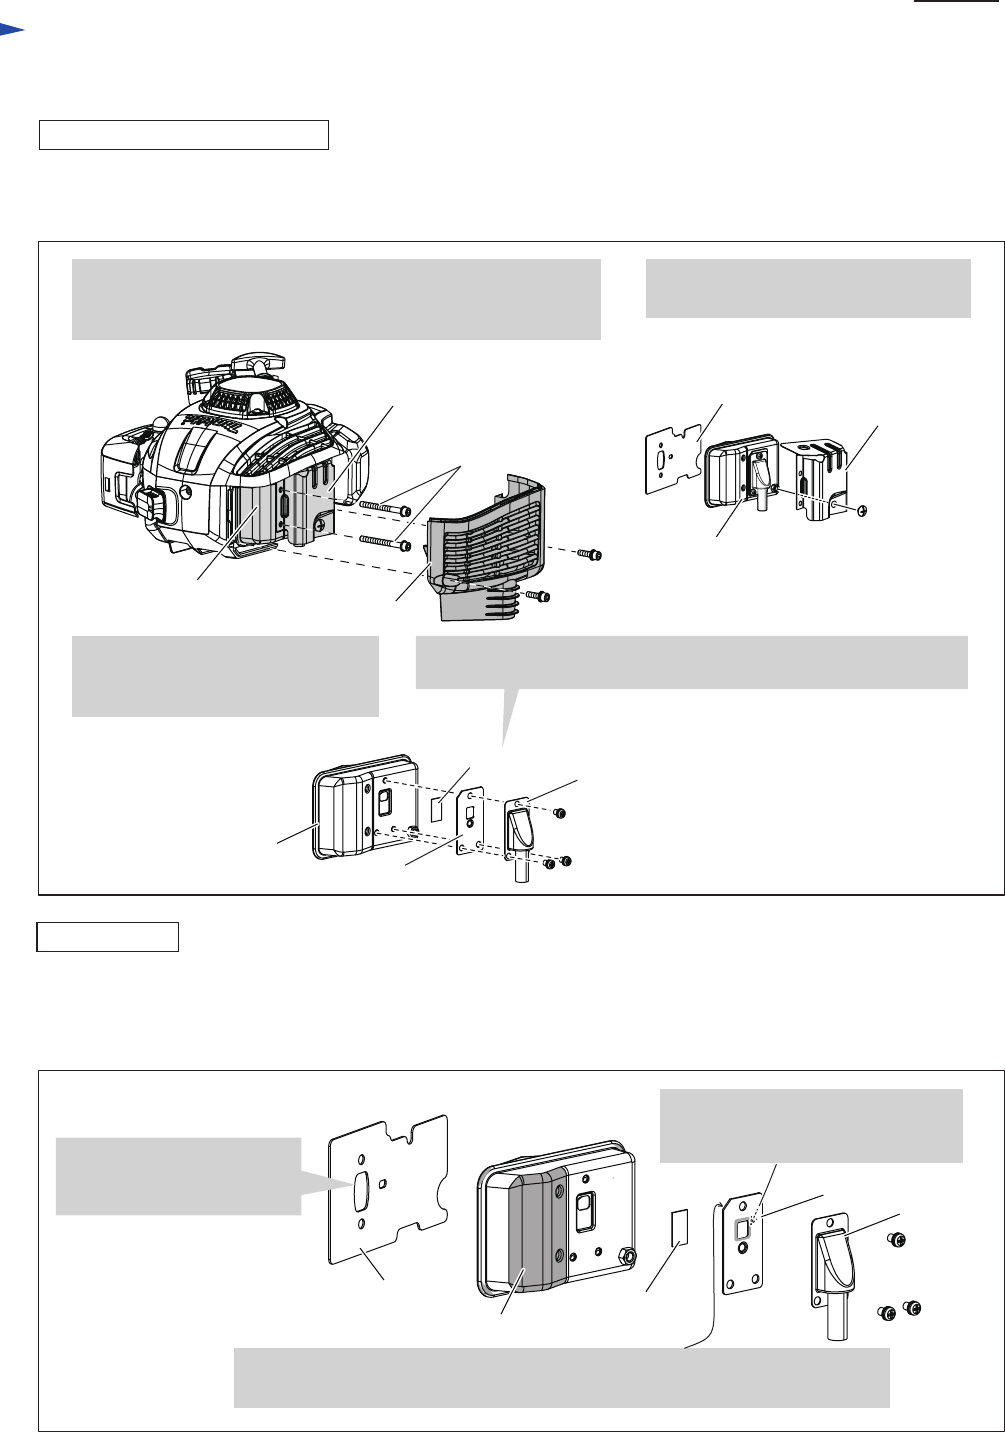
DISASSEMBLING, CLEANING
Fig. 44
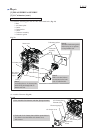
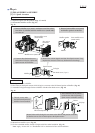
(1) Separate Engine from the product. (Figs. 1, 2 and 3)
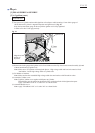
(2) Disassemble Muffler section. (Fig. 43)
Muffler cover (outer)
1. Remove Muffler cover (outer). And remove two Hex socket
head bolts. So, Muffler and Inner muffler cover (metal made)
are removed.
Hex socket
head bolt
Muffler
Tail pipe
Pan head screw (3 pcs.)
Gasket
Inner muffler cover
(metal made)
Muffler
Muffler
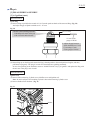
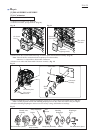
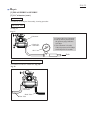
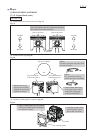
(1) Set Spark arrestor to Muffler.
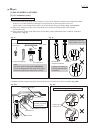
(2) Put Gasket on the Spark arrestor while facing its cut corner to the hill formed portion of Muffler. (Fig. 44)
(3) Assemble Tail pipe through Gasket to Muffler with three Pan head screws. (Fig. 44)
(4) Mount Inner muffler cover. (Fig. 43)
(5) Fix the assembled muffler section to Engine with Hex socket head bolts. (Fig. 43)
Note: Apply “Loctite 242” or “ThreeBond 1342” to the thread of Hex socket head bolts.
Fig. 43
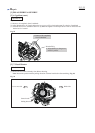
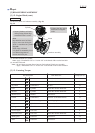
2. The Gasket has convex portion
on the reverse side for pressing
Spark arrestor to Muffler surface.
Spark arrestor
4. Remove the carbon deposits and dust from Spark arrestor if any.
Replace the Arrestor if it has any deformation or breakage.
3. Unscrew three Pan head screws
and remove Tail pipe, Gasket and
Spark arrestor from Muffler.
Inner muffler cover
(metal made)
Muffler gasket
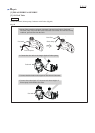
ASSEMBLING
Spark arrestor
Tail pipe
Mount Gasket while facing this cut corner to the Hill formed portion of Muffler
so that the convex side of Gasket presses the Spark arrestor.
Hill formed portion
1. The hole comes under
the Hill formed portion of
Muffler when assembled.
Gasket
Muffler gasket
P 22/ 25