


16
Section 2: Operating Instructions
PS25120 Primary Seeder 313-156M
8/21/06
Land Pride
Table of Contents
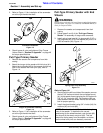
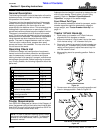
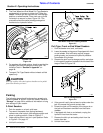
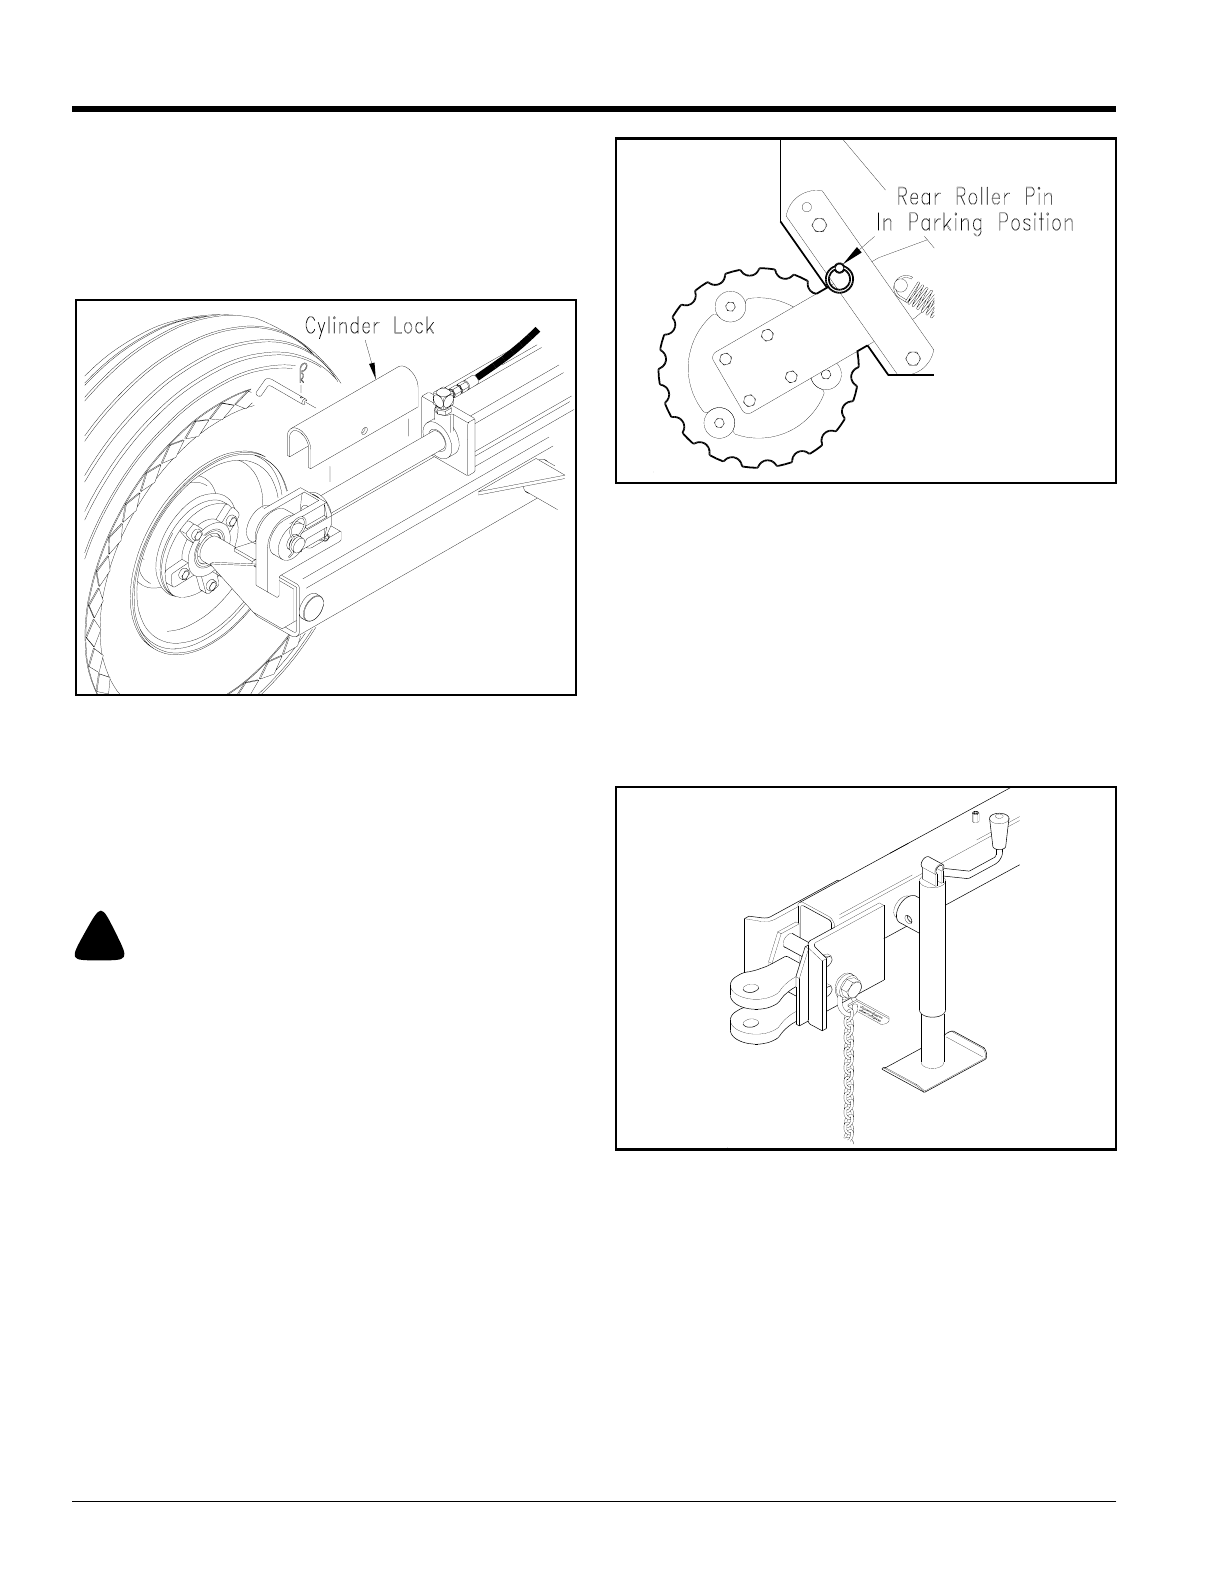
2. The Front Wheel and End Wheel Pull-Type Seeder is
equipped with a transport cylinder lock. Raise the
seeder. Remove pin and cylinder lock from storage
position on wheel bracket. Place lock over cylinder
rod and pin to secure in place, Figure 2-6. This
procedure should be done to safeguard against
mechanical or hydraulic failure.
Cylinder Lock
Figure 2-6
3. For seeders with wheel options, check to see that the
transport tires have the proper inflation, see Tire
Inflation Chart in “Section 9: Appendix” on
page 48.
4. Transport Pull-Type Seeder without wheels at field
speed only.
!
CAUTION
Pull-Type seeders with wheel options should never be pulled
faster than 20 miles per hour!
Parking
The following steps should be done when preparing to
store the seeder or unhitch it from the tractor. See also
“Storage” on page 39 for additional information on long
term storage of your seeder.
3-Point Seeders
1. Park the seeder on a level, solid area.
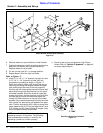
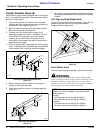
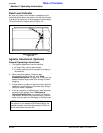
2. To prevent the seeder from tipping backward,
remove rear roller lock pin from storage position and
place in parking position. Refer to Figure 2-7.
3. Lower parking stand, and pin in park position. Refer
to Figure 2-1 on page 13.
4. Unhitch from tractor.
12741
Rear Roller Lock Pin in Parking Position
Figure 2-7
Pull-Type, Front or End Wheel Seeders
1. Park the seeder on a level, solid area.
2. Lower the seeder to the ground if equipped with front
or end wheels. Shut off tractor engine, engage
parking brake, and remove all hydraulic pressure
from seeder lift cylinders.
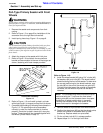
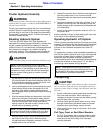
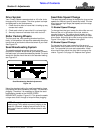
3. Remove the jack from its storage position and place
it in the parking position located on the left side of the
tongue. Refer to Figure 2-8.
Jack in Parking Position
Figure 2-8
4. If the ground is soft, place a board or plate under the
jack to increase the ground contact area.
5. Extend the jack until the weight of the tongue is on
the jack and has been removed from the tractor
drawbar.
6. If equipped with front or end wheels, unplug the
hydraulic lines from the tractor.
7. Remove the hitch pin and safety chain from the
tractor draw bar.
8. Unhitch from tractor.
11643
11653