


9
Section 1: Assembly and Set-up
8/21/06
PS25120 Primary Seeder 313-156M
Land Pride
Table of Contents
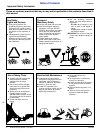
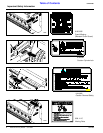
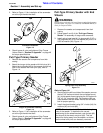
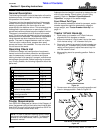
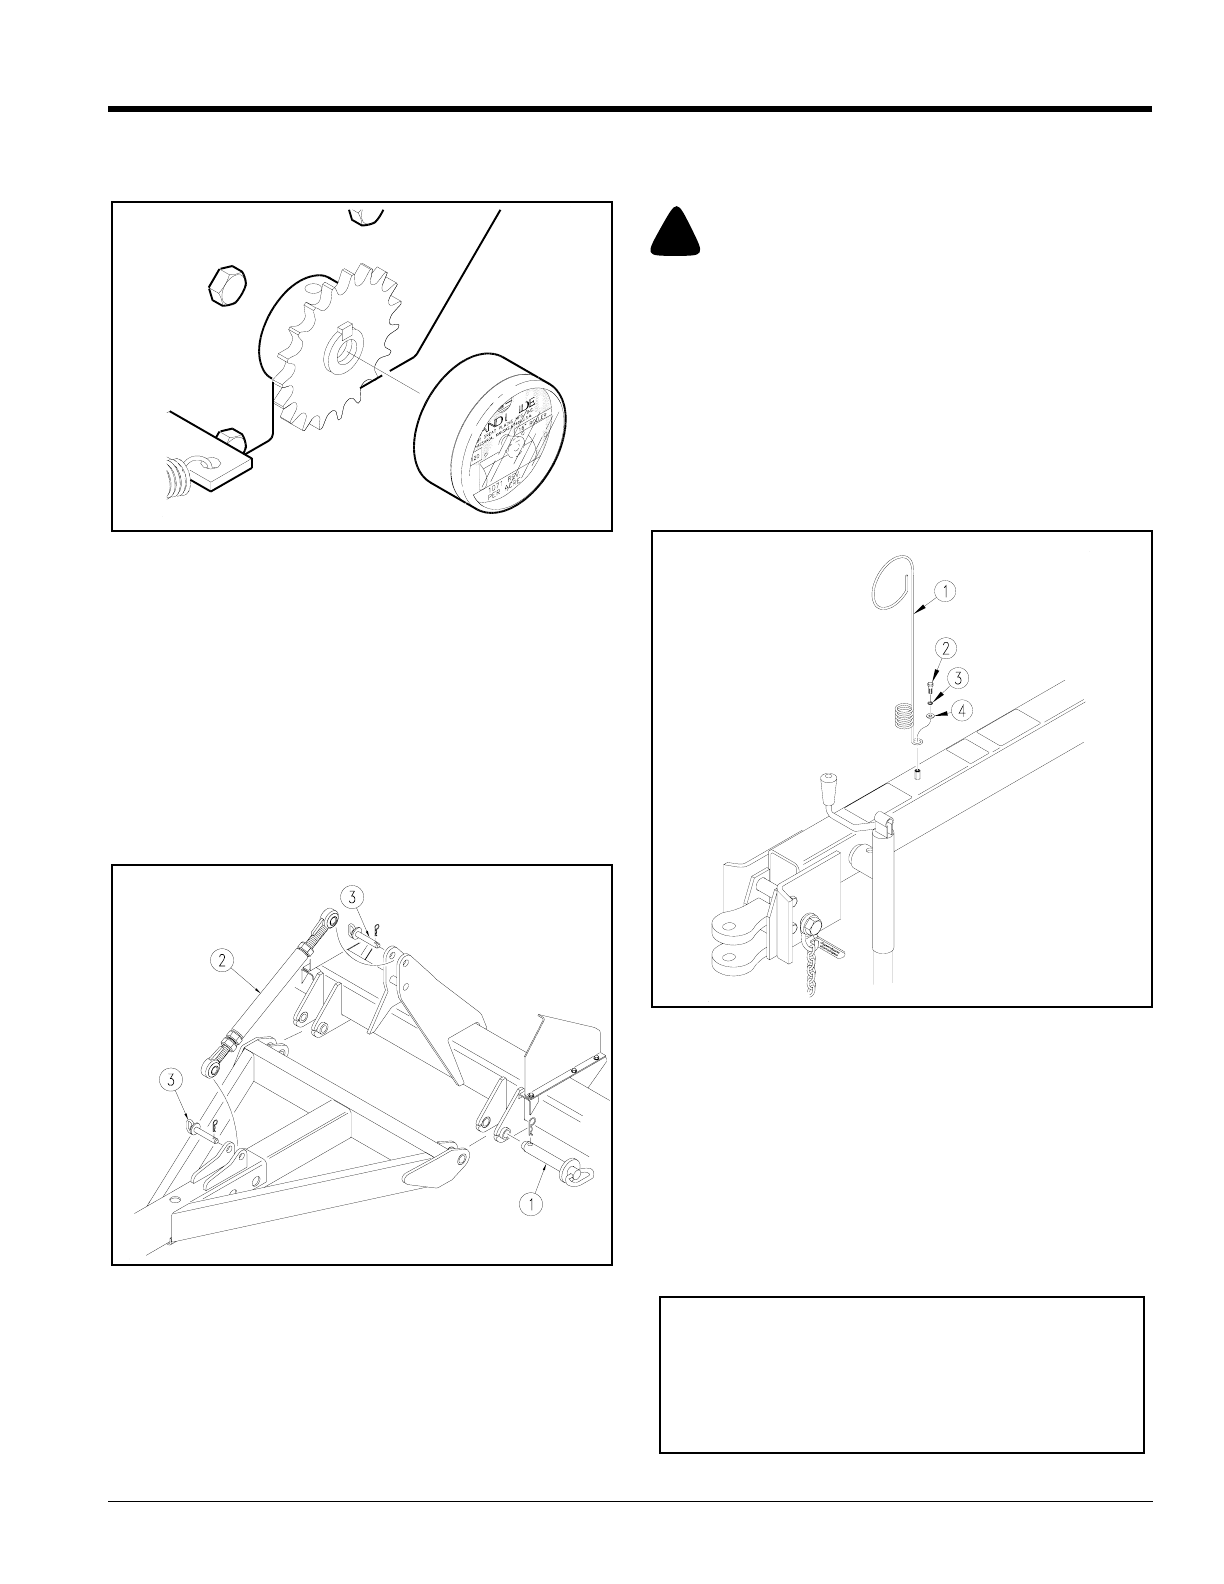
3. Refer to Figure 1-3 for installation of the acremeter
on to the right hand drive shaft.
Acremeter Installation
Figure 1-3
4. Check to see all nuts are tightened. See Torque
Values Chart in “Section 9: Appendix” on page 48
for torque specifications.
Pull-Type Primary Seeder
1. Remove the seeder and components from their
crating.
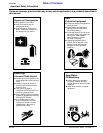
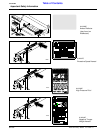
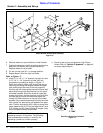
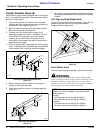
2. Attach the tongue to the seeder with hitch pins (#1).
Attach the turnbuckle (#2) to the tongue and the top
hitch of the seeder with hitch pins (#3), refer to
Figure 1-4.
Tongue & Turnbuckle Assembly
Figure 1-4
3. Refer to Figure 1-3 for installation of the acremeter
on to the right hand drive shaft.
4. Check to see all nuts are tightened. See Torque
Values Chart in “Section 9: Appendix” on page 48
for torque specifications.
15257
12736
Pull-Type Primary Seeder with End
Wheels
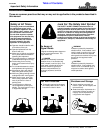
!
WARNING
Serious injury or death couldresult fromescaping high pressure
hydraulic fluid. Use paper or cardboard, NOT BODY PARTS, to
check for suspected leaks.
1. Remove the seeder and components from their
crating.
2. Follow steps 2 and 3 of the “Pull-type Primary
Seeder” for assembly of tongue and acremeter.
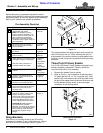
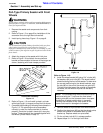
3. Install spring hose loop (#1) to tongue with 5/16" x
3/4" long bolts (#2), 5/16" lock washer (#3), and 5/16"
USS flat washer (#4), Figure 1-5.
Spring Hose Loop Assembly
Figure 1-5
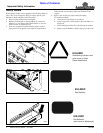
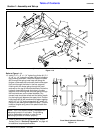
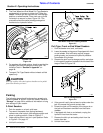
Refer to Figure 1-6:
4. Starting with the left hand side of the seeder, remove
the four 5/8" bolts and attach the end wheel mount
(#1) to the seeder frame replacing the 5/8" bolts with
5/8" x 2 1/4" long bolts (#2). Flat washers (#3) are
used between the end wheel mounts and the seed
box for proper spacing.
5. Install the wheel bracket using 3/4" u-bolts (#4), flat
washers (#5) and nuts (#6).
12737
NOTE: The wheel bracket (#7) should be facing the
rear of the seeder. To determine the correct
positioning for the wheel brackets, note the tab (#8)
on the end of the wheel arm pivot (#9). This tab
should be facing away from the seeder, as shown,
so the wheel arm pivot can be easily removed.