


8
Section 1: Assembly and Set-up
PS25120 Primary Seeder 313-156M
8/21/06
Land Pride
Table of Contents
Section 1: Assembly and Set-up
Before attempting to assemble the seeder use the
following as a check list. Having all the needed parts and
equipment readily at hand will speed up your assembly
task and will make the job as safe as possible.
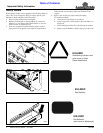
Sling Brackets
After the unit is uncrated check to see if the sling
brackets are installed, if not, install them now - two on
each end of unit with hardware, refer to Figure 1-1.
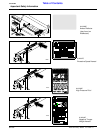
Pre-Assembly Checklist
Check Reference
Fasteners and pins that were
shipped with the seeder.
NOTE: All hardware from the
factory has been installed in the
location where it will be used. If a
part or fastener is temporarily
removed for assembly reasons,
remember where it goes. Keep the
parts separated.
Operator’s
Manual
All working parts are moving
freely, bolts are tight and cotter
pins are spread.
Operator’s
Manual
All grease fittings are in place and
lubricated.
Section 5
Page 39
Proper tension and alignment on
all drive chains.
Operator’s
Manual
Safety decals are correctly located
and legible. Replace if damaged.
Important
Safety
Information
Red and amber reflectors are
correctly located and visible.
Important
Safety
Information
“Slow moving vehicle” emblem is
in place.
Important
Safety
Information
Inflate tires to specified PSI air
pressure. Tighten wheel bolts to
specified torque.
Section 8
Page 48
Have a minimum of 2 people at
hand while assembling the drill.
Section 1
Have a fork lift or loader along with
chains and safety stands that are
sized for the job ready for the
assembly task.
Section 1
Have a tractor with remote
hydraulics ready to attach to the
tongue. The tongue must be
anchored to a large enough tractor
to overcome the negative tongue
weight that will be present if the
unit is equipped with front wheels.
CAUTION! Be familiar with the
term NEGATIVE TONGUE
WEIGHT. Be aware of the special
precautions you should take when
working with an implement that
can develop Negative Tongue
Weight.
Section 1
Page 15
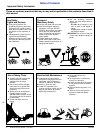
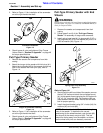
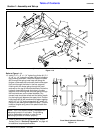
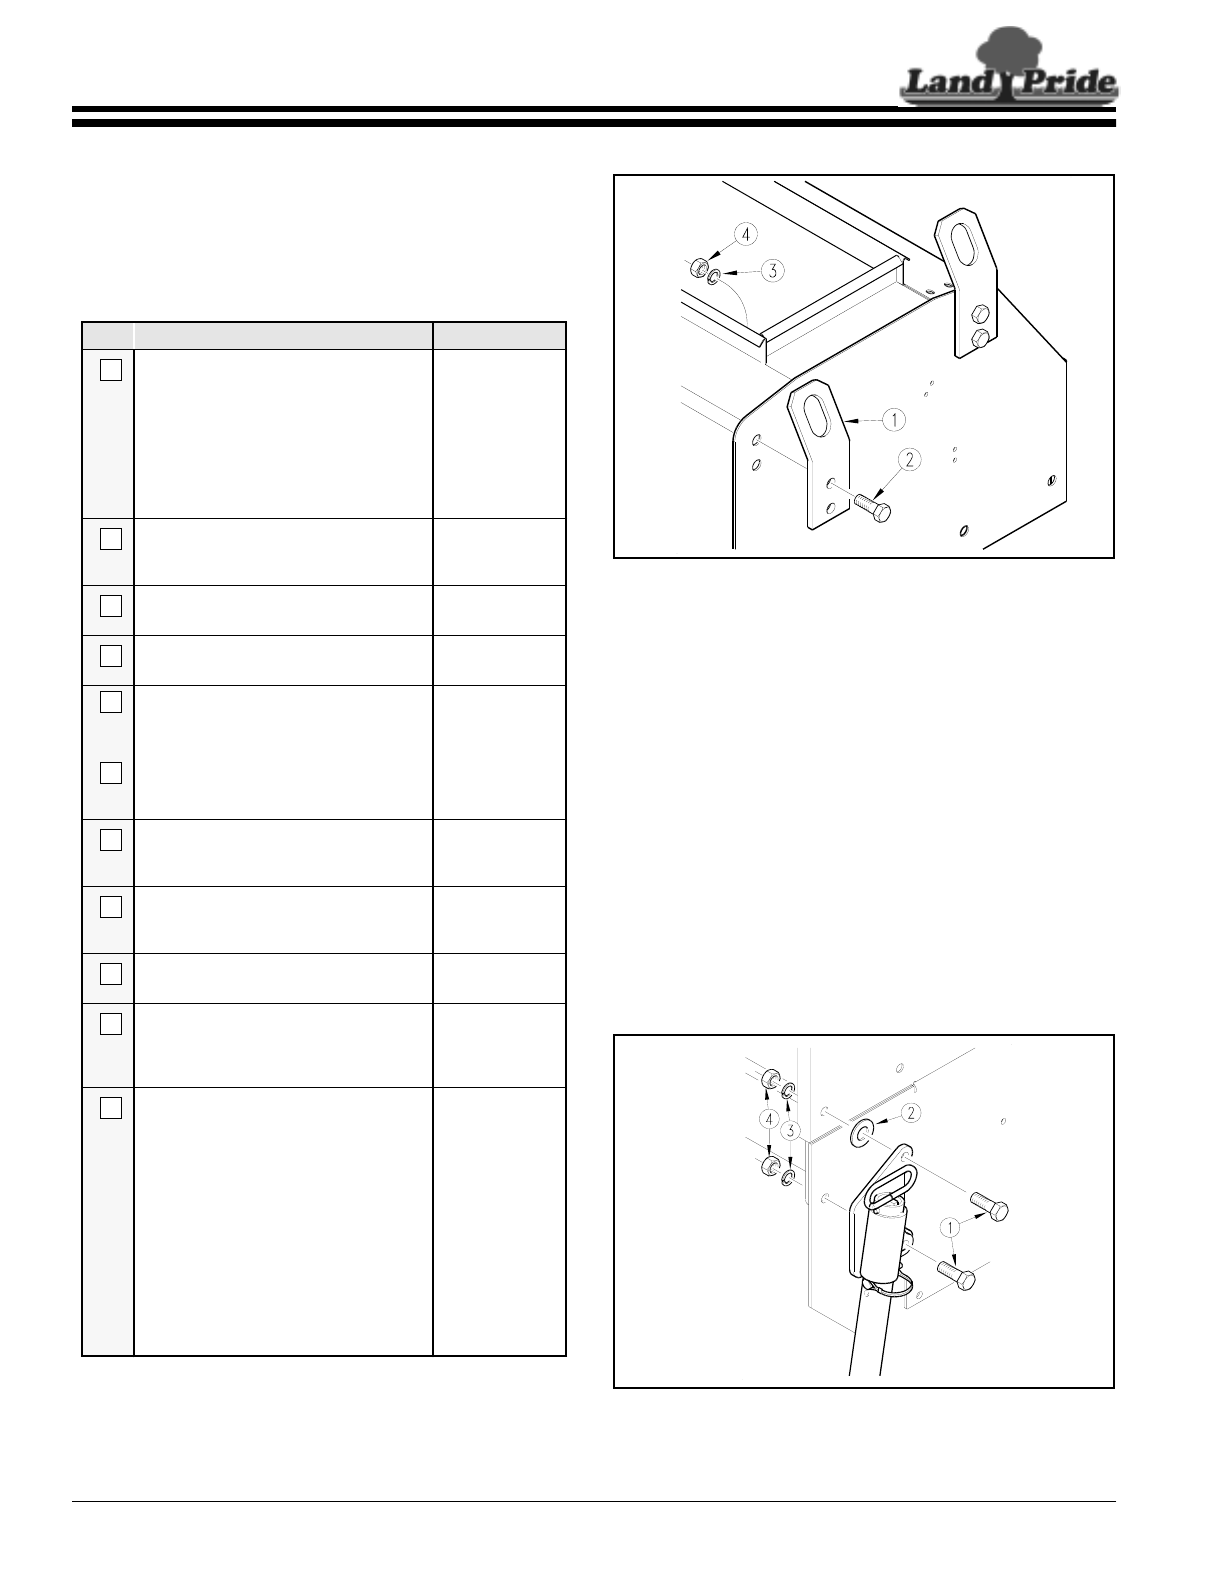
Sling Bracket Installation
Figure 1-1
The sling brackets allow points at each end to hook the
chain for lifting of the unit. When hooking the chain to
sling brackets, be certain to either use a spreader bar on
the chain or use a long chain to prevent bending the sling
brackets.
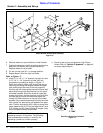
Three-Point Primary Seeder
Your 3-Point 25 Series Primary Seeder is shipped to you
almost completely assembled. Carefully follow the
instructions below for final assembly.
1. Remove the seeder from its crating.
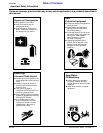
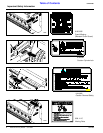
2. Refer to Figure 1-2 for installation of parking stand.
To install use the 5/8" x 2 1/4" long bolts (#1), a flat
washer (#2), lock washers (#3), and nuts (#4) on the
left end of the seeder frame as shown. Be sure to use
the flat washer (#2) as shown to ensure proper
installation of the parking stand.
Parking Stand Installation
Figure 1-2
15226
15225