31
Section 5: Maintenance & Lubrication
1/12/09
Z44 & Z52 (S/N 526171 & Above) Zero Turning Radius Mowers Riding Mowers Accu-Z Razor
®
357-187M
Land Pride
Table of Contents
Maintenance
!
WARNING
Read and observe all safety warnings in this manual andin the
engine service manual.
!
WARNING
Except when checking or changing components, always keep
protective shields on for safety as well as for cleanliness.
!
WARNING
Keep your machine clean and remove any deposits of trash
and clippings, which can cause engine fires and hydraulic
overheating as well as excessive belt wear.
!
WARNING
DO NOT have engine running when servicing or making
adjustments to the mower. Place control levers in the neutral
position, disengage blade engagement, shut engine off and
remove ignition switch key.
!
DANGER
Repairs or maintenance specifically requiring engine power
should be performed by trained personnel only. Control levers
should be set in park position. If the control levers are to be
operated, the tires should be properly supported off the floor.
Enclosed areas should be properly ventilated to prevent
carbon monoxide poisoning.
!
WARNING
Before working on or under the deck, make certain the engine
cannot be accidentally started. Shut engine off and remove
ignition switch key for maximum safety. Repairs or
maintenance requiring engine power should be performed by
trained personnel only.
!
DANGER
Exercise caution when working under the deck as the mower
blades are extremely sharp. Wearing gloves is advisable when
working around or with the blades.
!
WARNING
When possible, clean under mower using a stick or similar
instrument making sure that no part of the body, especially
arms and hands are under mower.
Regular maintenance is the best prevention for costly
downtime or expensive, premature repair. The following
pages contain suggested maintenance information and
schedules which the operator should follow on a routine
basis.
Check initially and periodically for loose bolts and pins.
Torque loose bolts per the “Torque Values Chart” on
page 48. Remain alert for unusual noises, they could be
signaling a problem. Visually inspect the machine for any
abnormal wear or damage. A good time to detect
potential problems is while performing scheduled
maintenance service. Correcting the problem as quickly
as possible is the best insurance.
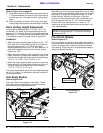
Clear away heavy build-up of grease, oil and dirt,
especially around the engine and under the seat
platform; minute dust particles are abrasive to close-
tolerance engine and hydraulic assemblies.
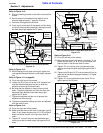
Inspect mower daily for grass clippings, tangled wire and
string. The underside of the mower deck will collect a
build-up of grass clippings and dirt, especially when
grass is wet or has high moisture content. This build-up
will harden, restricting blade and air movement and will
usually produce a poorer quality of cutting. Therefore,
debris should be routinely removed from under the deck.
To do this it will be necessary to raise and block the deck
in the full up position and scrape the build-up from
underneath.
Some repairs require the assistance of a trained service
mechanic and should not be attempted by unskilled
personnel. Consult your Land Pride dealer when
assistance is needed.
Torque Values
!
WARNING
Particular attention must be given to tightening the drive
wheel lug nuts, blade spindle bolts and electric clutch bolt.
Failure to correctly torque these items may result in the loss of
a wheel, blade or burnt clutch which can result in serious
damage and/or personal injury.
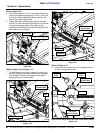
It is recommended that the lug nuts, spindle bolts and
electric clutch bolt be checked after the first 2 hours of
initial operation and after removal for repair or
replacement. Thereafter, they should be checked every
50 hours of operation.
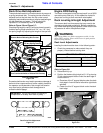
IMPORTANT: The arm rests on the Deluxe Seat
must be pivoted up before hinging the seat platform
forward. Leaving the arm rests down while
hinging the seat platform forward can cut the
arm rest covers and void their warranty.
NOTE: Refer to "Torque Values Chart" and
“Additional Torque Values” on page 48 for correct
torque values.


