


35
Section 4: Maintenance & Lubrication
2/27/07
Z44 & Z52 (S/N 472620 -526170) Zero Turning Radius Mowers Riding Mowers Accu-Z Razor
®
357-044M
Land Pride
Table of Contents
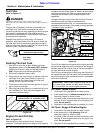
1. Remove blades by grasping the blade end with a rag
or thick padded glove while loosening the blade
mounting bolt.
2. With a 11/16” wrench, remove the 1/2” center blade
bolt and Washer from the bottom of the blade.
3. Reinstall blade, blade washer and bolt. Care should
be taken when installing the blade bolt to not get it
cross threaded.
4. Tighten blade bolt to 135 ft-lbs. of torque.
Blade Sharpening
!
CAUTION
ALWAYS wear eye protection and gloves when sharpening a
blade.
1. If the blade cutting edge is dull or nicked, it should be
replaced or sharpened.
2. Clean blade, blade washer and mounting surface of
all debris before replacing or sharpening.
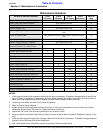
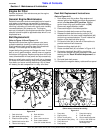
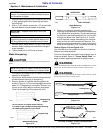
3. Sharpen blades on a grinder following pattern as
shown in Figure 4-13. Grind cutting edge at the same
bevel (27 1/2 degrees) as the original. Sharpen only
the top of the cutting edge to maintain sharpness.
Touch-up sharpening can be done with a file.
Blade Resharpening
Figure 4-13
IMPORTANT: Blade mounting bolts have right hand
threads. Turn blade bolts counterclockwise to loosen
and clockwise to tighten.
IMPORTANT: Replace blades with Land Pride
blades only.
IMPORTANT: Always install blades with cutting
edge facing direction of blade spindle rotation and
with wing tips pointing up towards bottom of deck.
NOTE: Care should be taken in order not to remove
any more material than necessary to sharpen blade.
Resharpening
Pattern
Do not sharpen to original pattern (below).
It is easier to get a straight cutting edge following
the resharpening pattern shown above.
Original Edge
19074
19075
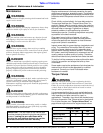
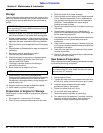
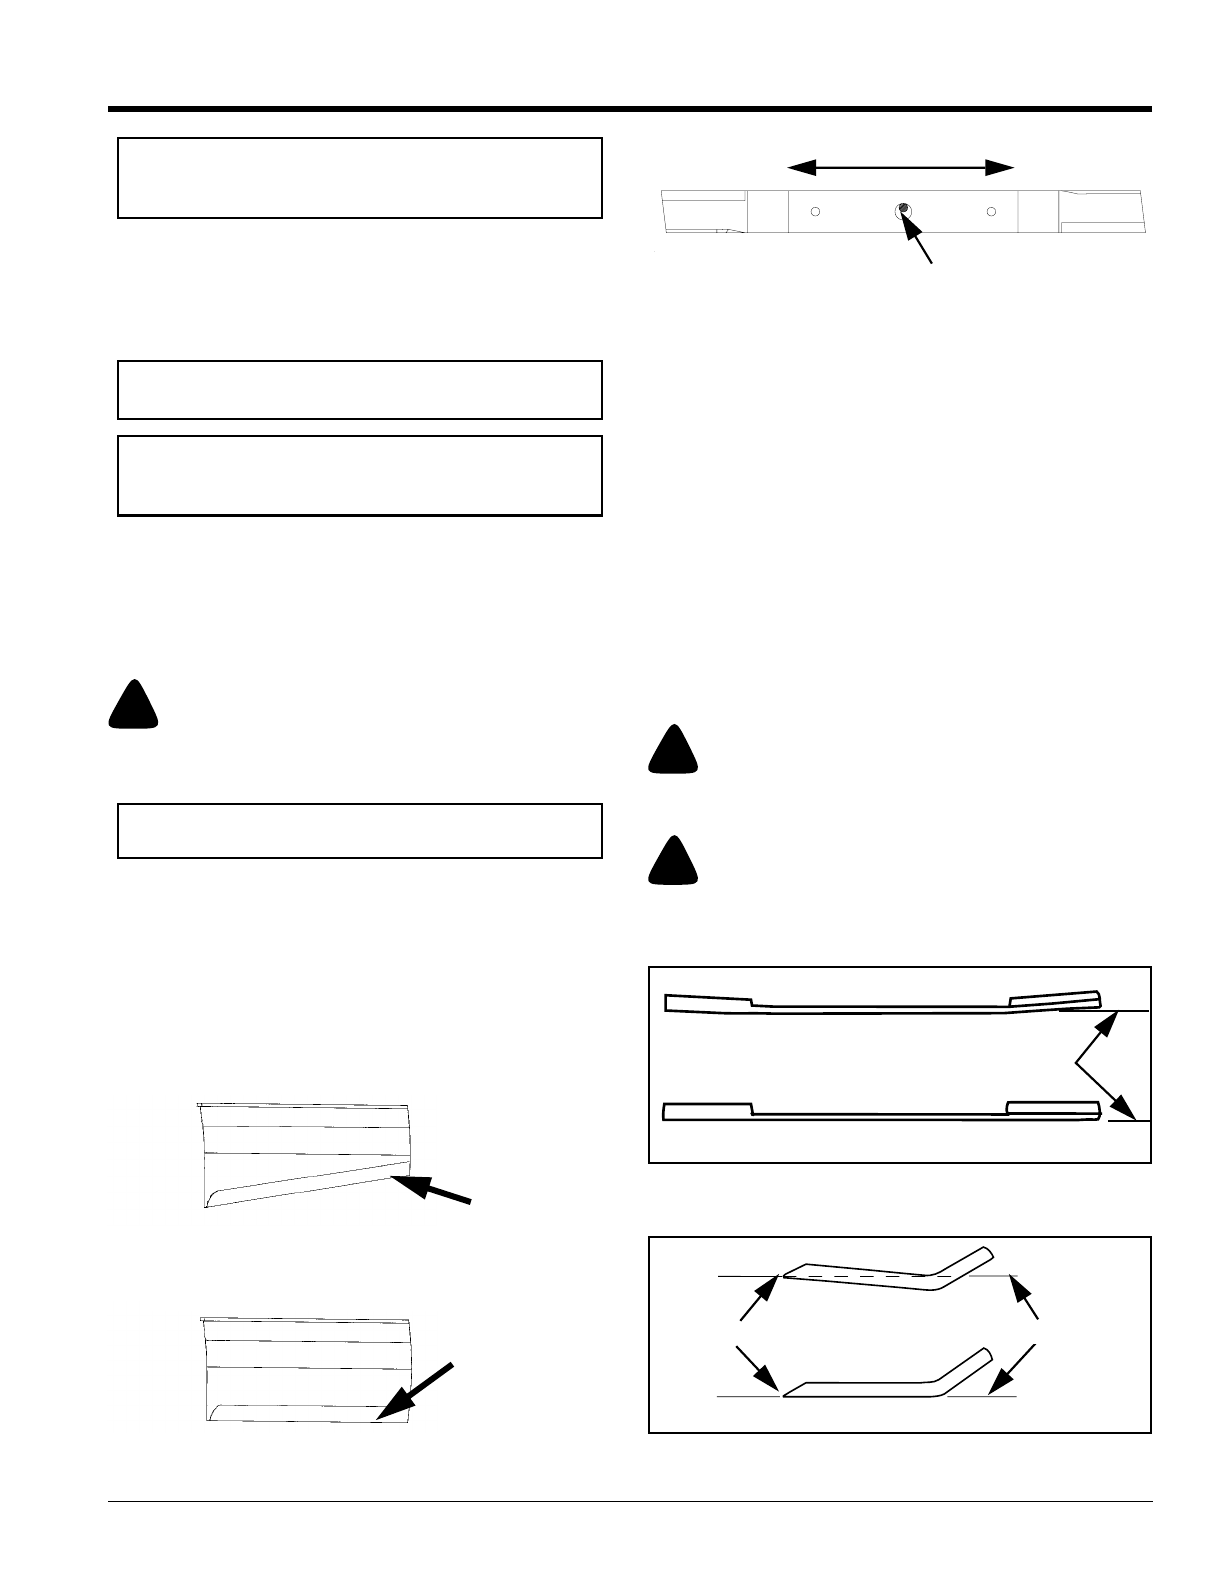
Blade Balancing
Figure 4-14
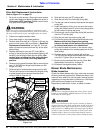
4. Balance of a blade is generally maintained by
removing an equal amount of material from each end
of the blade when sharpening. Check blade balance
by positioning the blade horizontally on a nail or shaft
through the center hole. See Figure 4-14. If either
end of the blade rotates downward, grind (remove)
metal on that end until the blade will balance. The
blade is properly balanced when neither end drops. If
blade is out of balance, true it up before reinstalling.
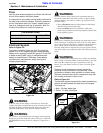
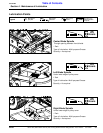
Refer to Figure 4-15 and Figure 4-16:
Lay the blade on a flat surface and check for distortion.
Replace any distorted blade.
Do not re-use spindle bolts which have stripped, worn or
undercut threads. Refer to “Torque Values Chart” on
page 44 when replacing hardware for proper torque.
!
WARNING
When mounting blades, rotatethem after installation to ensure
blade tips do not touch each other or sides of the mower.
!
WARNING
Failure to correctly torque the bolt may result in the loss of the
blade which can cause serious injury.
Comparison of Warped and Straight Blades
Figure 4-15
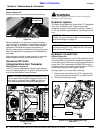
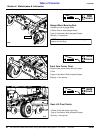
End View of Blades, Twisted & Straight Blades
Figure 4-16
NAIL OR SHAFT
HORIZONTAL
19046
19076
Warped Blade (Replace)
Straight Blade
Cutting Plane
19077
Twisted Edge (Replace)
Straight Edge
Cutting Plane
Cutting Edge