


PAGE 42 — DCA70SSJU4i
In addition to cleaning the fuel tank, the following
components should be inspected for wear:
Rubber Suspension — look for signs of wear or
deformity due to contact with oil. Replace the rubber
suspension if necessary.
Fuel Hoses — inspect nylon and rubber hoses for signs
of wear, deterioration and hardening.
— inspect the fuel tank lining for signs
of excessive amounts of oil or other foreign matter.
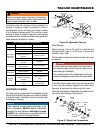
Replacing Fuel Filter
Replace the fuel filter cartridge with new one every 500
hours or so.
Loosen the drain plug at the lower top of the fuel filter.
Drain the fuel in the fuel body together with the mixed
water. DO NOT spill the fuel during disassembly.
Vent any air.
If air enters the fuel injection system of a diesel engine,
starting becomes impossible. After running out of fuel,
or after disassembling the fuel system, bleed the system
according to the following procedure. See the John Deere
for details.
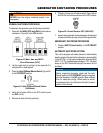
To restart after running out of fuel, turn the switch to the
“ON” position for 15-30 seconds. Try again, if needed. This
unit is equipped with an automatic air bleeding system.
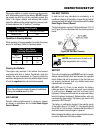
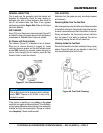
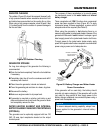
Check the crankcase oil level prior to each use, or when the
fuel tank is filled. Insufficient oil may cause severe damage
to the engine. Make sure the generator is level. The oil
level must be between the two notches on the dipstick as
shown in Figure 32.
Replacing Oil Filter
Remove the old oil filter.
Apply a film of oil to the gasket on the new oil filter.
Install the new oil filter.
After the oil cartridge has been replaced, the engine oil
will drop slightly. Run the engine for a while and check for
leaks before adding more oil if needed. Clean excessive
oil from engine.
Open both cocks located at the crankcase side and at
the lower part of the radiator and drain coolant. Open
the radiator cap while draining. Remove the overflow
tank and drain.
Check hoses for softening and kinks. Check clamps for
signs of leakage.
Tighten both cocks and replace the overflow tank.
Replace with coolant as recommended by the engine
manufacturer.
Close radiator cap tightly.
Flush the radiator by running clean tap water through
radiator until signs of rust and dirt are removed. DO
NOT clean radiator core with any objects, such as a
screwdriver.
Allow engine to cool when flushing out
radiator. Flushing the radiator while hot
could cause serious burns from water or
steam.
MAINTENANCE