46
SEEDER ASSEMBLY
WARNING!
DO NOT use or start the engine until the
seeder is in place.
1. Remove rear cover, it is not used with the
seeder attachment.
2. Place a stable support under the rear frame to
support the unit when the rear wheels are re-
moved.
3. Remove the two (2) retaining rings on the rear
wheel (they are not reusable, new rings are
provided in the kit). Remove wheel from rear
axle. (Some units use a cotter pin instead of
retaining rings.)
4. Loosen one (1) set screw on the locking collar.
Using a punch loosen the locking collar on the
rear axle. Repeat on the on the other side of
the unit.
5. Remove bolts holding the bearings to the frame.
6. Remove rear axle from unit. The wheel that is
pinned to the axle can remain on the axle.
7. Remove push nut (push nut is not reusable, a
new one is provided in the kit) from the right
side of the rubber flap rod. Lay the rubber flap
away from the right side so the cable can run
between the flap and frame. (Some units use
cotter pins to hold the flap rod.)
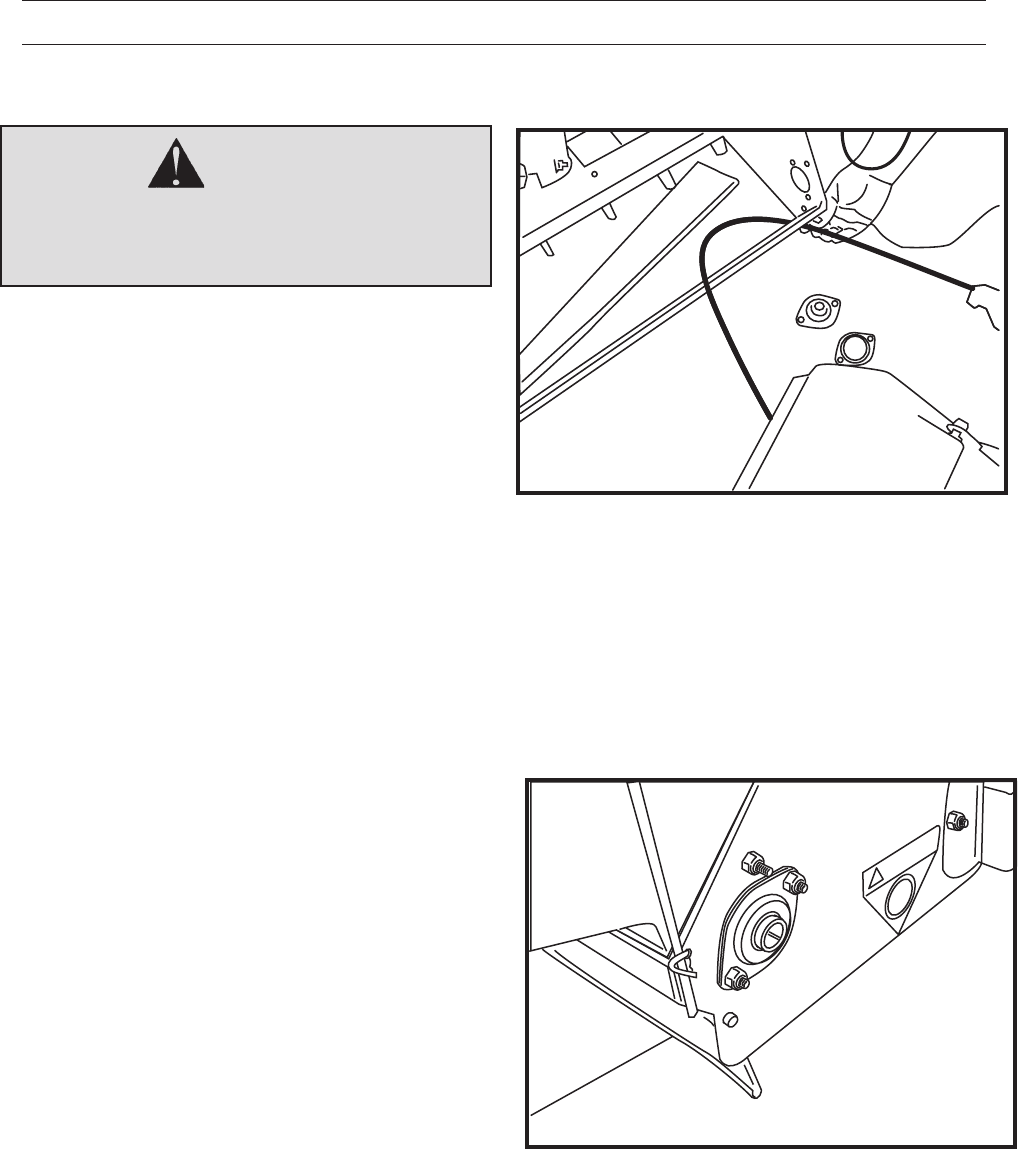
8. Route the cable from the seed gate between
the bottom of the frame and the top of the rub-
ber flap. See Figure 1.
FIGURE 1
9. Place seed box on unit, replace bearing with
eccentric collar to the outside. The screws that
attach the seedbox to the frame MUST have
washers inside the seedbox on the screws. DO
NOT overtighten and deform the plastic, snug-up
ONLY. See Figure 2.
FIGURE 2
NOTE: Do not tighten hardware on the bearings until
the axle is installed.
DT19
DT20


