


10
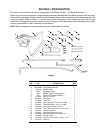
SECTION IV. REMOVAL AND ATTACHMENT
A. BLADE REMOVAL
NOTE
These removal and attachment instructions
apply to a blade assembly which has been
originally assembled and installed according to
Sections II and III of this manual.
1. Drive the tractor with blade to the storage location.
WARNING
Disengage the PTO, engage the brake lock,
stop the tractor engine and remove the key from
the switch before beginning removal
procedures.
WARNING
The exhaust system and surrounding areas are
HOT. To avoid personal injury, allow the tractor
to cool before beginning any blade removal
procedures.
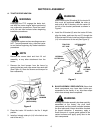
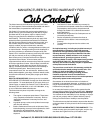
2. Place the implement lift handle in No. 2 position.
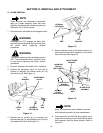
3. Remove the adjustment clevis (4) from the lift
bracket by removing the internal cotter pin (14)
and clevis pin (9). See Figure 14.
Figure 14
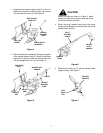
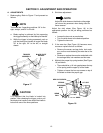
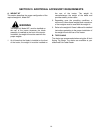
4. Remove the lift bracket (8) by removing one
internal cotter pin (14) and sliding the rod (7) out of
the implement lift links. See Figure 15.
Figure 15
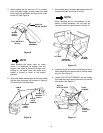
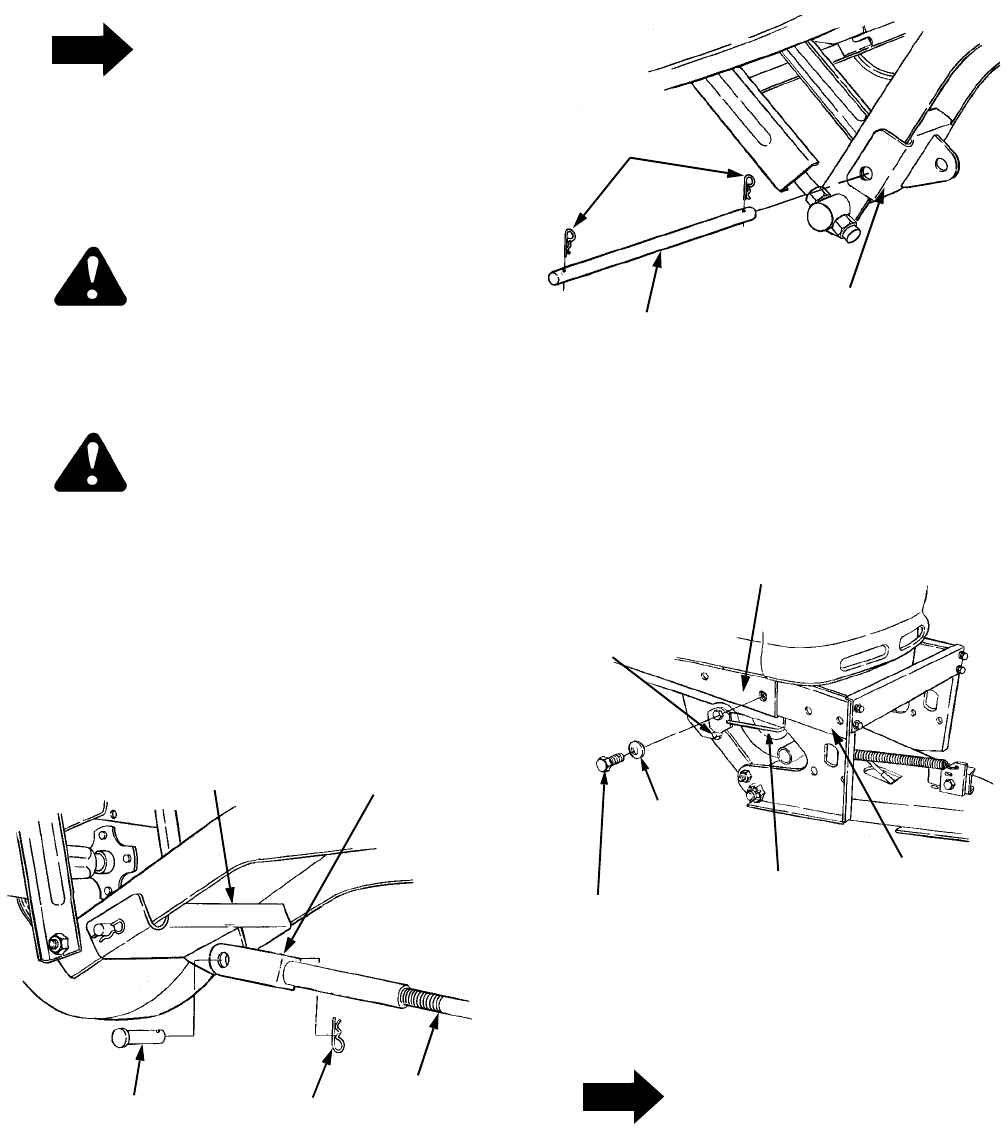
5. Remove the hex screws (10) and bell washers (11)
fastening the blade hitch assembly to the tractor
frame channels. See Figure 16
Figure 16
NOTE
Store all components and hardware removed
with the blade assembly for later reattachment.
6. Push downward and hold the quick attach rod to
release the mounting arm pins and slide the blade
hitch assembly from the frame channel. Refer to
Figure 16.
ADJUSTMENT
CLEVIS
INTERNAL
COTTER PIN
CLEVIS
PIN
LIFT
BRACKET
LIFT
ROD
LIFT
BRACKET
ROD
INTERNAL
COTTER PIN
BLADE HITCH
ASSEMBLY
FRONT FRAME
CHANNEL
QUICK
ATTACH
ROD
HEX CAP
SCREW
(BOTH SIDES)
MOUNTING
ARM PIN
(BOTH SIDES)
BELLEVILLE
WASHER
(BOTH SIDES)