CHECKTIREPRESSURE
Thetiresonyourtractorwereovednflated
atthefactoryforshippingpurposes.
Correcttirepressureisimportantforbest
cuttingperformance.
• ReducetirepressuretoPSIshownin
"PRODUCT SPECIFICATIONS" on
page 5 of this manual.
CHECK DECK LEVELNESS
For best cutting results, mower housing
should be properly leveled. See "TO
LEVEL MOWER HOUSING" in the
Service and Adjustments section of this
manual.
CHECK FOR PROPER POSITION OF
ALL BELTS
See thefiguresthat are shownfor replac-
ingmotionandmowerblade drivebeltsin
the ServiceandAdjustmentssectoinof
thismanual.Verifythat the beltsare mut-
ed correctly.
CHECK BRAKE SYSTEM
Afteryou learnhowto operateyourtrac-
tor,checkto seethatthebrakeisproperly
adjusted.See "TOADJUST BRAKE"in
the ServiceandAdjustmentssectionof
thismanual.
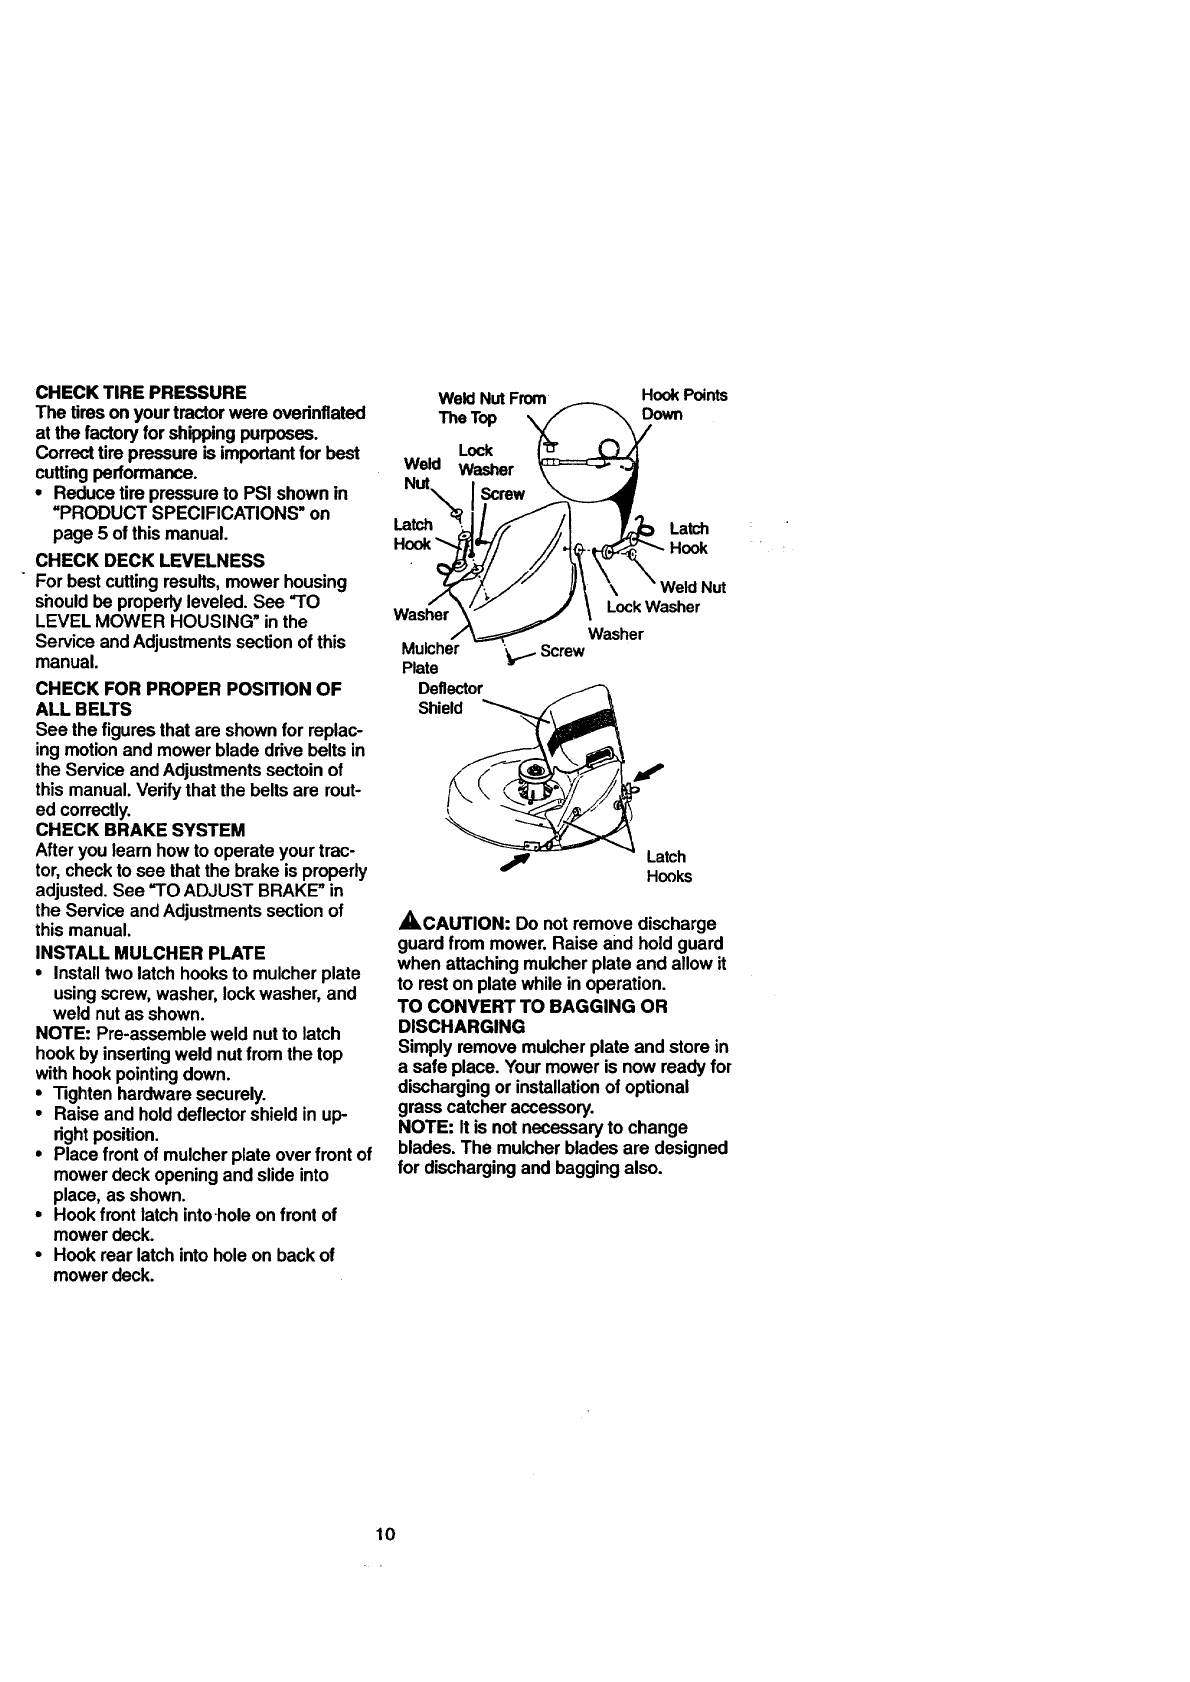
INSTALLMULCHER PLATE
• Installtwolatchhooksto mulcherplate
usingscrew,washer,lockwasher,and
weldnutas shown.
NOTE: Pre-assembleweldnutto latch
hookbyinsertingweldnutfromthetop
withhookpointingdown.
• Tightenhardwaresecurely.
• Raiseandholddeflectorshieldin up-
rightposition.
• Placefront ofmulcherplateoverfrontof
mowerdeck openingandslideinto
place, asshown.
• Hookfront latchinto-holeonfront of
mowerdeck.
• Hookrearlatchintoholeon backof
mowerdeck.
Weld NutFrom
The Top
Lock
Weld Washer
Nut
Latch
HookPoints
Down
Latch
Hook
Washer
Mulcher
Plate
Deflector
Shield
Lock Washer
Washer
Screw
Latch
Hooks
_CAUTION: Donotremovedischarge
guardfrom mower.Raiseand holdguard
whenattachingmulcherplate andallowit
to restonplatewhileinoperation.
TO CONVERT TO BAGGING OR
DISCHARGING
Simplyremovemulcherplate andstorein
a safeplace. Yourmowerisnowreadyfor
dischargingor installationof optional
grasscatcheraccessory.
NOTE: It is notnecessaryto change
blades.The mulcherbladesare designed
for dischargingandbaggingalso.
10


