


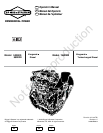

6 BRIGGSandSTRATTON.COM
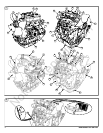
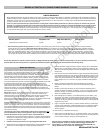
Features and Controls
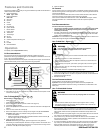
Compare the illustration
1
with your engine to familiarizeyourself withthe location of
various features andcontrols.
A. Engine Identification
Model Type Code
B. Engine Identification
Date Code
C. Glow Plug
D. Dipstick
E. Oil Fill
F. Oil Filter
G. OilDrain Plug
H. Injector Nozzle
I. Electric Starter
J. Injector Pump
K. Thermostat
L. Turbocharger
M. Oil Pan
N. Alternator
O. Coolant Temperature Sending Unit
P. Fan
Q. FanBelt
R. Exhaust Manifold
Operation
Oil capacity (see the Specifications section)
Oil Recommendations
We recommend the use of Briggs & Stratton Warranty Certified oils for best
performance. Other high-quality detergent oils are acceptable if classified for service CF
or CF-4. Do not use special additives.
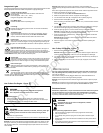
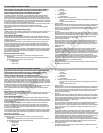
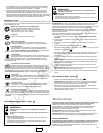
Outdoor temperatures determinethe proper oil viscosity for the engine. Use the chart to
select the best viscosity for the outdoor temperature range expected.
SAE 30
10W-30
Synthetic 5W-30
5W-30
°F °C
* Below 40°F(4°C) the use of SAE 30 will result in hardstarting.
** Above 80°F(27°C) the use of 10W-30 may cause increased oil consumption. Check
oil level more frequently.
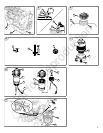
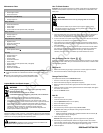
How To Check/Add Oil - Figure
2 4
Before adding or checking the oil
• Place engine level.
• Clean the oil fill area of any debris.
1. Remove the dipstick (A) and wipe with a clean cloth(Figure 2).
2. Completely insert the dipstick.
3. Remove the dipstick and check the oil level. It should be at the FULL mark (B)onthe
dipstick.
4. If the oil is low, remove the oil fillcap (J).
5. Remove the dipstick. Pour the oil slowly intothe engine oil fill (C). Do not overfill.
Important: Whenadding oil, adequate venting is required as follows:
• Remove the dipstick.
• Make sure adequateclearance (D) is maintained between the oil fill device (E)
and the engine oil fill (C).SeeFigure4.
6. Install and tighten the oil fill cap.
NOTICE: Before starting the engine, wipe the engine clean of any spilled oil.
7. After adding oil, installthe dipstick. Start and run engine atidle forfive minutes. Shut
off engine. Wait three minutes and check oil level. If required, add oil to bring oil level
to the FULL mark (B) on the dipstick (Figure 2).
8. Install the dipstick.
Oil Pressure
If the oil pressure is toolow, a pressure switch (if equipped) will either stop the engine or
activate a warning deviceon the equipment. If this occurs, stop the engine and check the
oil level with the dipstick.
If the oil level is below the ADD mark, add oil until it reaches the FULL mark. Start the
engine and check for proper pressure before continuing to operate.
If the oil level is between the ADD and FULL marks, do not start the engine. Contact
any Briggs &Stratton 3/LC Authorized Dealer to have the oil pressure problem
corrected.
Fuel Recommendations
Fuel must meet these requirements:
• This engine is certified to operate on diesel fuel. If incorrect fuel is used, black
smoke, power loss, and damage to the engine will occur, which will not be
covered by the warranty.
• Use clean, freshdiesel fuel with aminimum of 40 cetane. Fresh fuel preventsgum
from forming in the fuel system. Purchase fuel in a quantity that can be used within
30 days. Seethe Storage section.
CAUTION: Do not usekerosene or gasoline instead of dieselfuel. Failure to observe this
caution will damage the engine and void the engine warranty.
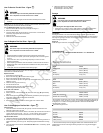
How To Add Fuel - Figure
5
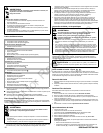
WARNING
Fuel and its vapors are extremely flammable and explosive.
Fire or explosioncan cause severe burns or death.
When Adding Fuel
• Turn engine off and let engine coolat least 2minutes beforeremoving thefuel
cap.
• Fill fuel tank outdoors or in well-ventilated area.
• Do not overfill fuel tank. To allow for expansion of the fuel, do not fill above the
bottom of the fuel tank neck.
• Keep fuelaway fromsparks, openflames, pilotlights, heat,and otherignition
sources.
• Check fuel lines, tank, cap, and fittings frequently forcracks or leaks.
Replace if necessary
• If fuel spills,wait until it evaporates before starting engine.
1. Clean the fuel cap area of dirt and debris. Remove the fuel cap (A, Figure 5).
2. Fill the fuel tank (B) with fuel. To allow for expansion of the fuel, do not fill above the
bottom of the fuel tank neck (C).
3. Reinstall the fuel cap.
Coolant Recommendations
Coolant capacity (seethe equipment manufacture’s manual)
Important: Thisis a liquid-cooled engine. A 50/50% mixture of phosphate-free
antifreeze and tap water is required for cooling, rust resistance, and lubrication of the
water pump.
How To Check/Add Coolant
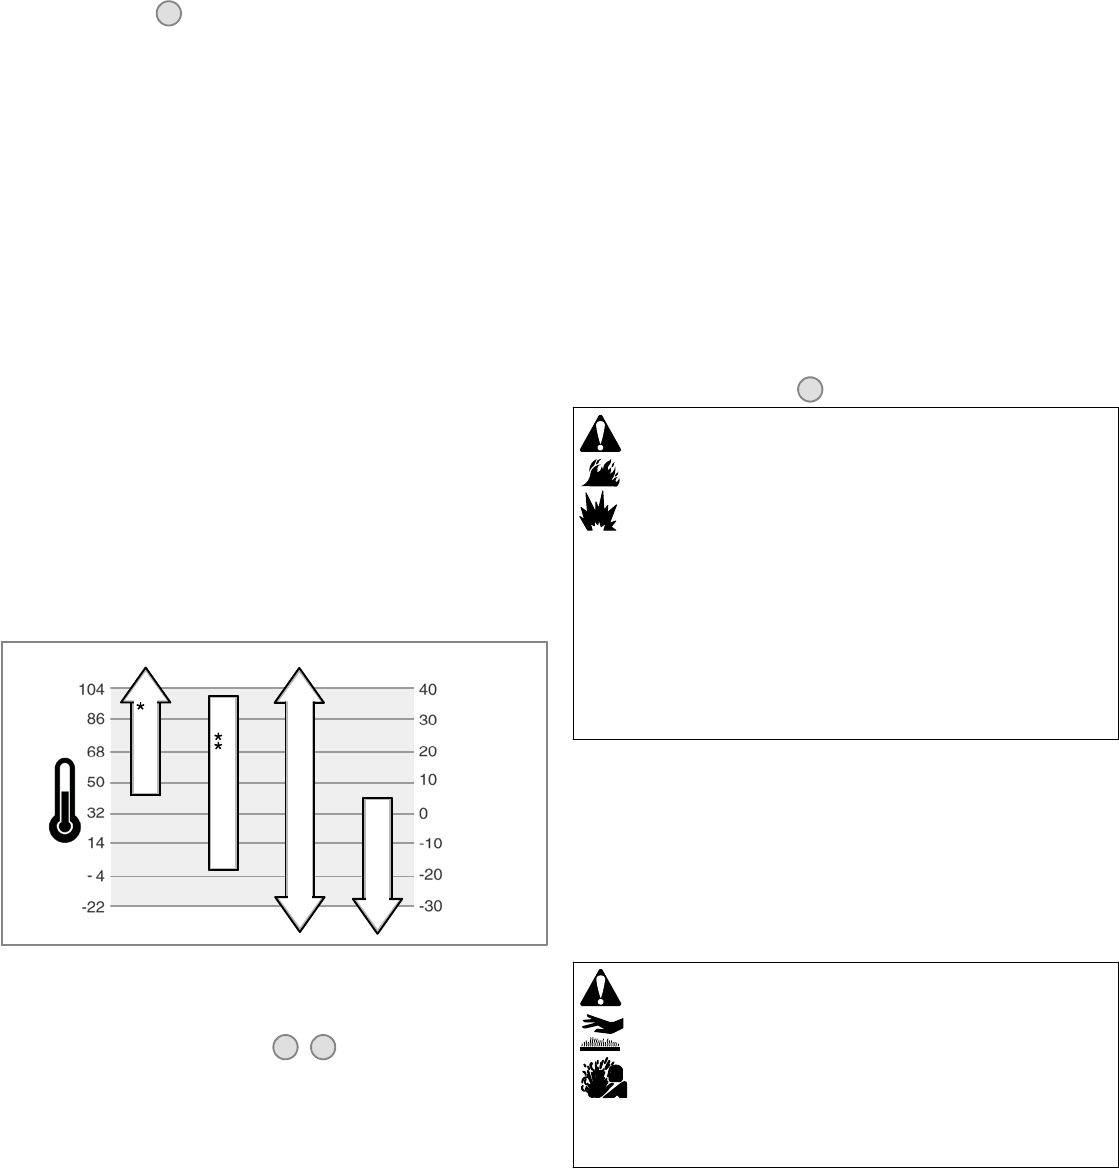
Severe thermal burnscan occur by escaping steam or hot coolant.
WARNING
• DO NOT remove radiator cap or reservoir cap if engine is warm or running.
• Stop engine and allow it to cool before removingradiator cap or reservoir cap
and before c hanging or adding coolant.
1. Before operating, check the coolant level. The coolant level must be between the
FULL and the LOW/ADD marks on the coolant reservoir. If the coolant level is low,
add a 50/50% coolant mixtureof phosphate-free antifreeze andtap water to the
reservoir.
2. To removethe reservoir cap after engine iscool, place a thick cloth over the reservoir
cap. Slowly turnthe reservoir cap counterclockwise to remove.
3. If the reservoir is dry, then add coolant to both the reservoir and to the radiator. See
the equipment manualfor location, operation, and maintenance of the coolant
reservoir and the radiator.
4. To remove the radiator cap after engine is cool, place a thick cloth over the radiator
cap. Slowly turnthe radiator cap counterclockwise to the first stop. Ifpressurized
steam escapes from the cap, standback to avoid injury. After all pressure is
released, push downand turn the radiator cap counterclockwise to remove.
Not for Reproduction