


Aquatic Industries, Inc.
8
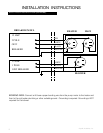
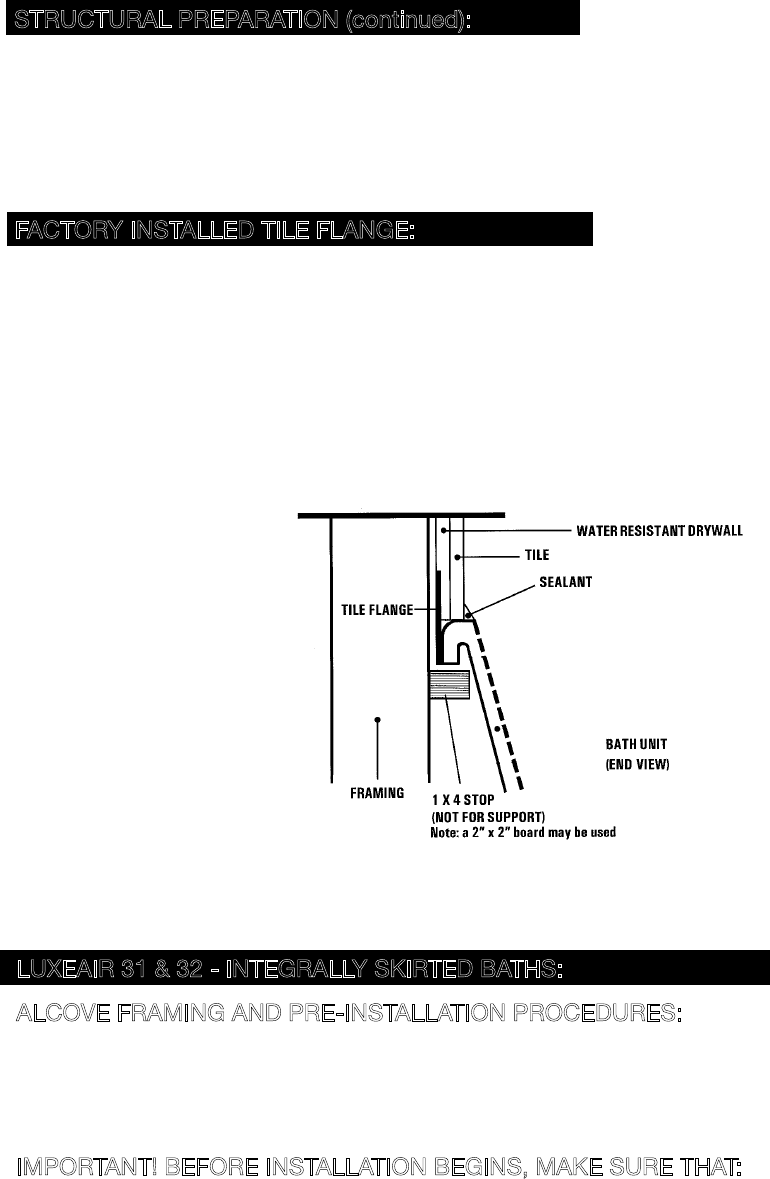
SEE ILLUSTRATION 2A
A. Install the whirlpool bath unit per the instructions provided in this manual.
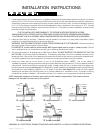
CAUTION: THE TILE FLANGE DOES NOT SUPPORT THE TUB! A ledger board must be provided under the
as this will void your warranty.
B. Use nails or screws to secure the flange into the studs around the bath.
C. Install water resistant drywall against the tile flange and flush to the top of the whirlpool deck. Install the tile or other
finishing materials. Apply a second bead of silicone between the first course of tile and the bath deck.
NOTE:
with the procedures on Page 22 of this manual.
INSTALLATION INSTRUCTIONS
specified rim dimensions. Extreme care must be taken in this type of installation to ensure the tub will come to rest
entirely on the leveling feet or ABS Support Base.
6. IF YOU HAVE PURCHASED A WHIRLPOOL WITH AN INSTALLED TILE FLANGE, PROCEED TO INSTRUCTION “A”.
STRUCTURAL PREPARATION (continued):
FACTORY INSTALLED TILE FLANGE:
2A
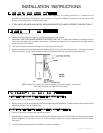
LUXEAIR 31 & 32 - INTEGRALLY SKIRTED BATHS:
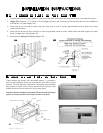
ALCOVE FRAMING AND PRE-INSTALLATION PROCEDURES:
1. Protect interior of tub throughout installation procedures.
2. Before moving unit into alcove see and follow enclosed Electrical Installation Procedures (electrical hookups will be
difficult to perform if unit is installed first.)
IMPORTANT! BEFORE INSTALLATION BEGINS, MAKE SURE THAT:
then drain.
3. A mortar base is prepared (this is mandatory for proper installation).