


ASSEMBLY
Eagle 20 03/09 Assembly Section 3-3
© 2009 Alamo Group Inc.
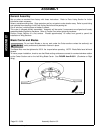
ASSEMBLY
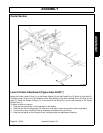
Tongue Attachment
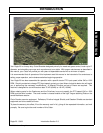
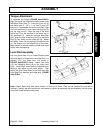
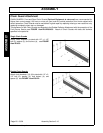
To assemble the tongue (FIGURE Asm-R-0013).
Align the lugs of the tongue with the top holes of the
mainframe hitch plate (1). Insert the pivot pin (2)
and fasten with 2 - 1/2" x 1 1/4" bolt (3) and 1/2"
locknut (4). To assemble the control rod insert a jam
nut to the short rod (5), then insert the short rod (5)
into the long rod (6). Align the hole of the short
control rod (5) to the top hole of the center lug on
the mainframe (7). Insert pin and lock with cotter
pins. Align the hole of the long rod (6) to the clevis
hitch (8) and insert pin with cotter pin (9). Attach
the Safety Chain (14) by looping it through the hole
on the tongue and the largest link on the chain.
Make certain to securely attach the hook end to the
tractor when transporting.
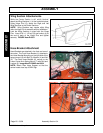
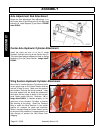
Level Rod Assembly
Lay Long Level Rods (10) on Center Section frame
tube and attach to Tongue with Level Rod Pins (11),
washers (12), and cotter pins (13) shown in
FIGURE Asm-R-0013 above. Attach Jam Nuts
(15) and Adjusting Nuts (16) to the Long Level
Rods. Install Short Level Rods to Adjusting Nuts.
Measure and adjust to the same length. Then
attach the Short Level Rods to the Rear Axle with
Level Rod Pins, washers, and cotter pins. FIGURE
Asm-R-0014.
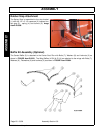
Note: Control Rods must have same tension on them at all times. They can be checked by tone with a
hammer. Carefully tap each control rod, and loosen or tighten the adjusting nuts as necessary until the tones
from each control rod sound the same.