8
AXLE
REAR
TONGUE
LATCH STAND
BRACKET
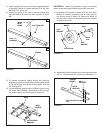
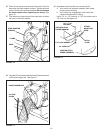
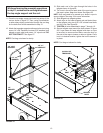
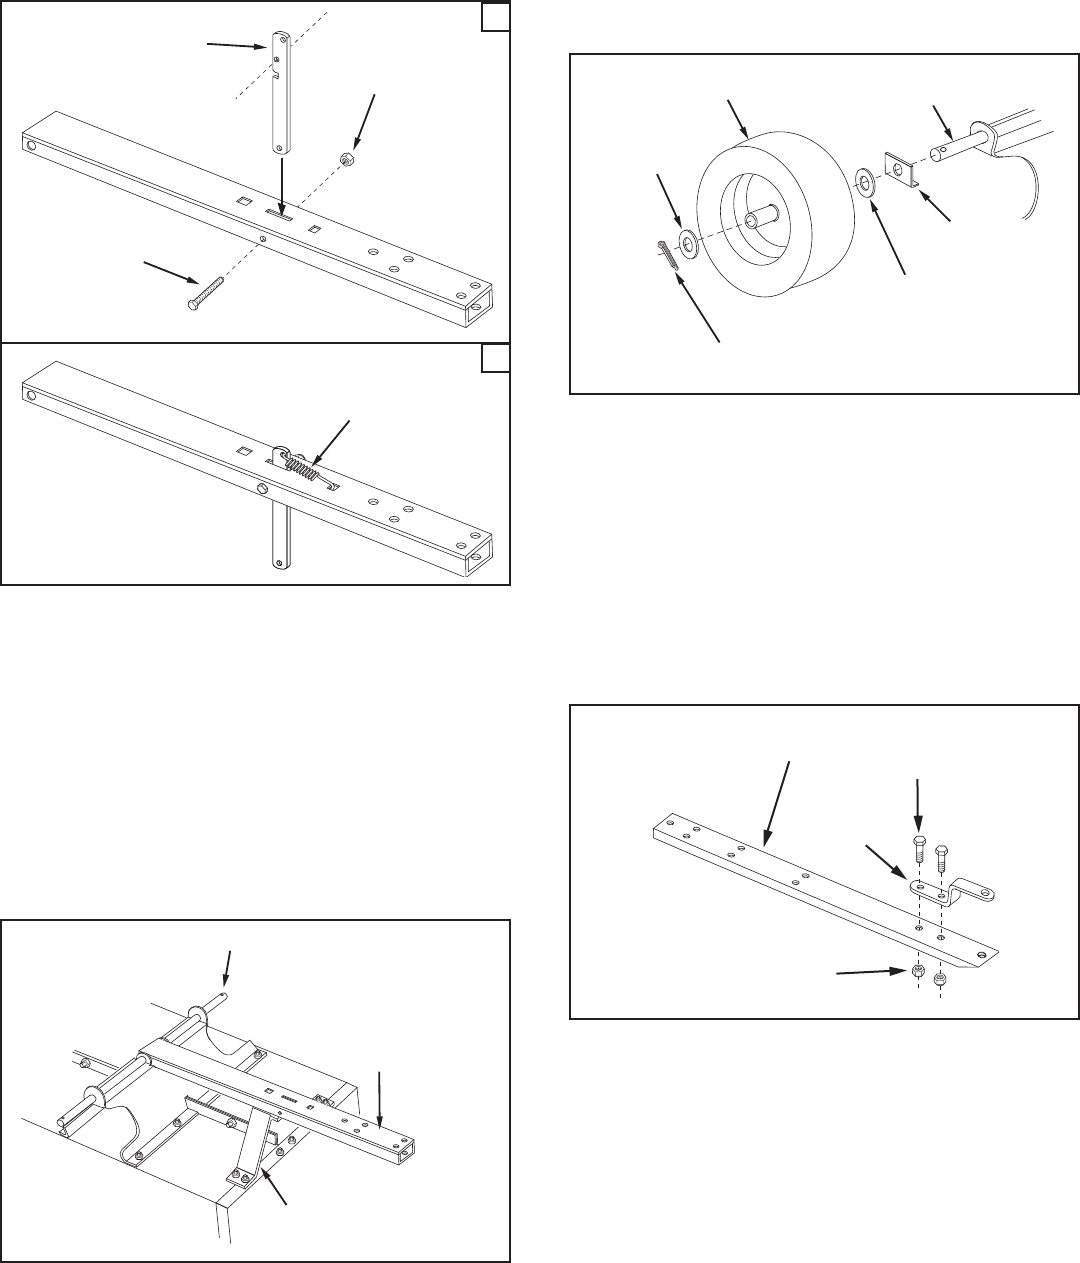
15. To prevent accidental tipping during the following
assembly procedures, lower the cart to rest upside down
onitstopanges,sothatthewheelsupportisfacing
up.Seegure9.
16. LaythedrawbartongueontotheWheelSupportand
theLatch StandBracket.Assemblethe axlethrough
thewheelsupportandthetongue.Seegure9.
COTTER PIN
WHEEL
FLAT
WASHER
FLAT
WASHER
AXLE
AXLE
CLIP
IMPORTANT: Make sure drawbar tongue is securely
lockedtothelatchstandbracketbythelatchlocklever.
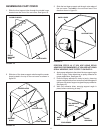
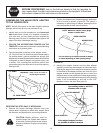
17. Assembleaatwasher,awheelwiththevalvestem
facing out,anotheratwasherandanaxlecliponto
theaxleasshowningure10.Securethewheelon
the axle with a cotter pin, spreading the ends. Repeat
on other end of axle.
FIGURE 9
FIGURE 10
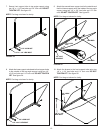
TONGUE
(FRONT)
3/8" NYLOCK
NUT
3/8" x 1"
HEX BOLT
HITCH
BRACKET
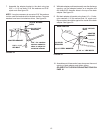
FIGURE 11
18. Assemblethehitchbrackettothefronttongueusingtwo
3/8"x1"hexboltsand3/8"nylocknuts.Seegure11.
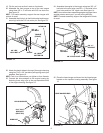
5/16" x 4"
HEX BOLT
SPRING
LATCH
LOCK
LEVER
5/16" LOCK NUT
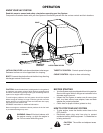
FIGURE 8
13. Insertthelatchlockleverintothereartongueasshown
ingure8A.Secureitinplaceusingthe5/16"x4"hex
boltand5/16"nylocknut.
14. Attach the spring to the hole in the rear tongue and
thelowerholeinthelatchlockleverasshowningure
8B.
B
A


